How to Set Up Multi-Tenant Management in Microsoft Defender XDR

Multi-tenant management in Microsoft Defender XDR (MTO) is designed to provide security operation teams with a single, unified view of all the tenants they manage. This feature allows teams to quickly investigate incidents and perform advanced hunting across data from multiple tenants, thereby improving their security operations.

Multi-tenant management in Microsoft Defender XDR became generally available (GA) on February 20th, 2024.

A copilot search can provide more details 🙂

Blog Purpose

The goal of this blog post is to show you how to set up multi-tenant management in Microsoft Defender XDR with the least privilege needed. Multi-tenant management in Microsoft Defender XDR allows you to manage and monitor multiple tenants from a single console. This feature was released for general availability (GA) on February 20th, 2024.

Topology Scenario

Source tenant : Contoso.com
Target tenant : Fabrikam.com

Typically, I choose a hub and spoke topology. Source and target tenants’

Roles

Global Admin Role, is required for the initial set up in the ‘Contoso.com’ source tenant, when configuring the ‘cross tenant’ configurations

Browser Sessions

Sometimes using multiple Microsoft Edge profiles to sign into the source tenant and the target tenants can cause problems, due to cookies and too many Edge active browser sessions.

Typically, I use the Microsoft Edge browser in private window option to sign into the source ‘Contso.com’ tenant

And then Google Chrome ‘Incognito Mode’ session to sign into the target ‘Fabrikam.com’ tenant.

#####Step 1

Log into the target tenant ‘Fabrikam.com’, browse to https://entra.microsoft.com/ / external identities/ cross-tenant access settings

Select ‘Add organization’ and add the tenant id for ‘Contoso.com’

When the Contoso organization has been added to Fabrikam.com, select the inbound access/ cross-tenant sync and select ‘Allow users sync into this tenant’

Select the inbound access/ trust settings  ‘Automatically redeem invitations with the tenant’
(Typically, this setting will automatically be selected, but just in case, it needs to be checked)

#####Step 2

Log into the target tenant ‘Contoso.com’, browse to https://entra.microsoft.com/  external identities/ cross-tenant access settings

Select ‘Add organization’ and add the tenant id for ‘Fabrikam.com’

When the organisation ‘Fabrikam.com has been added, select Outbound Access/ trust settings/ automatically redeem invitations with the tenant Fabrikam

#####Step 3

Now login to ‘Contoso.com’ and browse to , browse to https://entra.microsoft.com/ / external identities/ cross-tenant access settings

Select ‘Add organization’ and add the tenant id for ‘Fabrikam.com’

In the source tenant ‘Contoso.com’ / cross-tenant access settings, select ‘Fabrikam.com’ outbound settings / trust settings

#####Step 4

This section is where global admin privileges are required in the source tenant ‘Contoso.com’

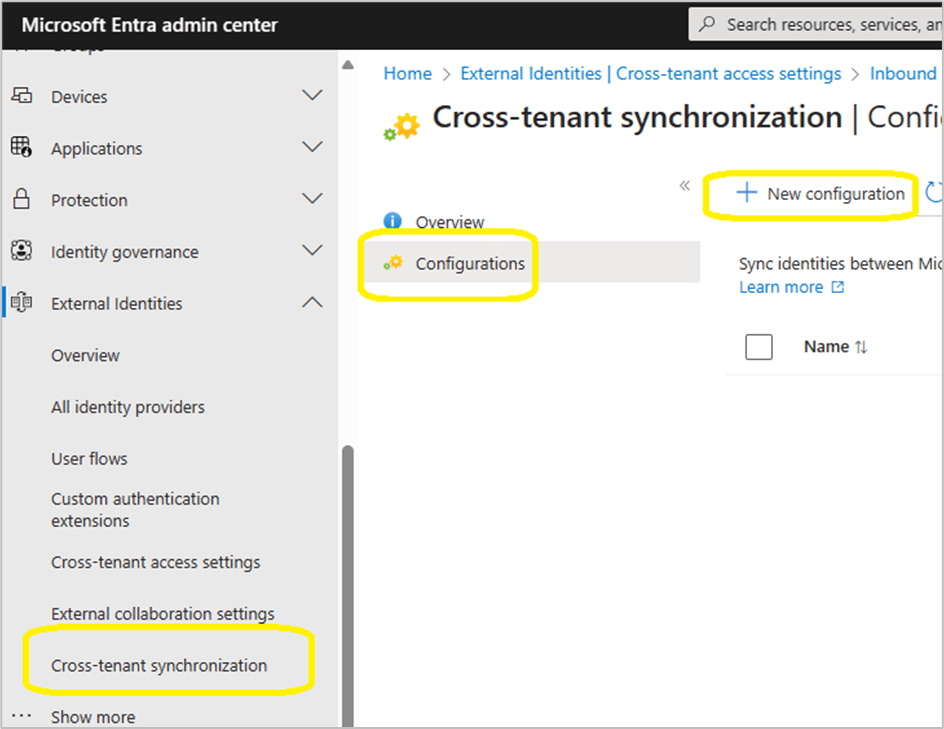
Browse to Contos.com | cross-tenant synchronization > Cross-tenant synchronisation

Select new configuration
Provide a name for your configuration

It can take up to 60 seconds for the configuration to be created, if the browser session appears like it is hung, JUST WAIT!

Select ‘Get Started’

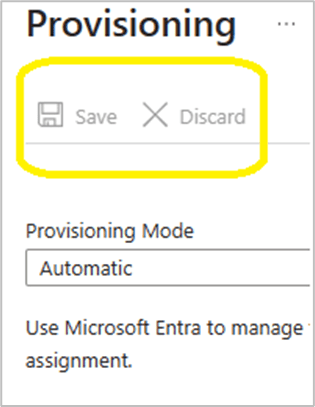
Change the provisioning mode, authentication mode and tenant ID as per the image below.

When pressing save, the browser session does not revert to the global cross-tenant synchronization / cross-tenant synchronization / configurations GUI.
#####Step 5

At this stage we will configure the provisioning configuration.

Select the ‘Contoso – Fabrikam organization’

Add the admin user accounts from the source tenant ‘Contoso.com’ that will be provisioned into ‘Fabrikam.com’

Select the provisioning status and change it from off to on.

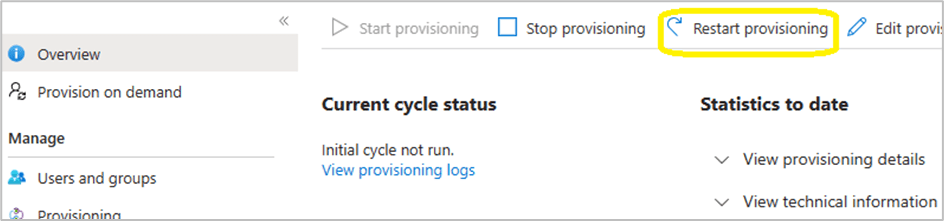
Within the provisioning overview section, select ‘Restart provisioning’

Note: Do not keep clicking on ‘start provisioning’ , ‘stop provisioning’ and ‘restart provisioning’ , be patient and wait!
#####Step 6

To access the security data of the ‘Fabrikam.com’ tenant, the admin users from ‘Contoso.com’ need to be assigned the ‘Security reader’ role in ‘Fabrikam.com’. This role allows them to view security reports and alerts, but not to make any changes.

However, if ‘Fabrikam.com’ has Privileged Identity Management (PIM) enabled and is an Enterprise Identity Protection 2 (EIP2) tenant, there is an extra step involved.

The ‘Security reader’ role assignment must be activated through PIM, either for a specific duration or as permanently eligible. Note that the permanent option is not really permanent, it still expires after 6 months and needs to be renewed manually.

Therefore, it is recommended to set a reminder to check the PIM role assignments in ‘Fabrikam.com’ and renew the ‘Security reader’ role for the ‘Contoso.com’ admin accounts when necessary.

‘Security Reader’ role can manually be added per Contoso admin in Fabrikam or a Microsoft Entra ID security group can be created and assigned the ‘Security Reader’ role. This process could make life easier for admins, they simply need to add the Contoso admins to the newly created security group.

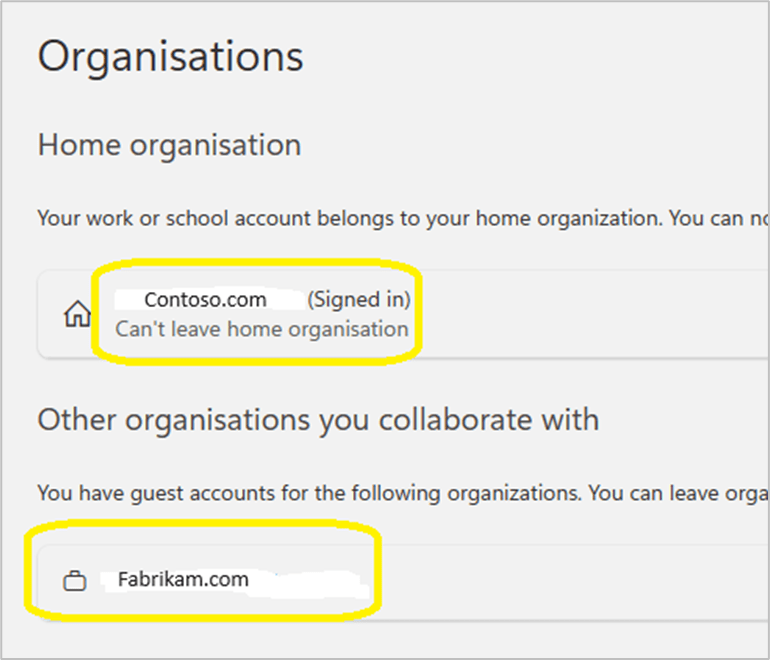
#####Step 7 Each admin account should confirm that ‘Fabrikam.com’ appears in their list of organisations that they can collaborate with via this url: https://myaccount.microsoft.com/organizations
#####Step 8

Each ‘Contoso.com’ admin must login to https;//mto.security.microsoft.com and select settings/ add tenants / and select ‘Fabrikam.com’

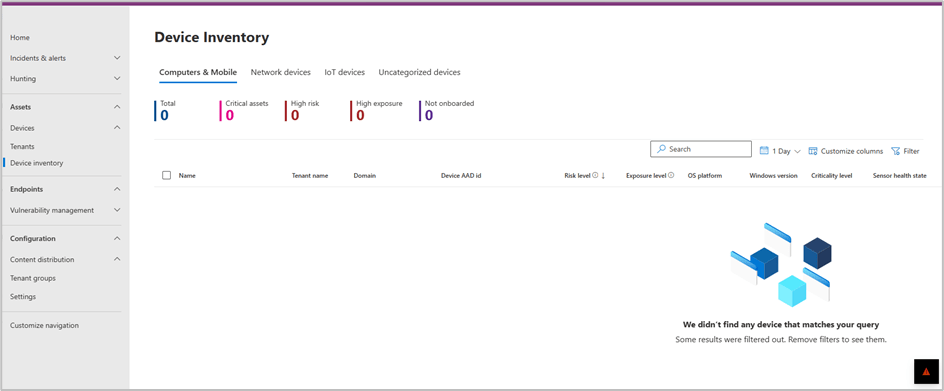
To validate successful configuration and visibility of multi tenant devices. The Contoso admin needs to browse to the Devices \ Devices Inventory

By selecting Devices/ Tenants, it will provide an image that provides a high level overview of device status per tenant.

#####Step 9

In this scenario ‘Contoso.com’ and ‘Fabrikam.com’, corporate office locations have trusted named locations in Entra ID conditional access. When a ‘Contoso.com’ admin accesses MTO, the Conditional access policies, may simply grant a ‘Contoso.com’ admin access to ’Fabrikam.com’ tenant without MFA challenge.

In the scenario where an organisation does not have ‘named locations’ configured in ‘Entra conditional access’, the source tenant admin, may be unable to view the organisations target tenant.
Browse to content distribution / tenant groups / create tenant group

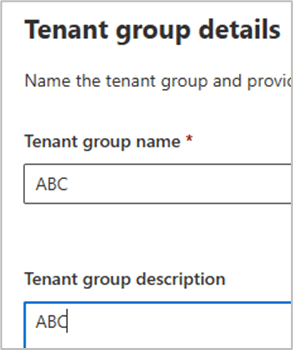
In the bottom right hand corner, the image below may display and prompt for MFA login.

Once logged into Fabrikam , via MFA. The Fabrikam tenant will and devices will become visible in MTO

Also test login to the target tenant via https://security.microsoft.com/tenantid to ensure security admins can view all sections of the security.microsoft.com portal.

#####Step 10

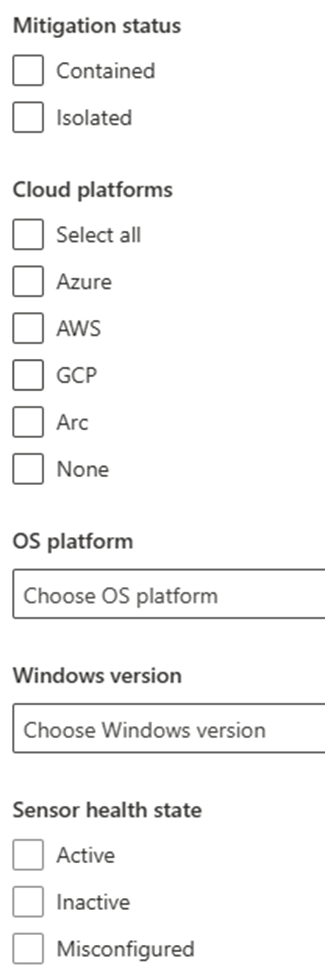
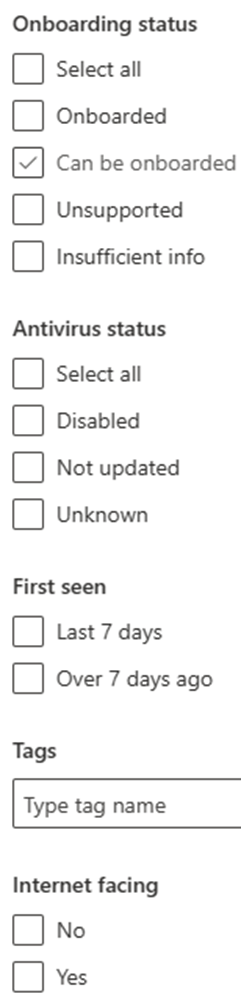
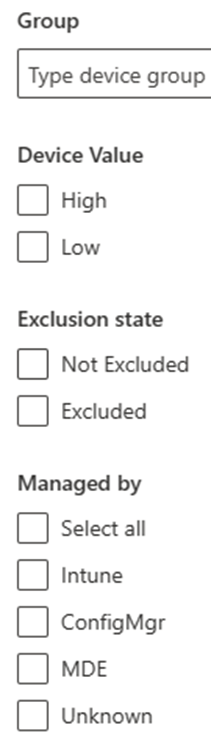
MTO device filer view

#####Step 11

Advanced hunting.

Advanced hunting queries can be executed against ‘Contoso.com’ and ‘Fabrikam.com’

#Some sample KQL queries

## All mitre attack alerts

AlertInfo // Define timerange | where Timestamp > ago(30d) | where AttackTechniques != “” | mvexpand todynamic(AttackTechniques) | summarize count() by tostring(AttackTechniques) // Define graphic | render piechart

## Device Scans

DeviceEvents

| where ActionType == “AntivirusScanCompleted”

| summarize arg_max(Timestamp, *) by DeviceId

| extend ScanType = tostring(parse_json(AdditionalFields).ScanTypeIndex),

    DaysAgo = datetime_diff(‘day’, now(), Timestamp)

| project DeviceName, ActionType, ScanType, DaysAgo

// Filter only devices that have not performed a antivirus scan in the last day

| where DaysAgo > 0

| sort by DaysAgo

#####Summary

#Some of the positive features are:

– Simplified threat hunting with multi-tenancy support.

– Centralized view of all device inventory across all tenants and within each tenant.

– Instant insights and ability to filter views according to needs.

The most amazing feature for me is the ability to run KQL queries across all tenants. I ran some KQL queries across 8 tenants with thousands of devices and the results took between 1 – 5 seconds.

#One of the negative features is:

– The service does not provide a cross-tenant reporting functionality.

#### Reference for KQL queries.

https://github.com/Bert-JanP/Hunting-Queries-Detection-Rules/blob/main/MITRE%20ATT%26CK/Mapping.md

M365 Data Desired State Configuration (DSC) M365 Data Use Cases

The Microsoft website : https://microsoft365dsc.com/ explains all things, regarding Microsoft DSC, including configuration, export, import, synchronisation etc..

Microsoft have made things a lot easier compared to earlier versions of Microsoft365 DSC. It is now possible to select which configuration policies can be backed up and re-used from the numerous M365 technologies via the Microsoft365DSC Portal: https://export.microsoft365dsc.com

This blog post will focus on the most common M365 configurations that can be re-used in multiple M365 tenants, to speed up deployment and also remove human error, which can often occur from manual configuration.

Where to start

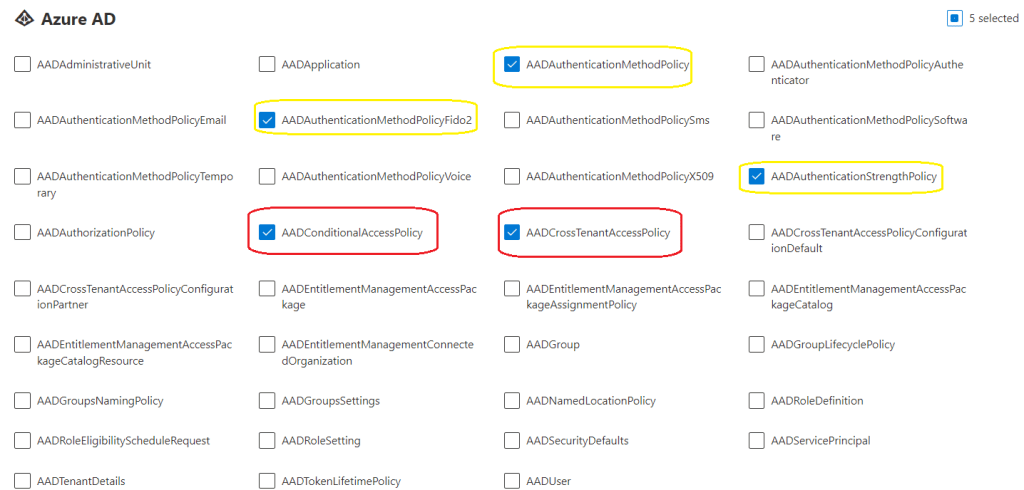
Browse to https://export.microsoft365dsc.com/ and then select the configuration items per M365 technology, that you would like to re-use in, another M365 tenant, tenants’ or a research and development M365 tenant.

Microsoft Entra ID \ Azure Active Directory

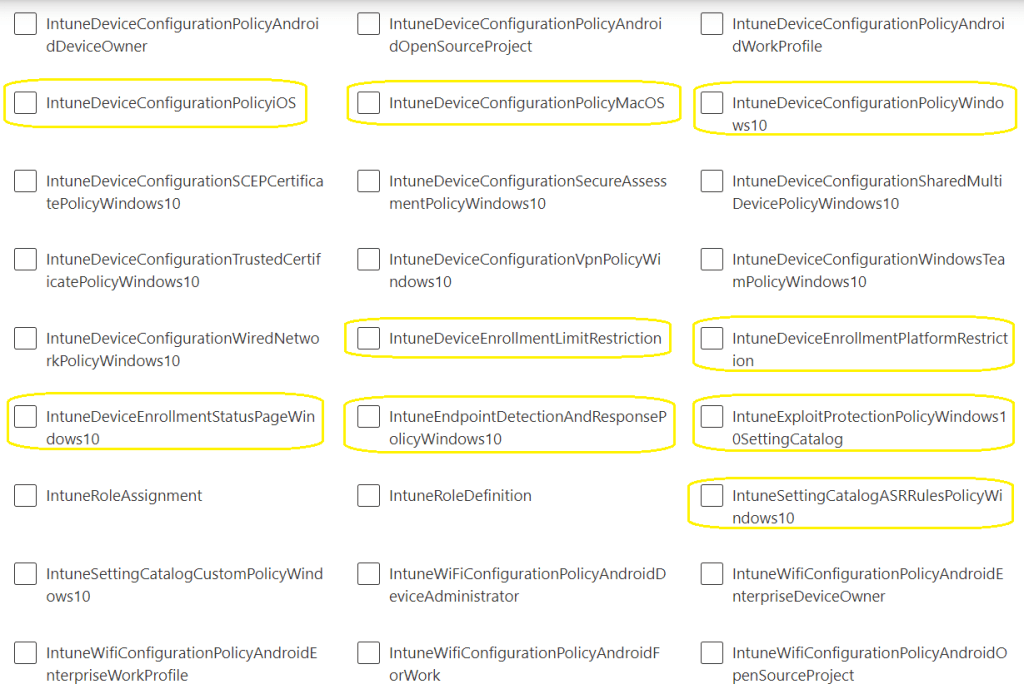
The items highlighted in yellow, could be potentially be used per M365 tenant, tenants’ or a research and development M365 tenant.

Items : Highlighted in red

Microsoft have recently added, conditional access templates, which was a very welcome addition, however, I still prefer to use PowerShell to implement Conditional Access Policies, which can be unique per organisation.


Exchange Online

The items highlighted in yellow, could potentially be used per M365 tenant.
I do not like using the Exchange Online, standard and strict protection templates, as they cannot be re-configured.

My preference is to run an Exchange Online Orca Report and then review the recommendations and tweak the configuration per organisation. Microsoft Exchange Online security policies should always come first.

Intune

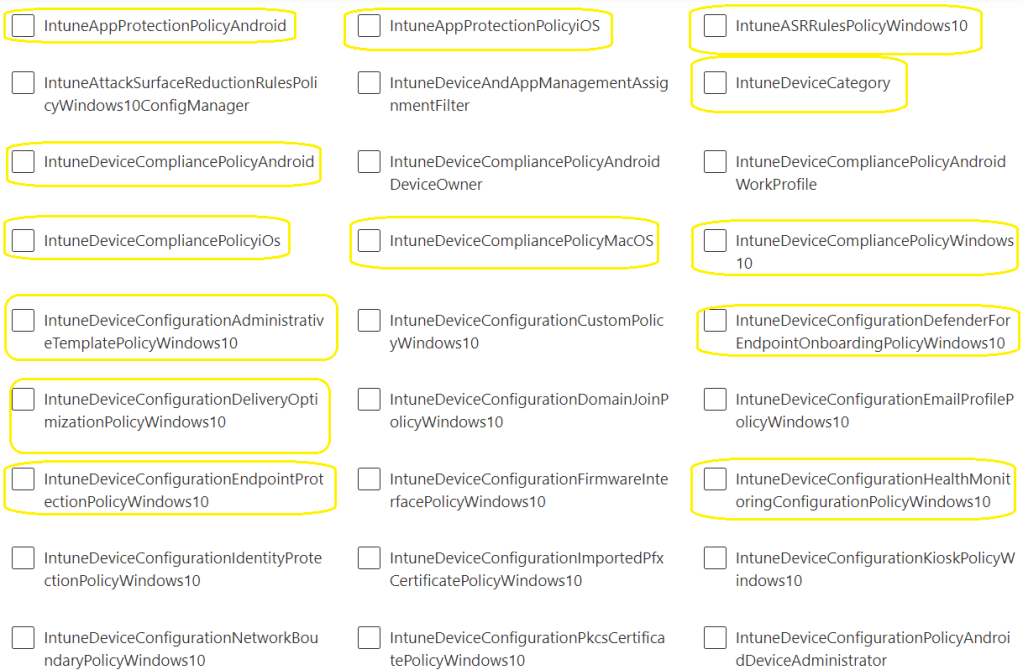
Intune DSC, for me, this is by far the most beneficial use case.

Device security ( Jeffrey Appel’s : Defender for Endpoint – Ultimate Blog Series)
Jeffrey’s blog series, doesn’t just focus on Microsoft Defender for Endpoint configurations, it includes a lot of Windows 10 and later, hardening policies, which should be used in every organisation. It takes a long time to configure these policies! M365 DSC can, re-use these configurations polices, if Jeffrey, updates his blog series, the change can be made in a research and development M365 tenant, tested and then pushed to a production tenant.

The following images that contain items highlighted in yellow , could be potentially used per M365 tenant.

Additional M365 DSC modules

  • Office 365 : do not re-use per M365 tenant
  • OneDrive: do not re-use per tenant, however an Intune ‘IntuneDeviceConfigurationAdminisrativeTemplatePolicyWindows10; can be re-used to configure One Drive for Business configuration and governance
  • Planner : do not re-use
  • Power Platform : do not re-use
  • Security and Compliance: do not re-use, (unique per organisation)
  • SharePoint : do not re-use, (unique per organisation)

Teams

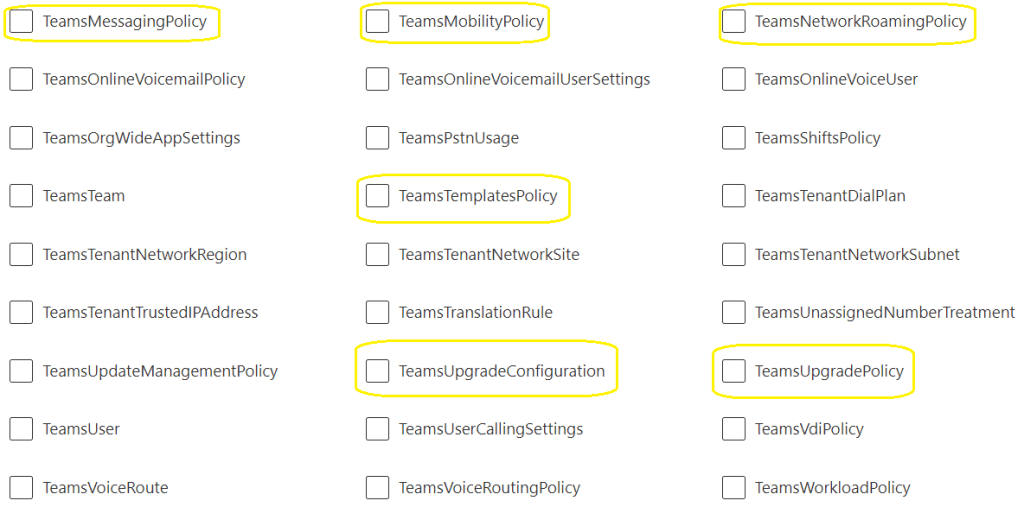
The following images that contain items highlighted in yellow , could be potentially be used per M365 tenant

Summary

This blog post , attempted to highlight the practical and beneficial usage of M365 DSC.

An IT services provider can, standardise configurations in line with best practices and re-use these configurations per customer.

Microsoft consistently drives innovation and adaptability to meet evolving industry demands.

An organisation can test emerging M365 technologies in a research and development M365 tenant, and when the organisation has completed testing etc, the configuration can be synchronised to the organisation’s production tenant or tenants’, which can control and mitigate risks, with regards, simply allowing an M365 tenant accept all new and emerging technology features from Microsoft. It can also accelerate the adoption of new and emerging technology features from Microsoft, when an organisation has fully tested these new features and is ready to deploy the new features in their production tenant or tenants’

If anyone, or any organisation would like some further assistance with this, please get in touch with me via LinkedIn : https://www.linkedin.com/in/seanofarrelll/

Just in Time Access for M365 Purview Roles

Microsoft’s unwavering commitment to security and compliance has consistently driven innovation and adaptability to meet evolving industry demands. Their dedicated security and compliance portals have left the legacy portal, portal.office.com, in the not too distant past.

One common frustration for M365 administrators is the inability to assign the following roles within Microsoft Privileged Identity Management:

  • Microsoft Purview roles’
  • Microsoft Defender roles’
  • Microsoft Dynamic roles’

    This blog post will primarily delve into the assignment of Microsoft Purview roles. The image below showcases the default role assignment choices available in Microsoft Privileged Identity Management.

Microsoft Purview Roles

Microsoft has invested significantly in their portal redesign at compliance.microsoft.com. In traditional scenarios, IT administrators often find themselves tasked with configuring, executing, exporting e-discovery case results, and subsequently reporting to compliance officers, data protection officers, or HR departments. However, entrusting IT admins with these compliance tasks raises initial concerns about data protection. It’s imperative that IT admins remain unaware of sensitive information contained within e-discovery case results, as these results might encompass IT admin staff within the search criteria.

As of the time of this post, there are approximately 95 role groups within M365 Purview. Here are some practical use cases illustrating how these roles can be assigned to fulfil various compliance roles and organizational requirements:

  • e-discovery
  • Insider Risk Management
  • Privacy Management
  • Data Investigator

How to Assign Microsoft Purview Roles to Microsoft Entra ID Groups

Note: For the purposed of this blogpost, I created a Microsoft CDX tenant, all users and screenshots are fictional.

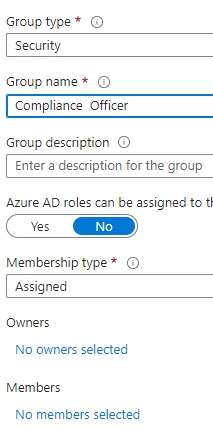
1: Create a Microsoft Entra id group. Important, to not add any members or owners

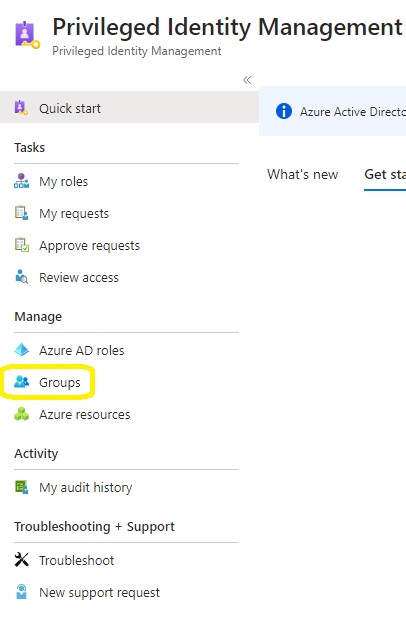
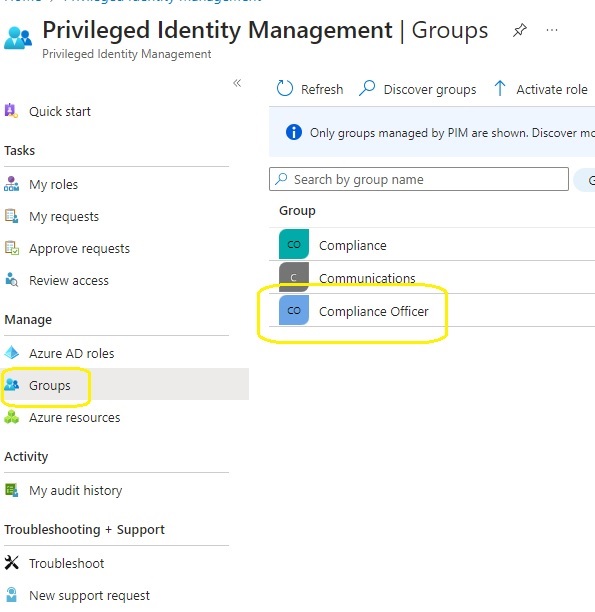
2: Login to Microsoft Entra Privileged Identity Management and select Groups.

3.Seclect Discover Groups

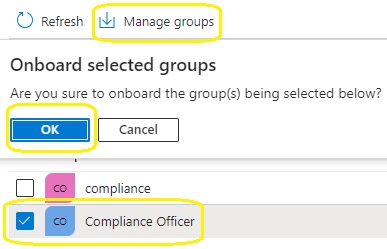
4.Search for the previously created group and then select manage groups

5.Select groups in Privileged Identity Management

6. Click on assignment, add members to eligible assignments, this is why , we did not need to add any group members in step 1

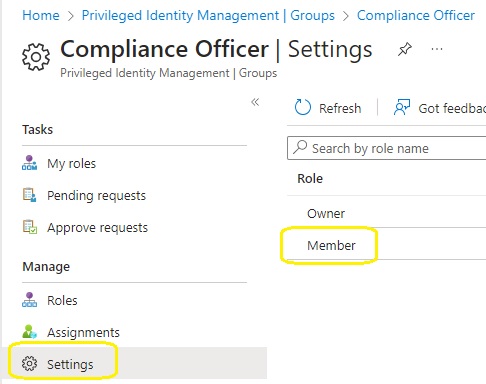
7. Click on settings and member

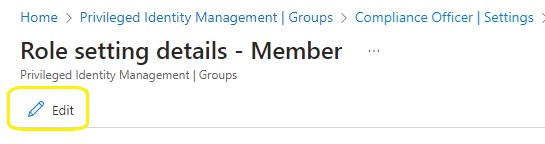
8. Edit the member settings

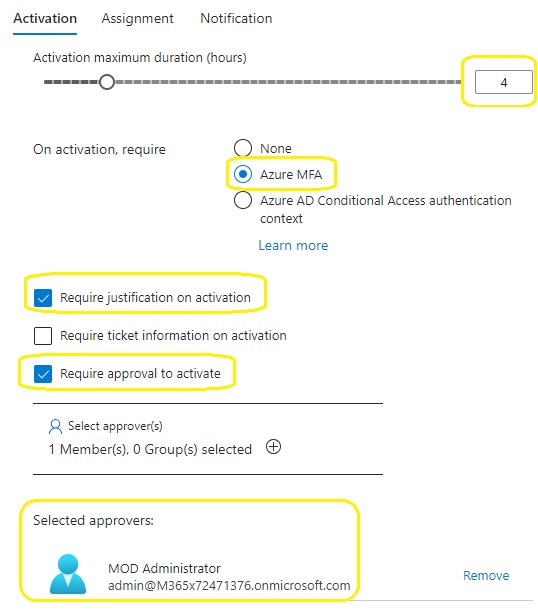
9. Set hours to 4, require justification on activation, require approval to activate and then finally select the approver. The approver may be different per role that requires activation.

10. Create a role group in the compliance.microsoft.com portal : Microsoft Purview Permissions

11. Name the role group

12. Add the roles.

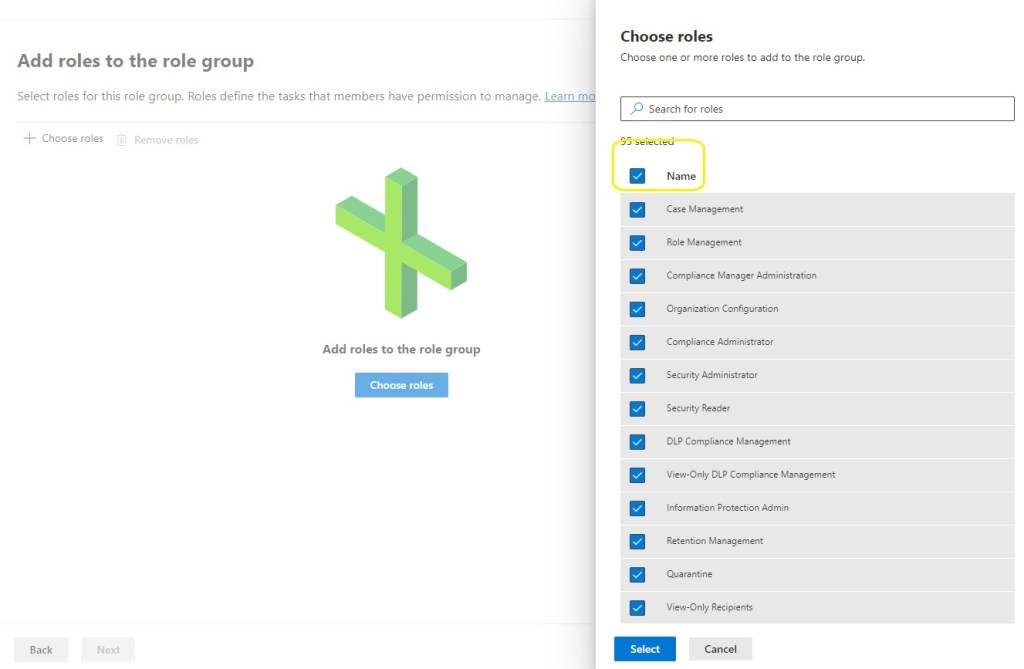
Select all roles

13. Choose groups and add the group that was created previously

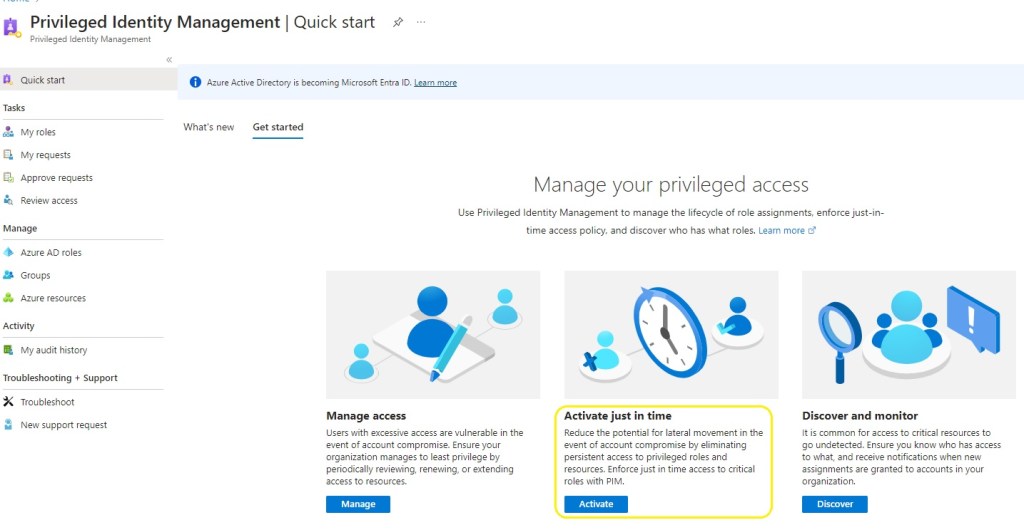
14. Now the end user Adele Vance can login to https://entra.microsoft.com /identity governance / Privileged Identity Management and select ‘Activate just in time’

15. The user then selects group, activate and provides a business justification.

16. The group owner and admin , receives an email notification, that there is a pending just in time access request and can choose to approve or deny the request.

17. The compliance officer can then login to complicane.microsoft.com and perform his\her compliance activities. During my testing, no license was required for the compliance officer. I am sure Microsoft would insist that the compliance officer has an M365 E5 or E5 compliance add-on license:)

Summary

The technical steps outlined in this blogpost, enable organisations to apply Privileged Identity Management policies to roles \ permissions control in services like

  • Microsoft Purview roles’
  • Microsoft Defender roles’
  • Microsoft Dynamic roles’

M365 Purview roles are not available in M365 roles or Microsoft Entra ID Privileged Identity Management, for really good reasons. M365 Purview role \ permission elevation , can be typically required for legal disputes.

Every organisation, should consider compliance and governance with a cloud transformation journey where services, data and line of business workflows, transition from on-premises to Microsoft cloud services.

If anyone, or any organisation would like some further assistance with this, please get in touch with me via LinkedIn : https://www.linkedin.com/in/seanofarrelll/

Exchange 2016 – 2019 Federation Fails with Exchange Online

When attempting to federate a domain hosted in Exchange on premises with Exchange Online. The error message displayed below appears.

To resolve this issue TLS 1.2 needs to be enabled on the Exchange Hybrid servers.

ALI TAJRAN has a excellent ARTICLE and script to enable TLS 1.2 on Exchange servers. Once this script has run on the Exchange Hybrid servers, the wizard to add a federated domain will complete successfully.

Note: TLS 1.3 is not supported on Exchange on premises yet.

Securing M365 mail routing : SCENARIO 3

When an organisation has completely transitioned and migrated to Exchange Online and directed their MX record to contoso-com.mail.protection.outlook.com. The organisation should in line with best practices, have Microsoft Defender for Office365 Plan 2 securely configured.

Scenario 3, this my proffered choice. All Contoso *.onmicrosoft.com aliases can be blocked as they are no longer required. When Contoso’s mx record has been directed at Exchange Online protection. Exchange Online Protection & Microsoft Defender for 365 will protect all aliases. It may not even be necessary to block all Contoso *.onmicrosoft.com aliases.

It is possible to create an email address policy for Office365 groups that only use’s @contoso.com primary email addresses, which can still allow mail flow to Team’s channels. Then the usual protection of contoso.com comes into play, SPF, DKIM and finally DMARC.