Series: This is Part 4 of 7 in my series on Microsoft Purview Insider Risk Management. New to the series? Start with the series guide, which summarises every part.
In this post I create a Data theft by departing users policy from start to finish in the Microsoft Purview portal. I also explain who needs which permissions and what the HR connector is, and share two PowerShell scripts and a set of KQL queries to set up, test and hunt. Every screenshot comes from my test environment, including the warnings and gaps I hit along the way.
Why start with departing users?
Remember the email from Part 1: every person who had resigned had moved data out of the organisation. That scan tells you the problem exists, but it does not raise an alert about any individual. A Data theft by departing users policy does. That is why it is the first policy I recommend every organisation creates.
Before you start
- Licensing. Covered in Part 3.
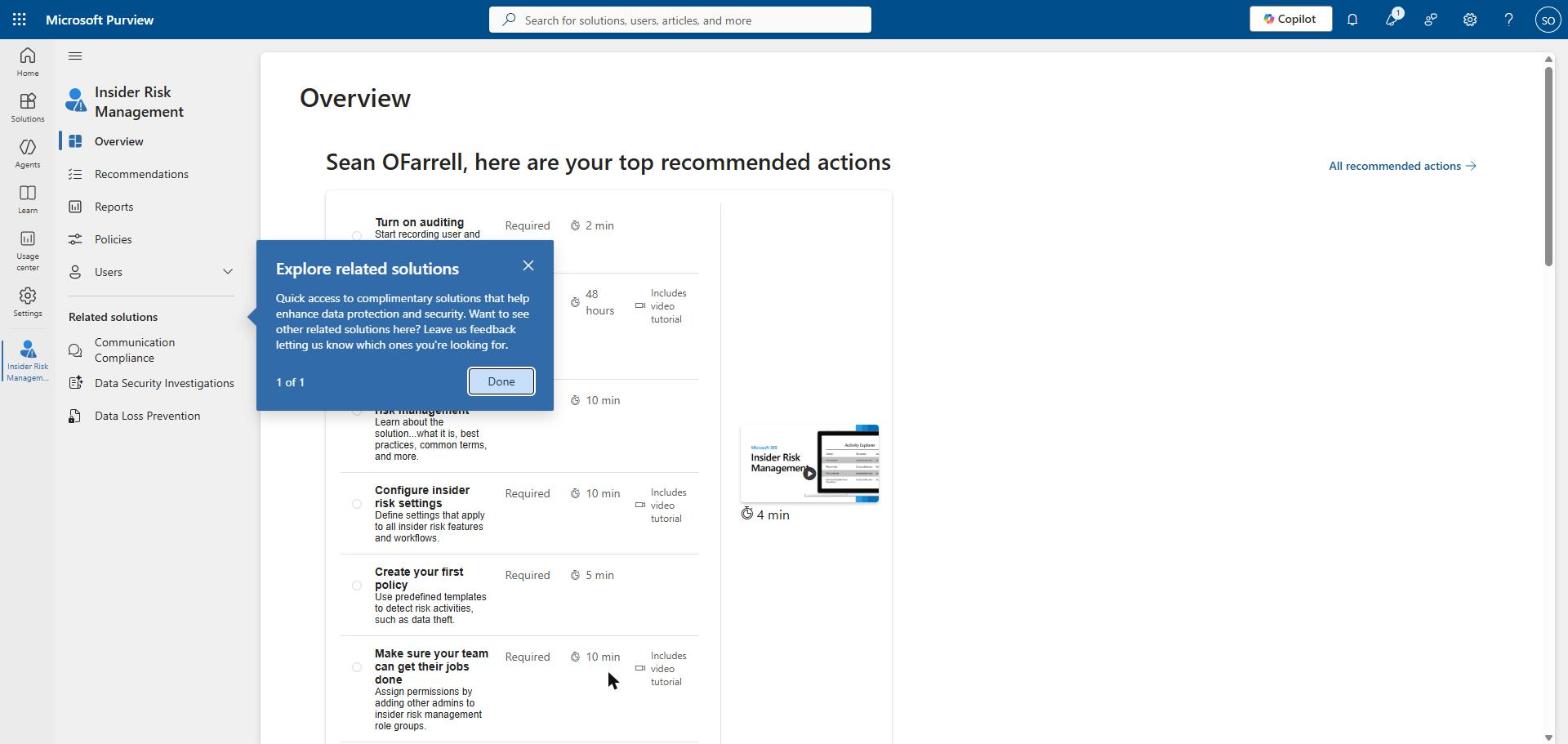
- Audit logging. Microsoft 365 keeps a log of user activity, and Insider Risk Management relies on it. It is on by default, but some organisations have turned it off. My test environment flagged it as something to check.
- Permissions. Covered below.
- Analytics (recommended). Turn on analytics in the Insider Risk Management settings. It scans for risky activity across the organisation and can take up to 48 hours to report back.
- Indicators. The activities Insider Risk Management watches for are switched on in its settings. If they are off, the policy set-up stops you, as it did for me.
- Connections to other systems. The HR connector for the leavers policy, and laptops connected to Microsoft Defender for Endpoint so their activity can be seen.
Required roles
Insider Risk Management has its own permission groups, called role groups. They are separate from the usual administrator roles on purpose: the people who set up policies should not automatically be able to see who is being investigated.
| Role group | What it allows |
|---|---|
| Insider Risk Management | Full access to every Insider Risk Management feature. Use for small teams or a single lead investigator. |
| Insider Risk Management Admins | Configure policies and settings, Adaptive Protection, analytics and forensic evidence requests. Cannot investigate alerts. |
| Insider Risk Management Analysts | Triage alerts and cases, view analytics and reports. Users are pseudonymised. |
| Insider Risk Management Investigators | Investigate alerts and cases, view forensic evidence and use Content explorer. |
| Insider Risk Management Auditors | View and export the Insider Risk Management audit log only. |
| Insider Risk Management Approvers | Approve forensic evidence capture requests only. |
| Insider Risk Management Session Approvers | Visible in the portal alongside the others. Relates to forensic evidence session approval. |
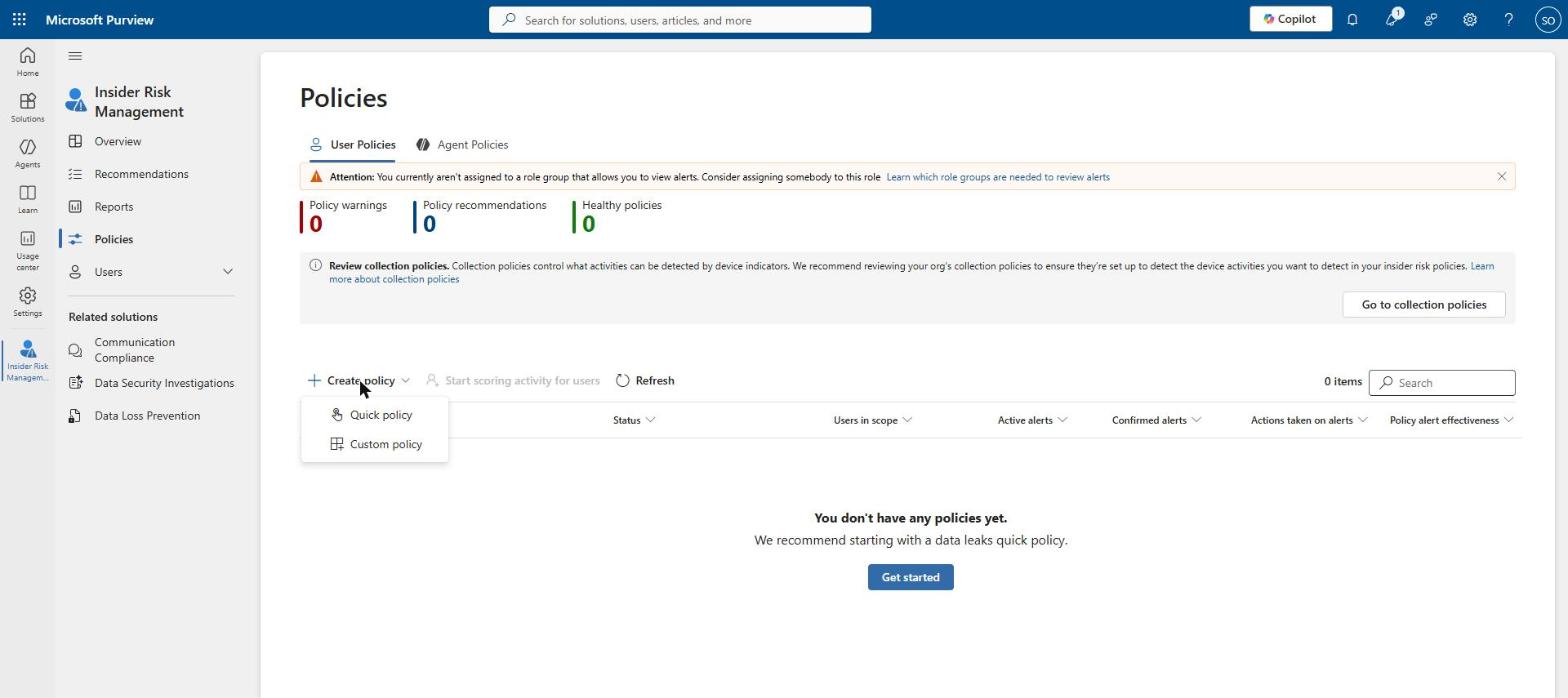
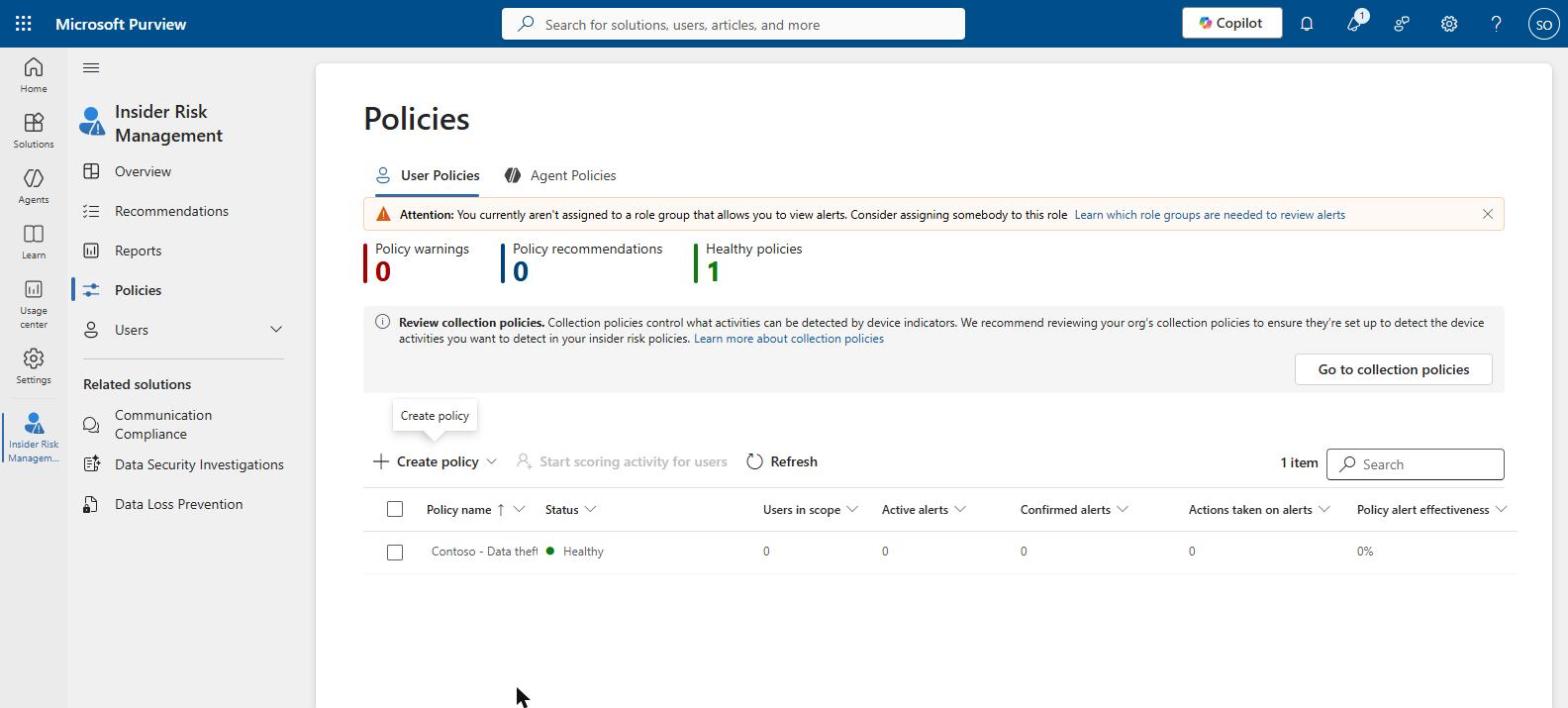
Senior administrators, such as Global Administrators and Compliance Administrators, can set up Insider Risk Management, but they cannot see alerts or investigations. My test environment shows this perfectly. I created the policy without a problem, but the Policies page warned that I could not see the alerts it would produce:
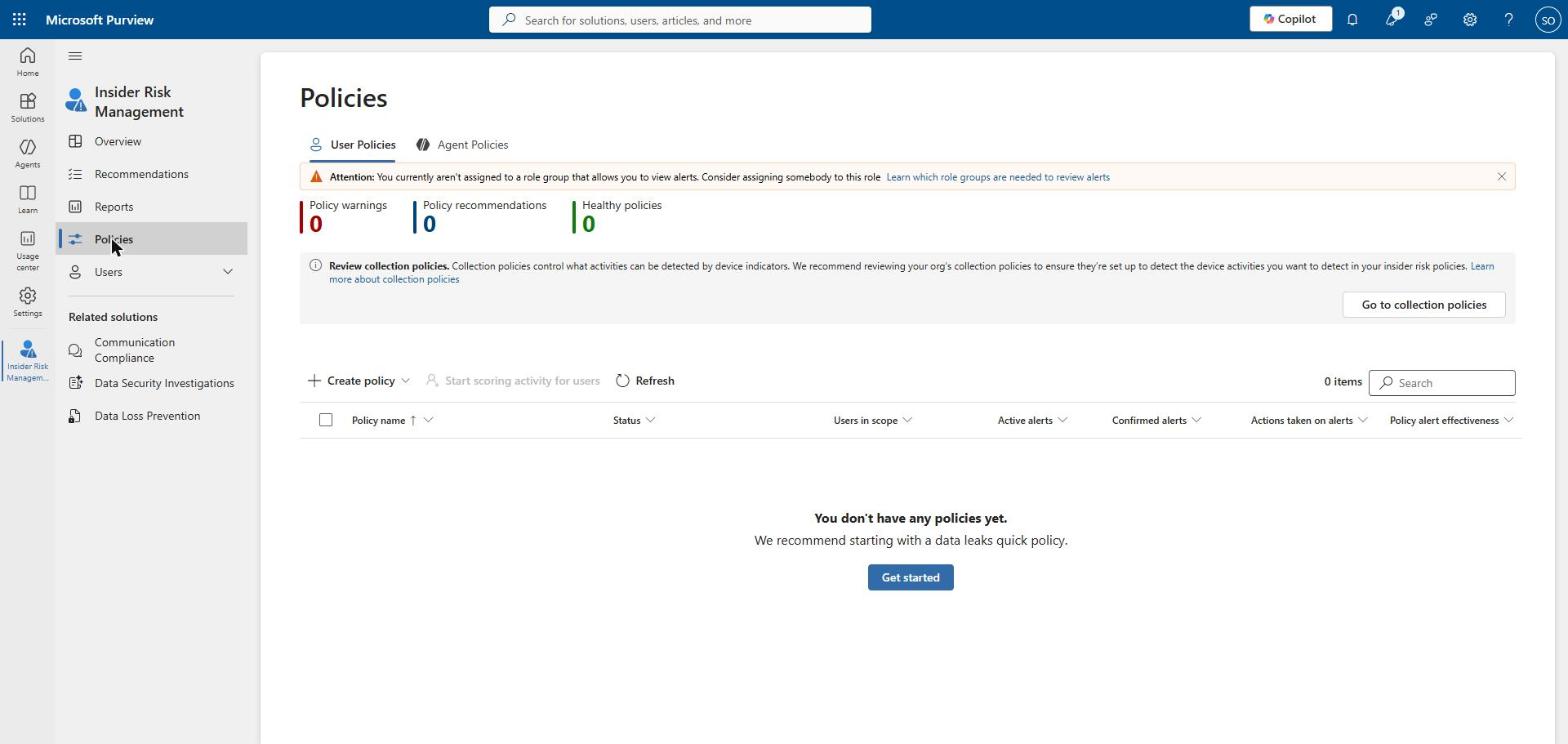
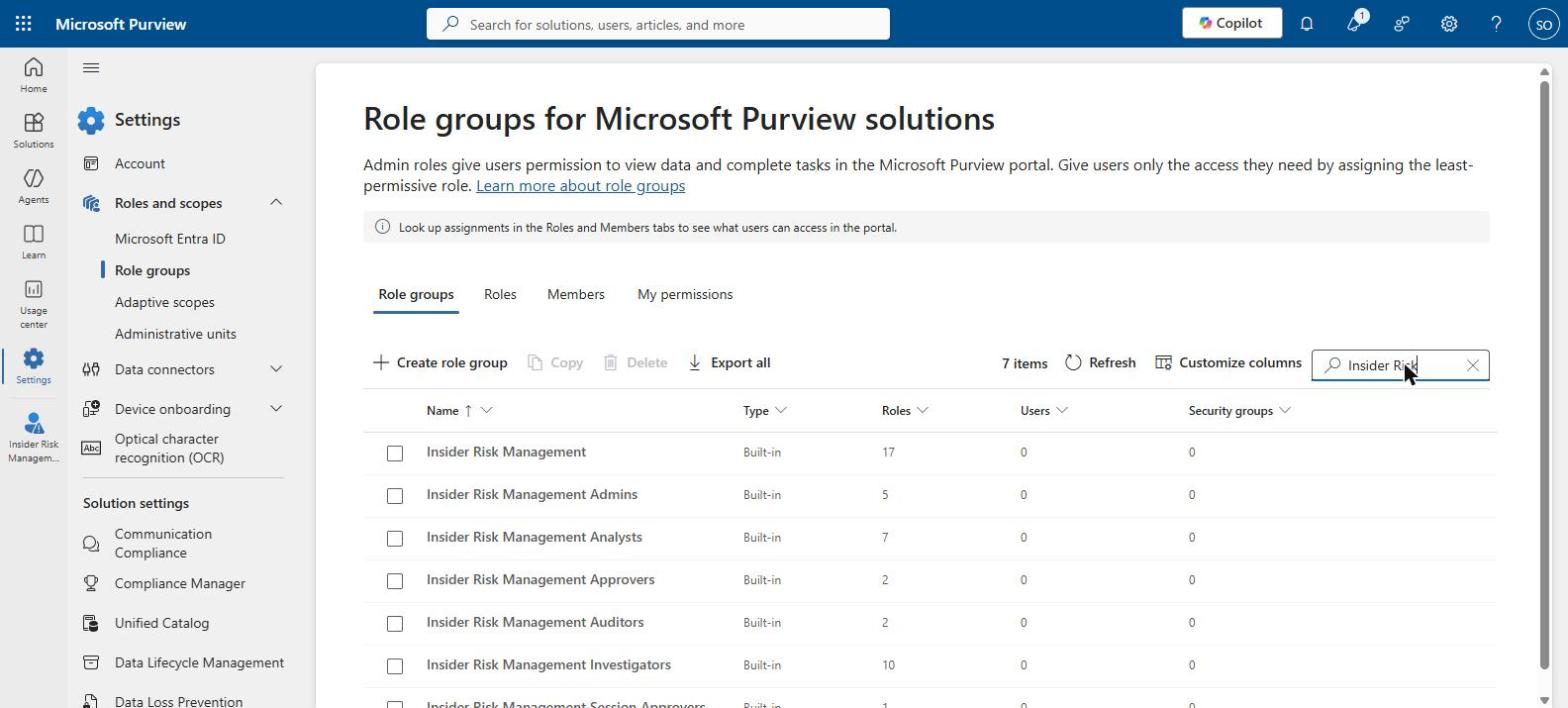
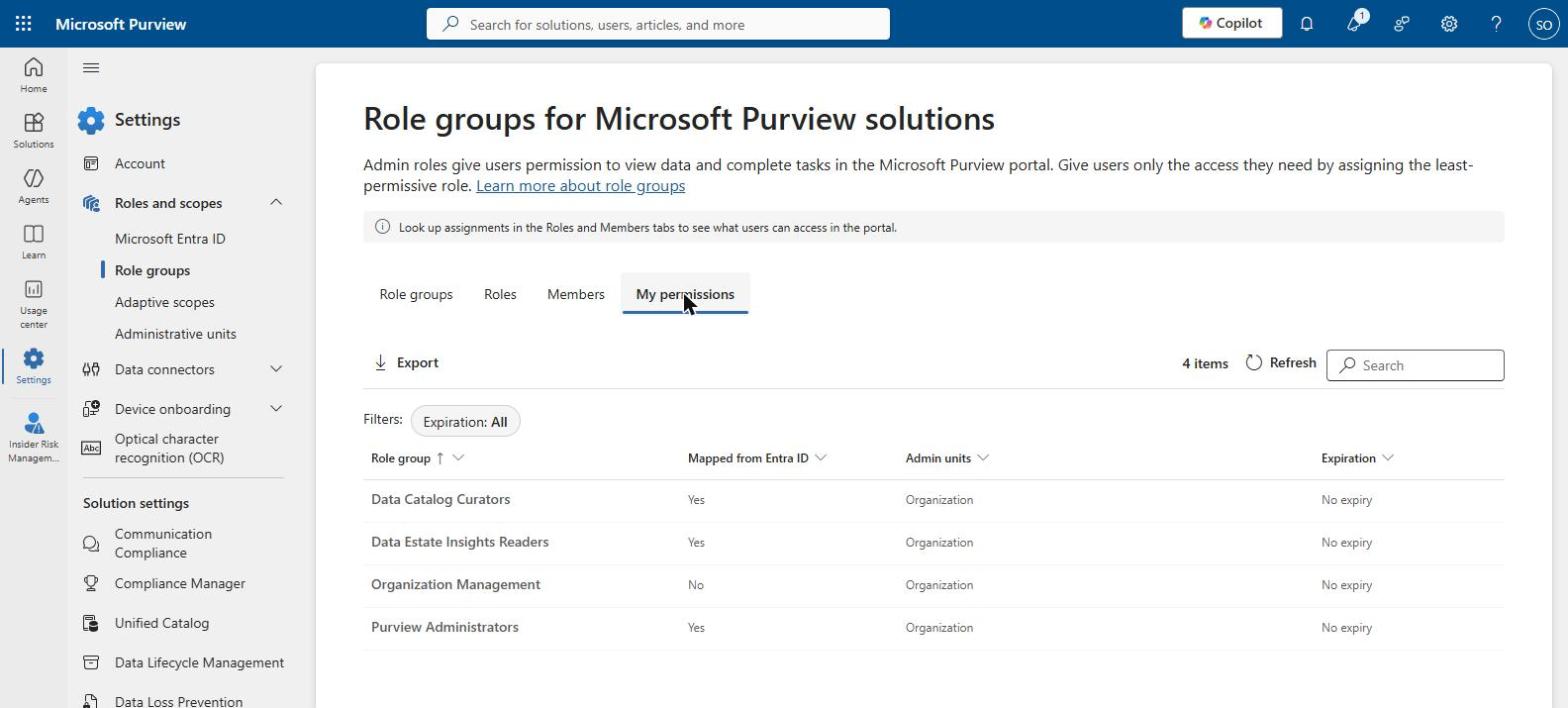
Recommendation: Put the people who set up policies in the Admins role group, and your compliance officers – not IT – in the Analysts or Investigators role group. Keep the two separate and keep both small. For the roles that can see alerts and reveal names, add a PIM-enabled security group rather than individual people, as described in Part 1, so access is only switched on when needed. Changes can take up to 30 minutes to take effect.
The HR connector explained
Insider Risk Management needs to know when someone is leaving, and Microsoft 365 cannot work that out on its own. The HR connector is how you tell it. It takes a simple spreadsheet file (a CSV) exported from your HR system and feeds it into Purview. As well as resignations, it can share job changes such as demotions, performance reviews and performance improvement plans.
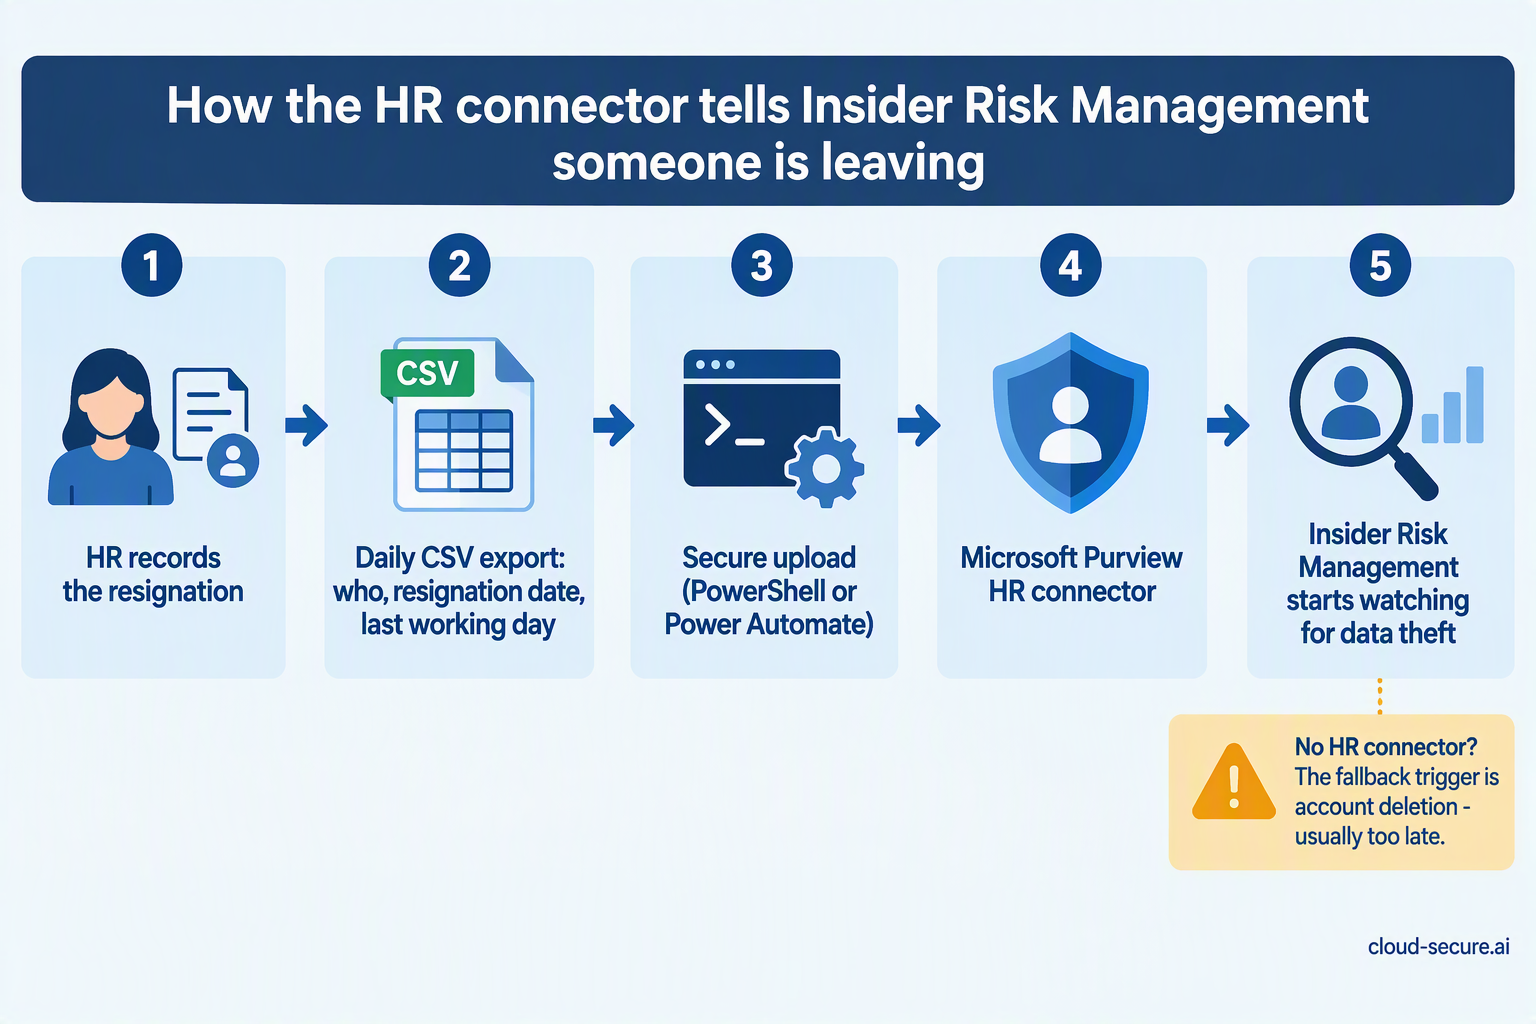
For leavers, the file only needs three columns – who, when they resigned, and their last working day:
UserPrincipalName,ResignationDate,LastWorkingDate
engineer@contoso.com,2026-10-24T09:00:00Z,2026-11-21T17:00:00Z- Create an app registration in Microsoft Entra ID. This gives the upload process its own secure identity. Note its application ID, tenant ID and client secret.
- Create the HR connector in Purview under Settings > Data connectors, tell it which column is which, and copy the job ID it gives you.
- Upload the file using Microsoft’s sample PowerShell script. The computer running it must be allowed through your firewall to webhook.ingestion.office.com.
- Schedule it to run daily, or use Microsoft’s Power Automate template to upload automatically whenever HR saves a new file to SharePoint or OneDrive.
Resignation data is used by the two leaver templates. Job changes and performance data are used by the risky user templates.
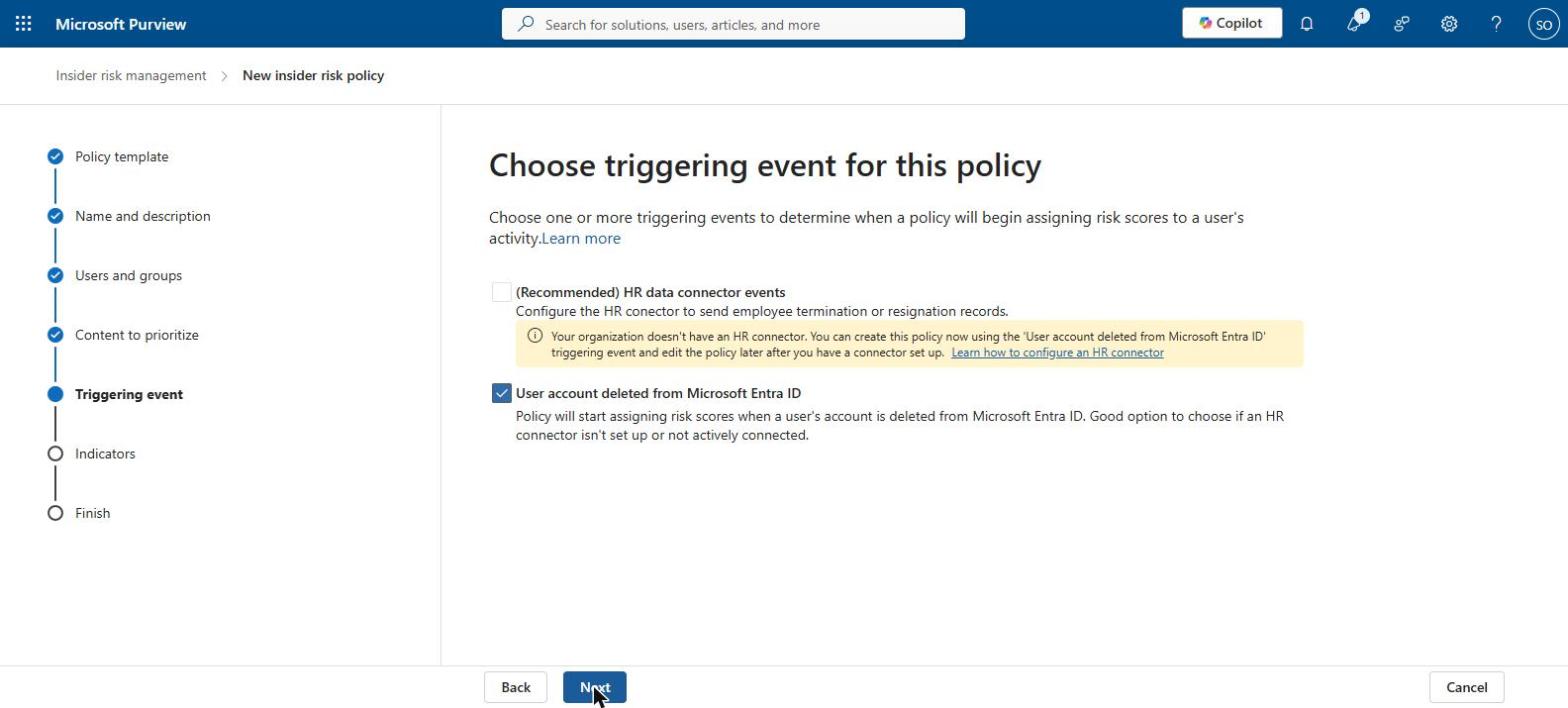
No HR connector yet? You can still create the policy. It will use “User account deleted from Microsoft Entra ID” as the trigger instead. That usually happens after the person has already left – too late to stop the data walking out – so treat it as a temporary fix.
Walkthrough: creating the policy
Go to Insider Risk Management in the Purview portal, open Policies and select Create policy.
Step 1 – Start a custom policy
A quick policy fills in sensible defaults for you. A custom policy walks through every setting, which is what I use here so you can see each option.
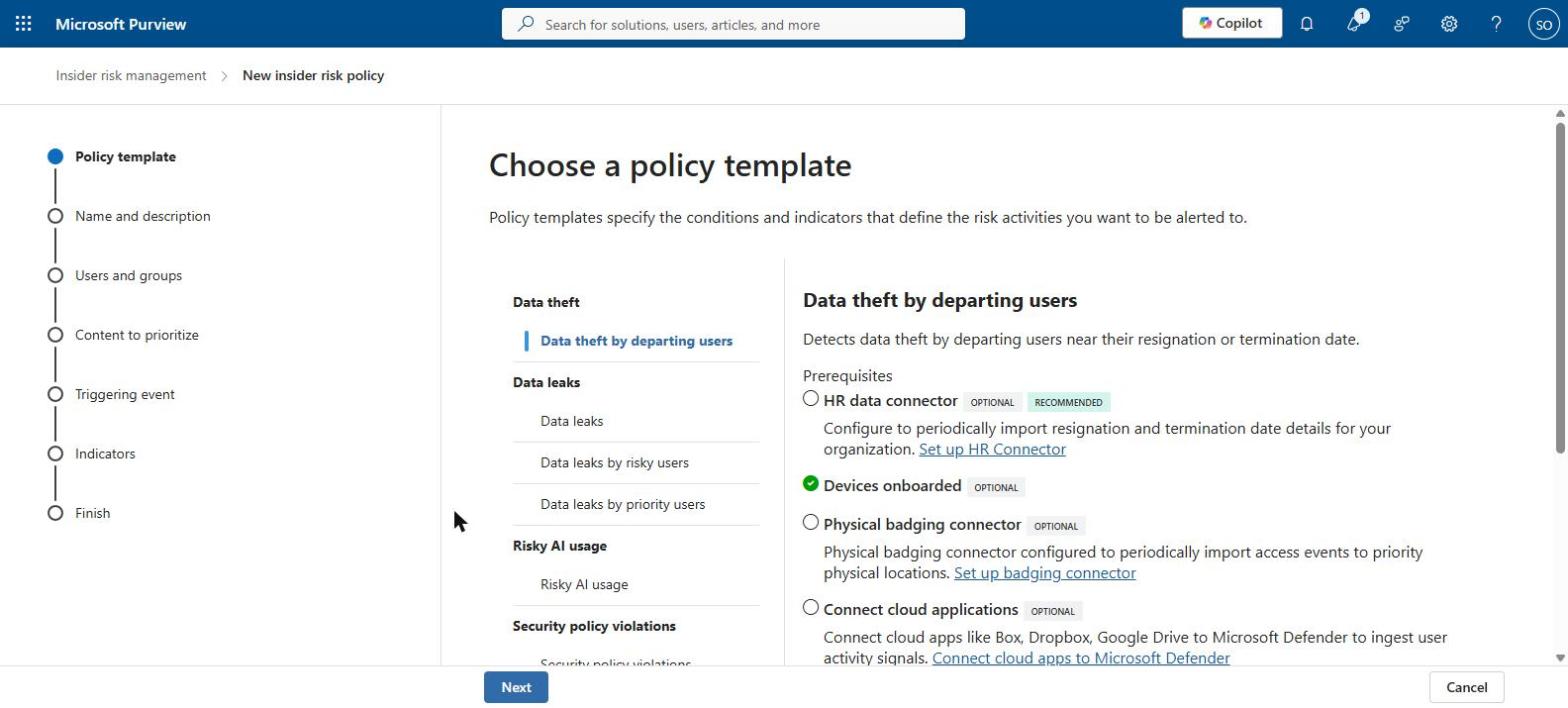
Step 2 – Choose the template
Select Data theft by departing users. The panel on the right shows what the template needs: the HR connector is recommended, and my laptops are already connected.
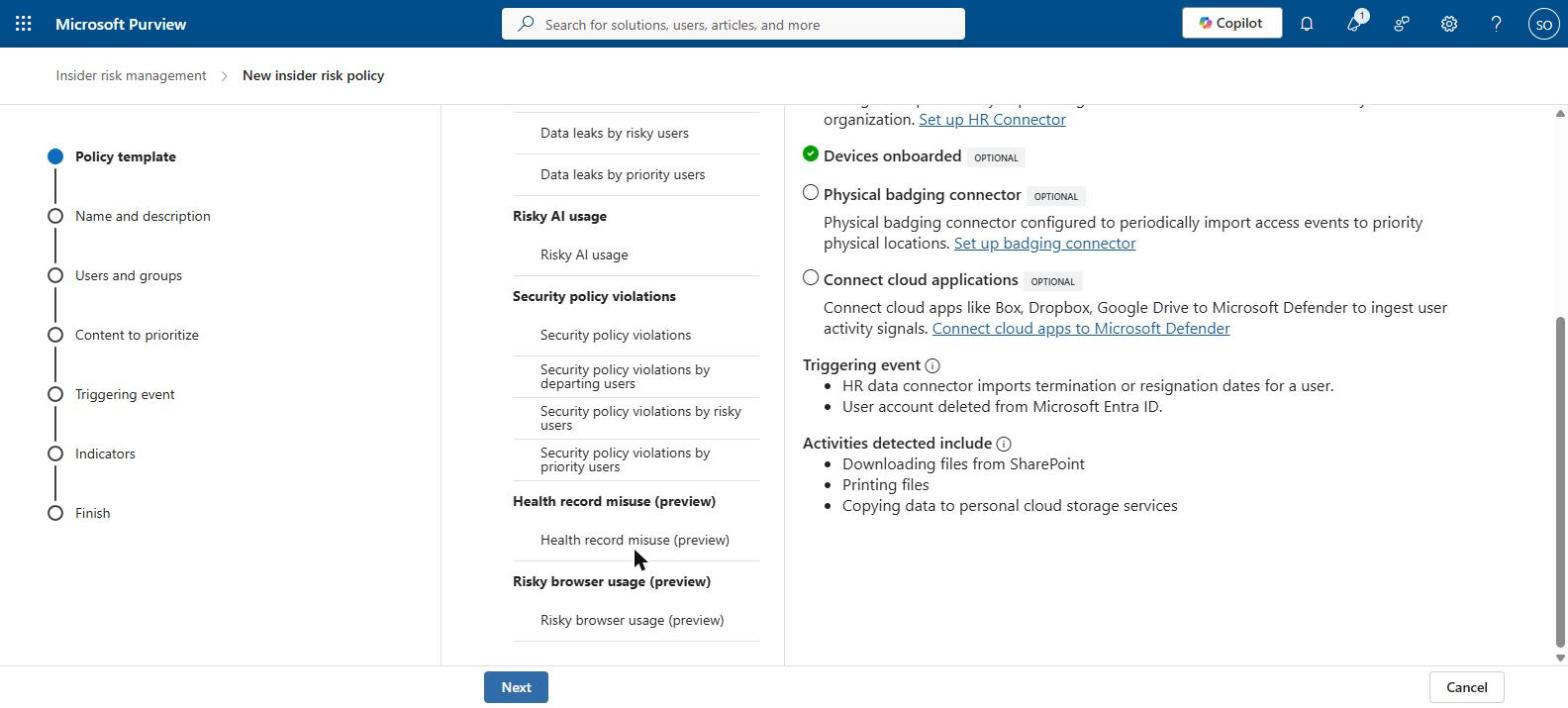
Scroll down to see what starts the policy and what activity it looks for. You can also see the other templates, including Risky AI usage, and a separate tab for AI agent policies.
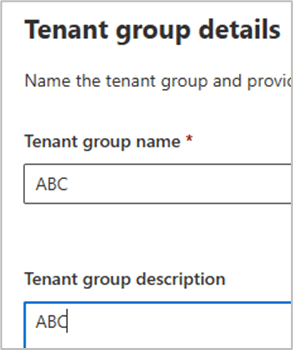
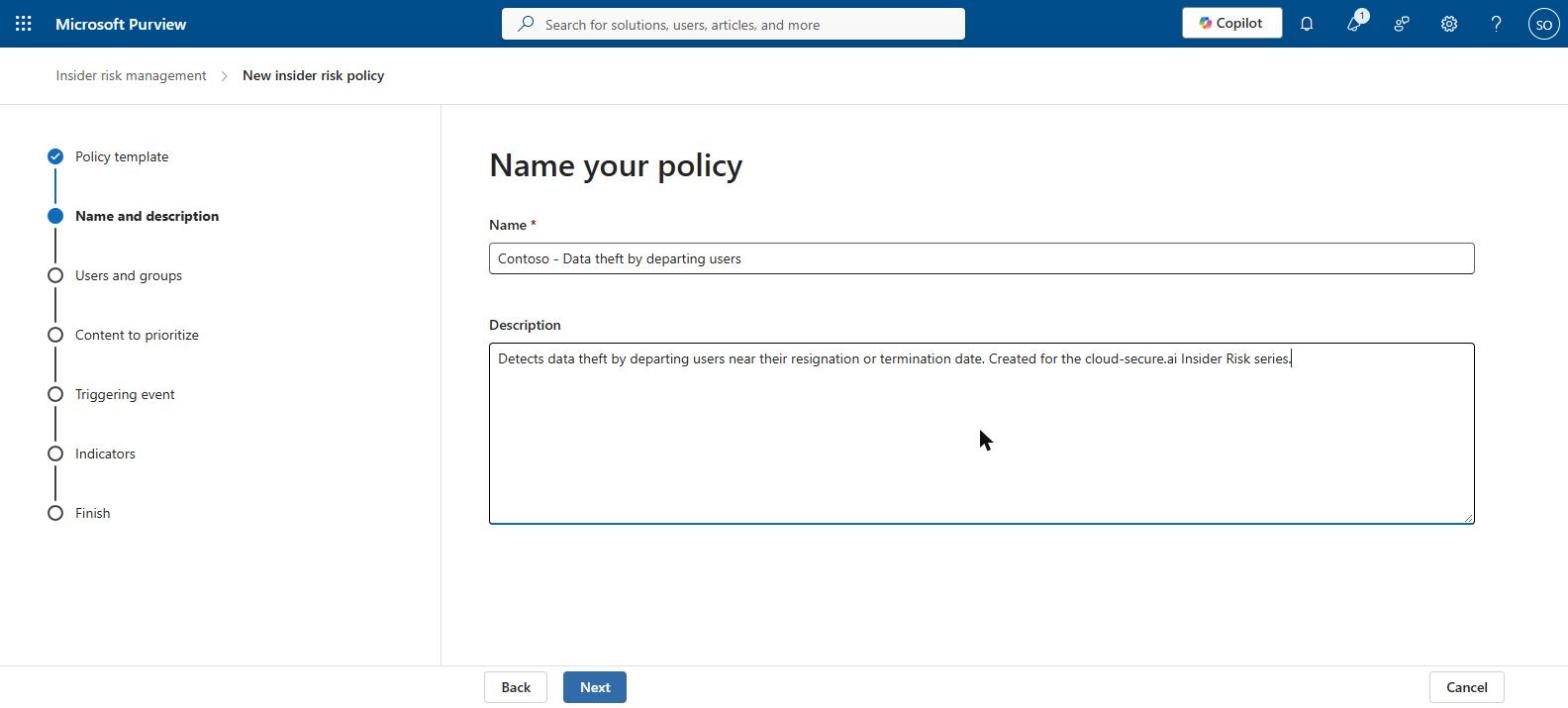
Step 3 – Name and describe the policy
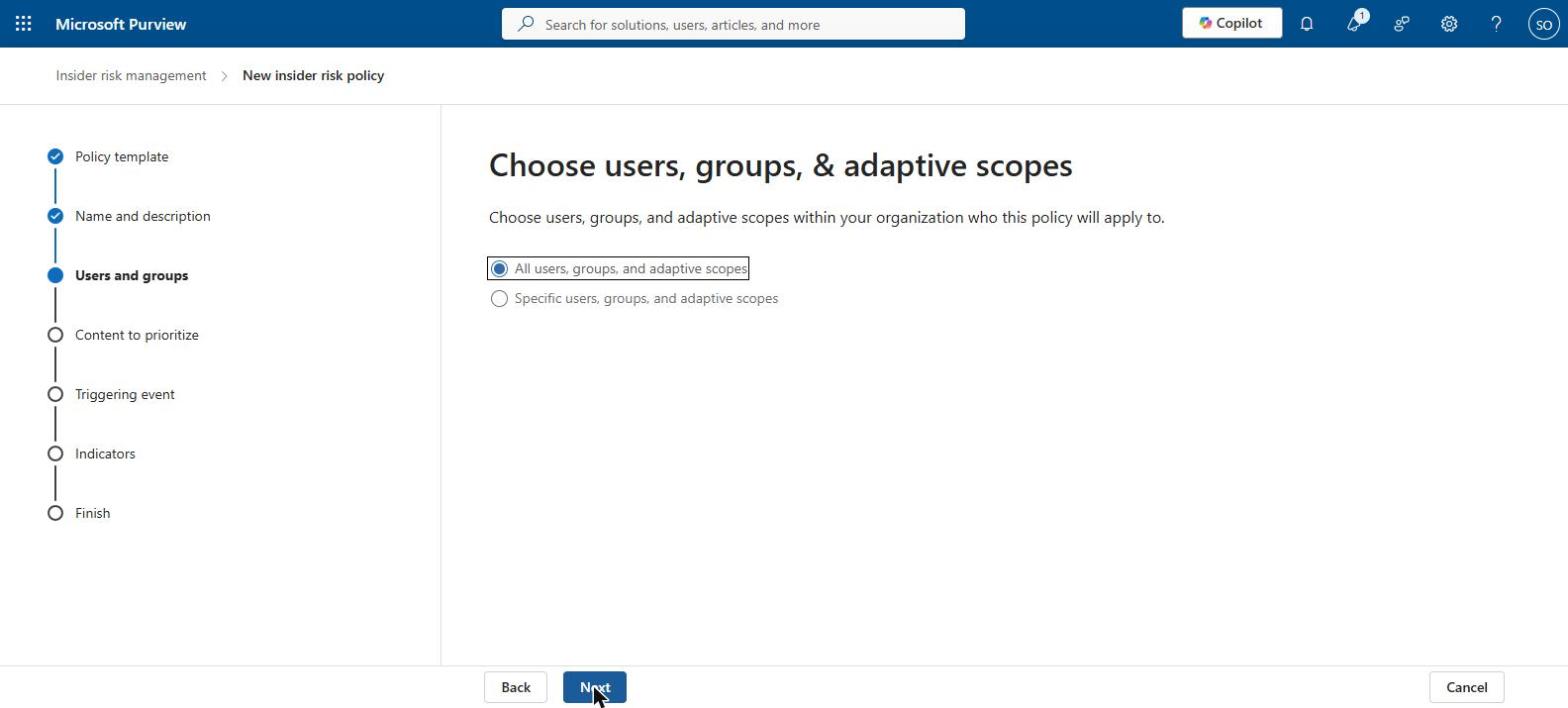
Step 4 – Choose users and groups
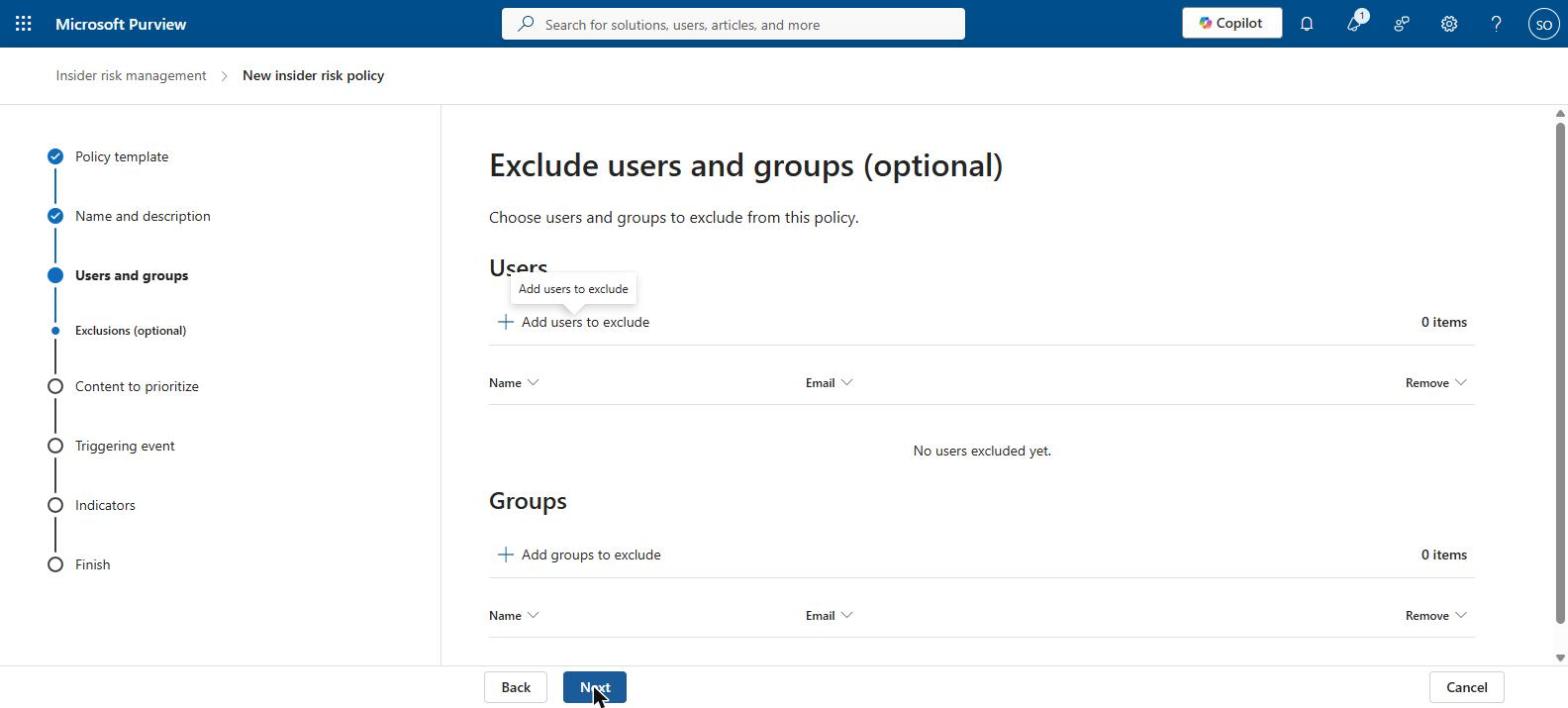
I kept the default of all users in my test environment. In a real organisation, consider starting with a pilot group, and remember everyone covered needs a licence. On the next screen you can leave out test or system accounts.
Step 5 – Content to prioritise
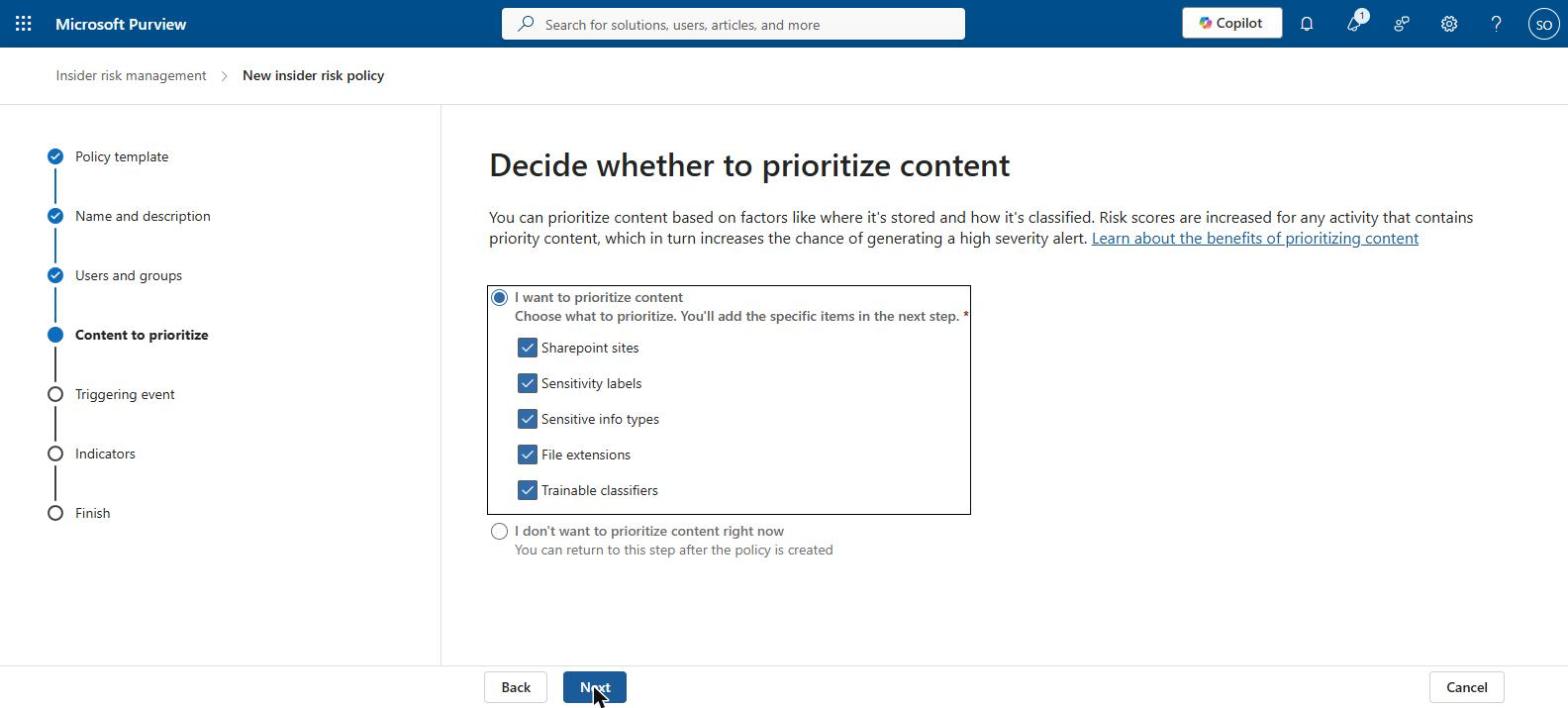
Here you can tell Insider Risk Management which data matters most – specific SharePoint sites, sensitivity labels, or types of sensitive information such as credit card numbers. Activity involving that data scores higher. For a first policy I skipped this. You can add it later, and it is where your labelling work really starts to pay off.
Step 6 – Triggering event
Because my test environment has no HR connector, the set-up selects “User account deleted from Microsoft Entra ID” and explains why.
Step 7 – Indicators
This is where my test environment stopped me. The activities the policy needs to watch were switched off for the whole organisation:
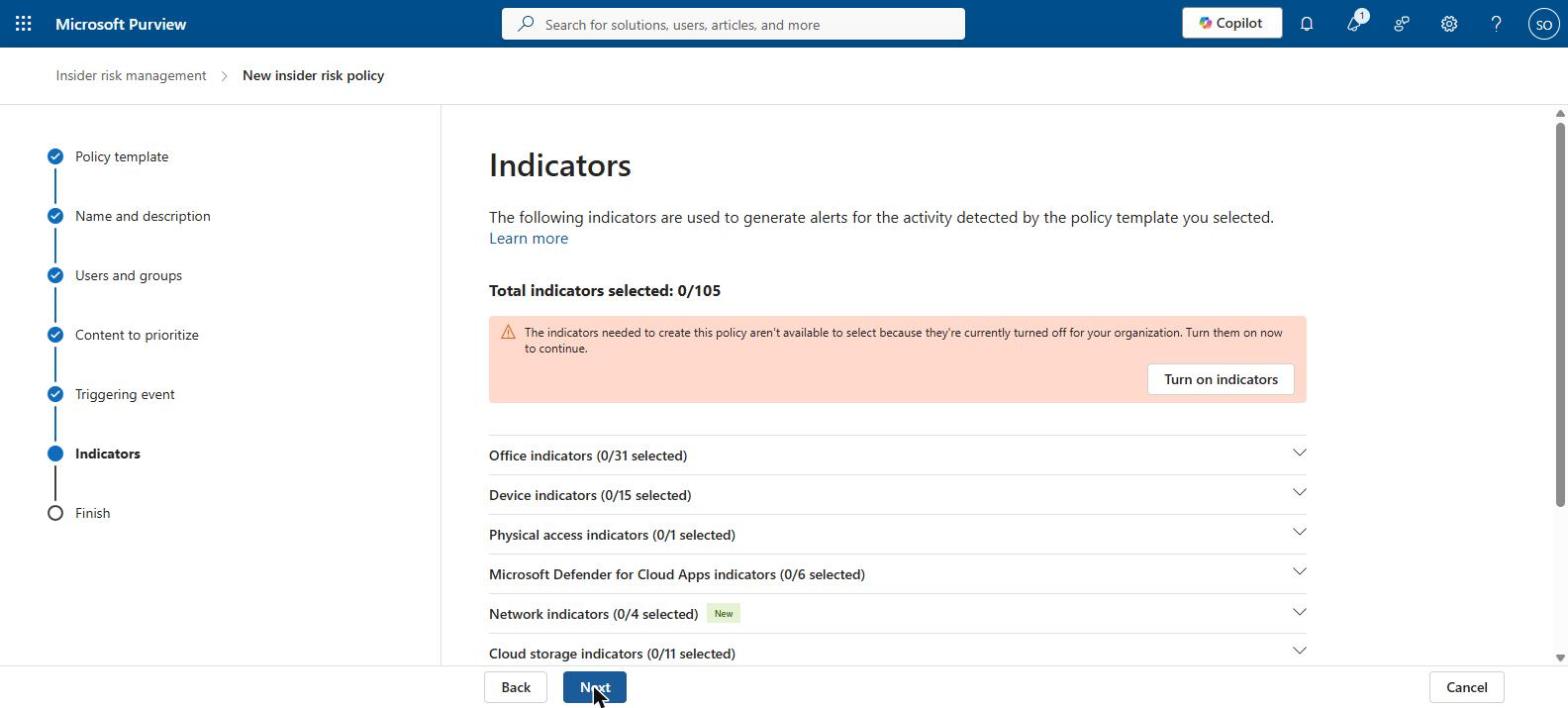
Selecting Turn on indicators changes a setting for the whole organisation – every insider risk policy can then use them.
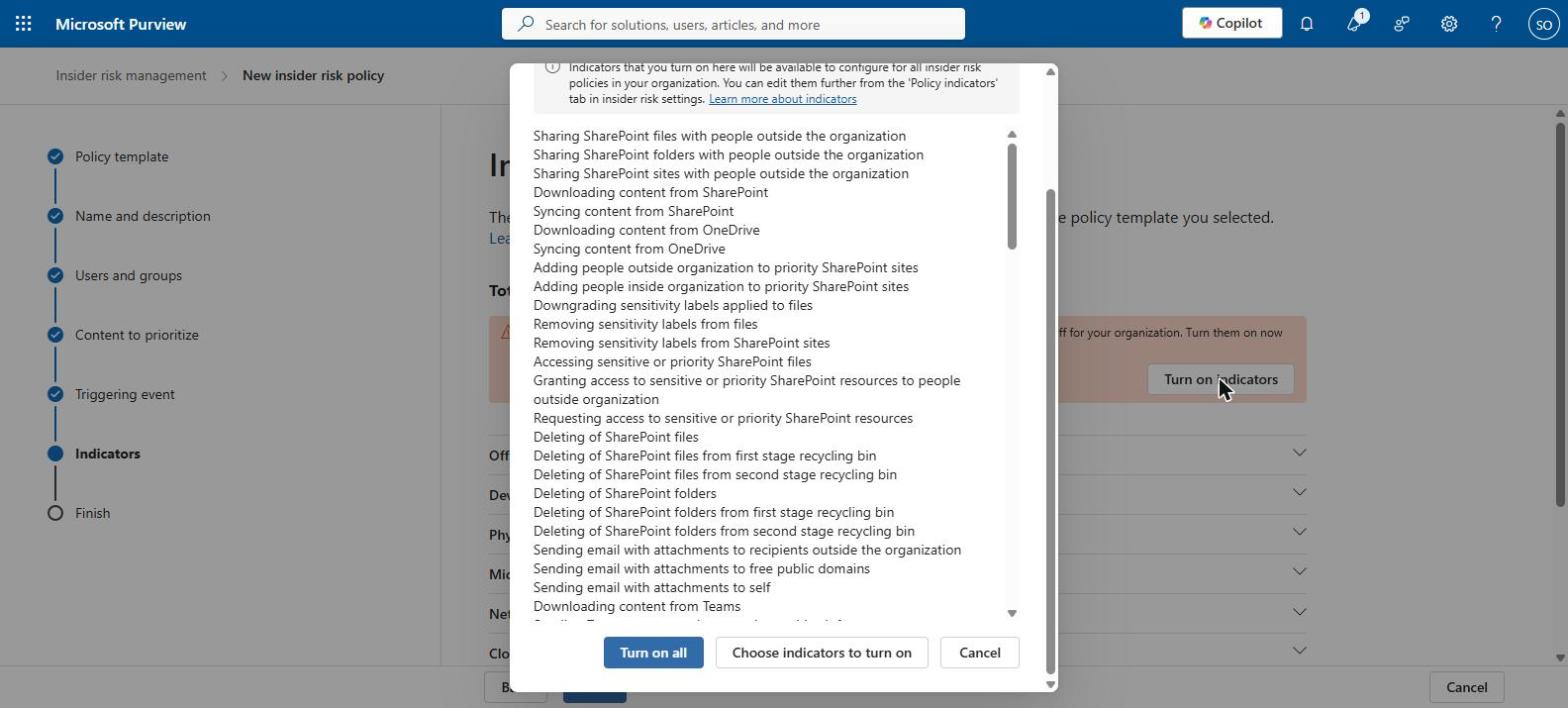
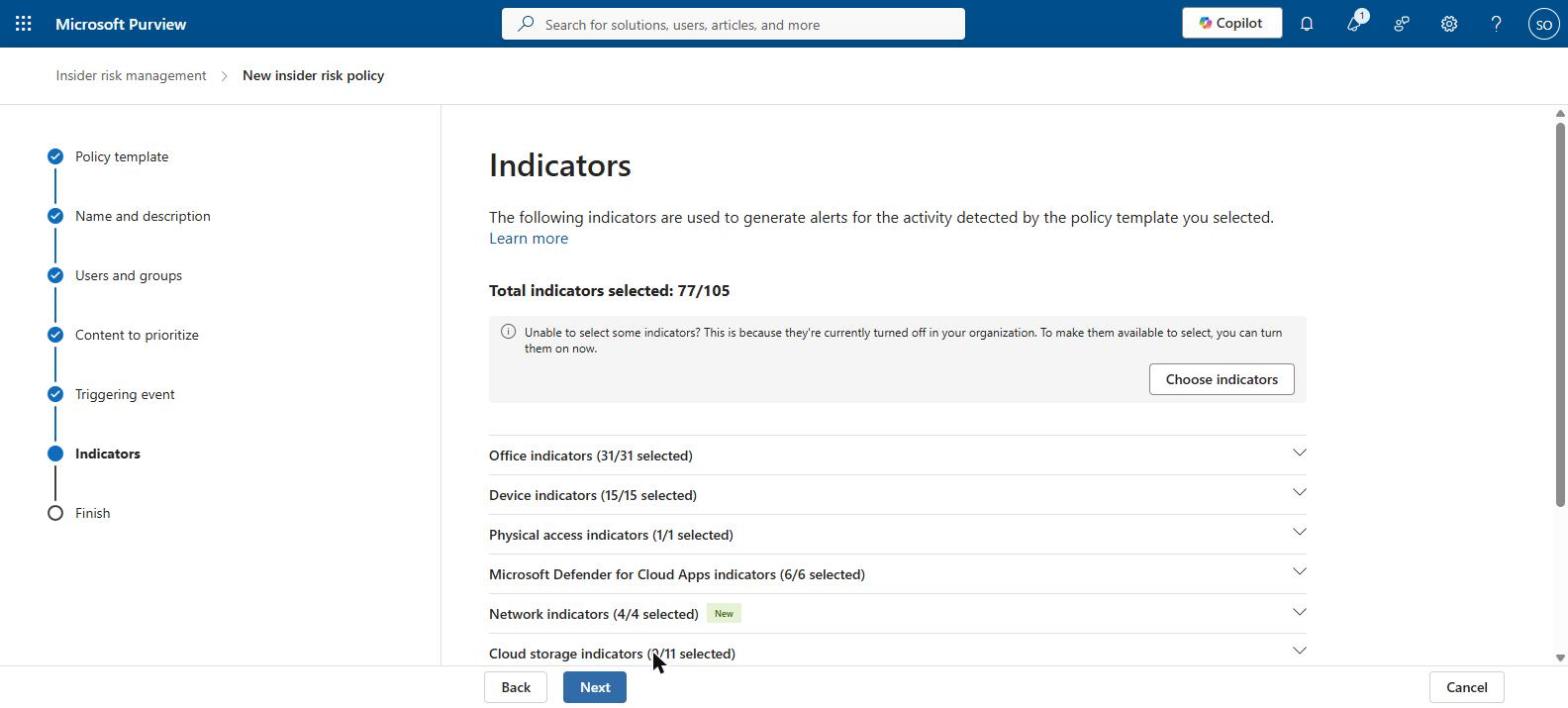
After selecting Turn on all, 77 of the 105 available indicators were switched on for this policy.
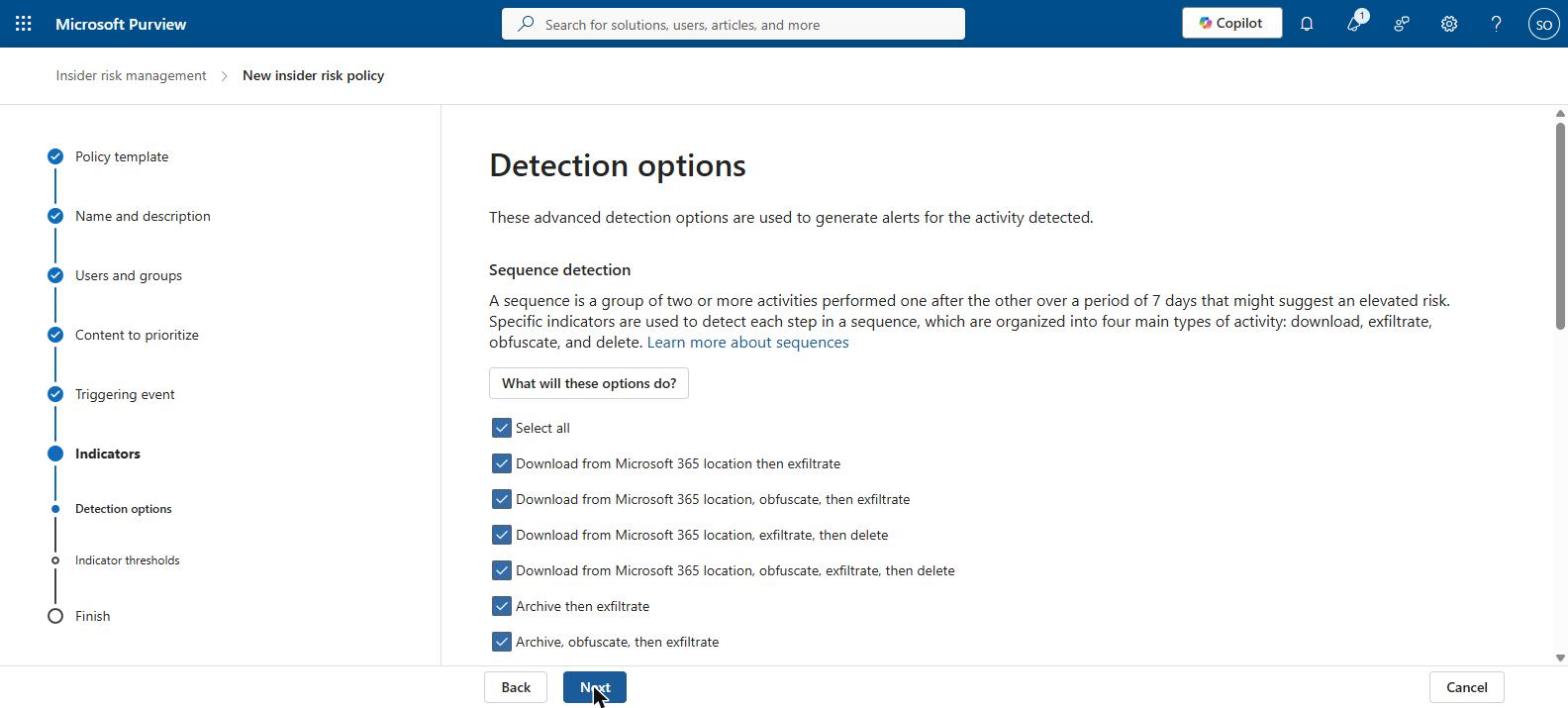
Step 8 – Detection options
Sequence detection is on by default. It looks for a chain of steps within seven days – downloading data, disguising it, moving it out and deleting the evidence.
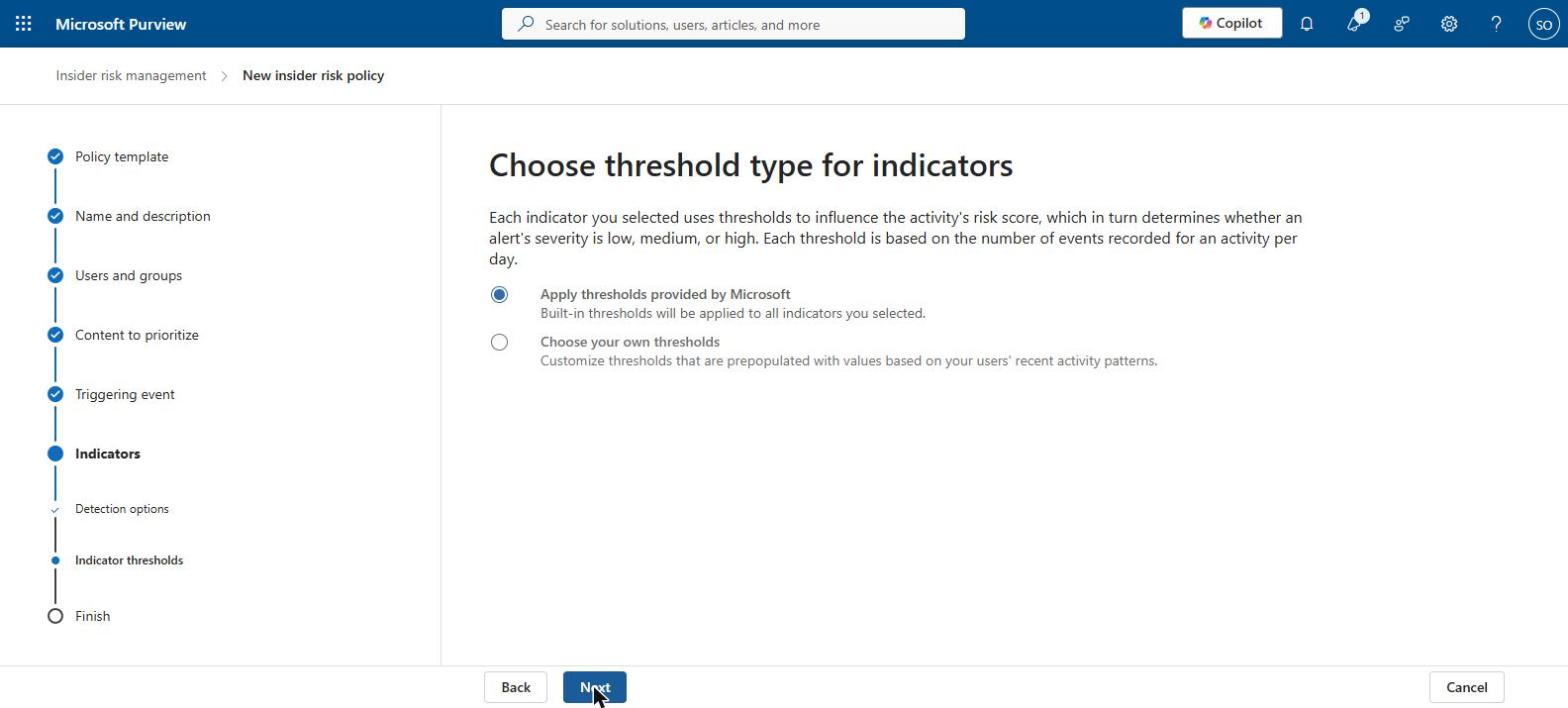
Step 9 – Indicator thresholds
Thresholds decide how much activity counts as unusual. Start with Microsoft’s, and fine-tune them once analytics has learned what is normal for your organisation.
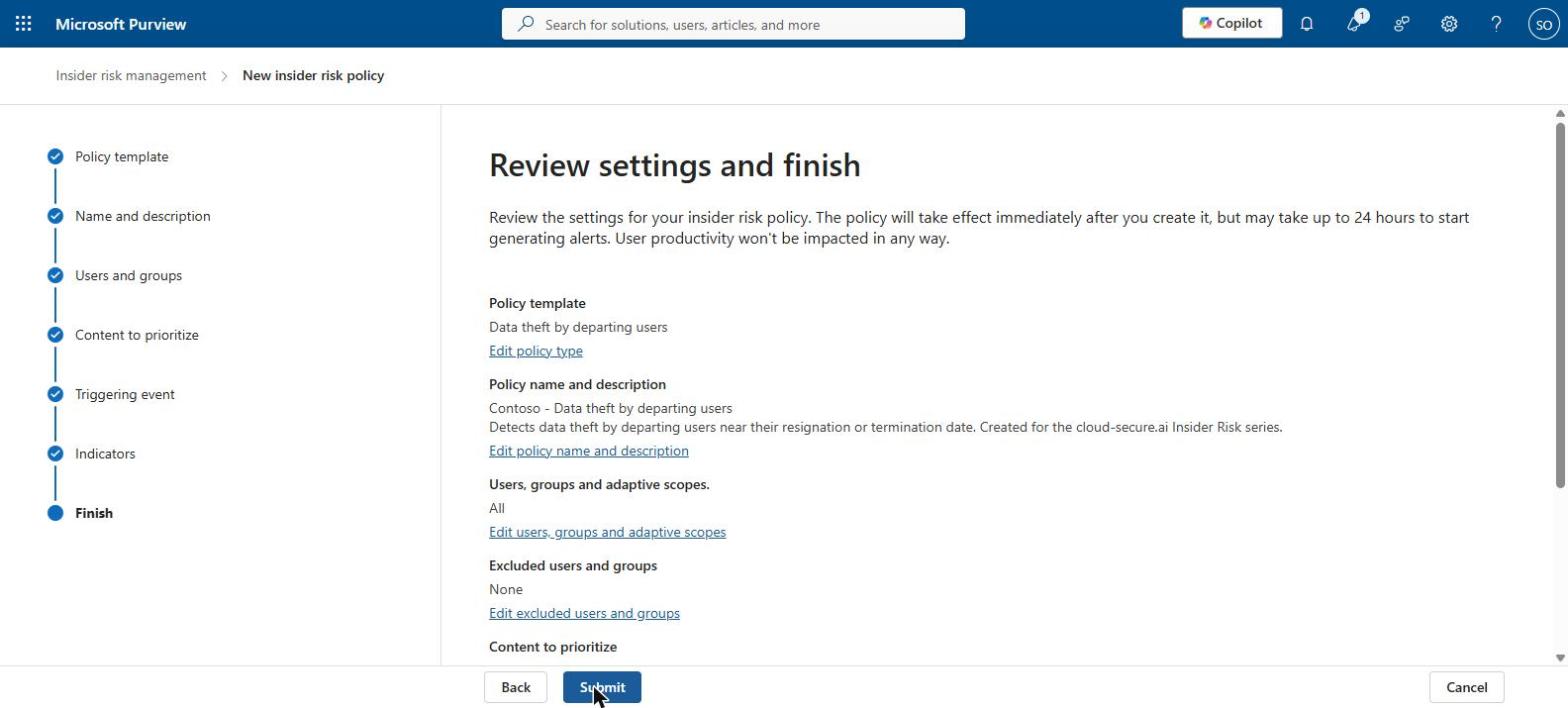
Step 10 – Review and submit
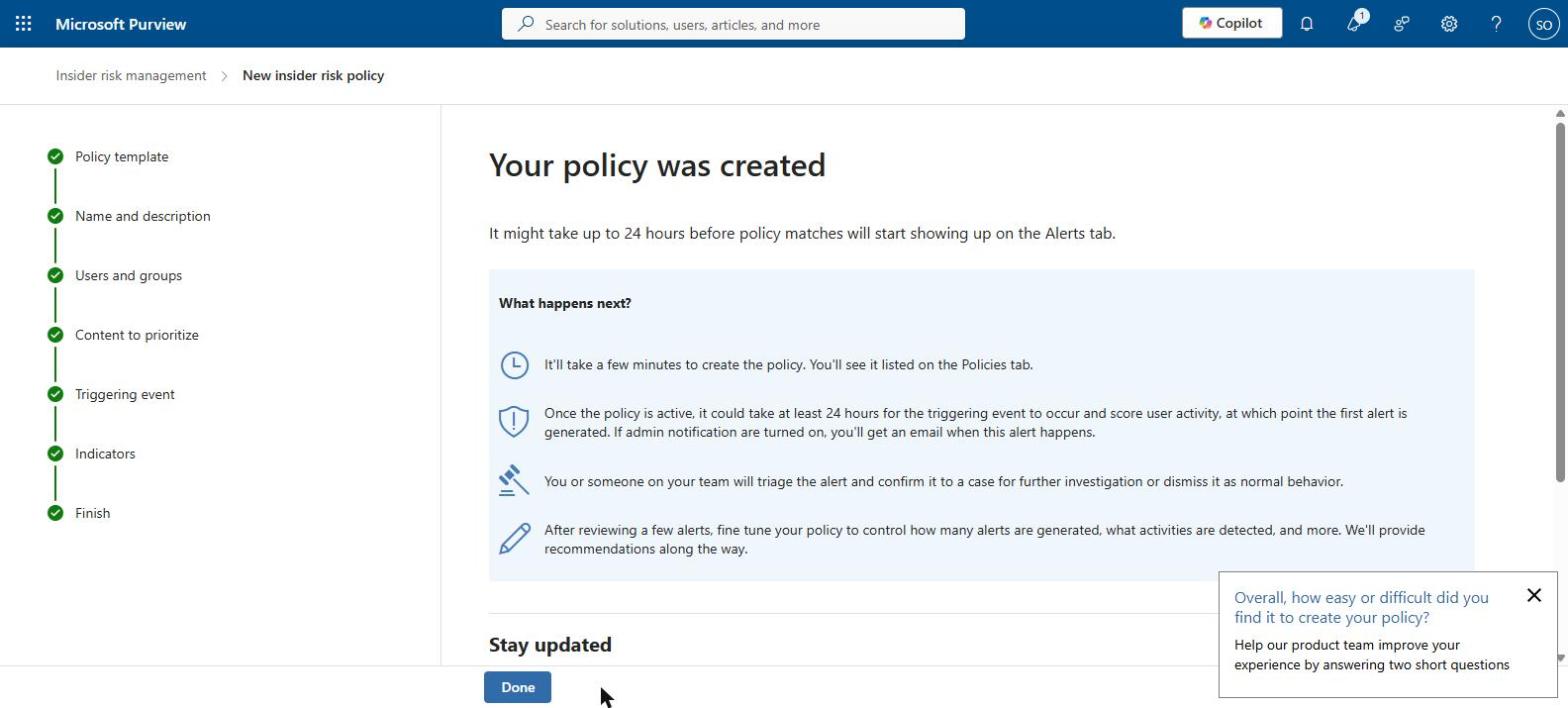
The policy starts straight away, but it can take up to 24 hours before the first alerts appear.
Automating with PowerShell
Microsoft does not provide a supported PowerShell command for creating insider risk policies, so the policy itself has to be created in the portal. The companion script, Invoke-InsiderRiskSetup.ps1, automates everything around it instead:
- Checks audit logging is on, and can turn it on for you
- Adds people to the Insider Risk Management role groups
- Shows which insider risk PowerShell commands are available to you
- Confirms your policy exists and saves a copy of its settings for your records
The scripts, the KQL hunting queries and their README files are on GitHub: https://github.com/cloud-secure-ai/Purview-insider-risk-management
.\Invoke-InsiderRiskSetup.ps1 `
    -AdminUpn admin@contoso.com `
    -AnalystUpn analyst@contoso.com `
    -InvestigatorUpn investigator@contoso.com `
    -EnableAuditing -WhatIf
Proving it works
A policy is only useful if it catches something. The second companion script, Invoke-InsiderRiskSimulation.ps1, plays the part of a leaver in a test environment. It creates files containing dummy sensitive data, downloads them from SharePoint, zips them up and renames the archive to hide what it is, copies it to a USB stick or a personal cloud folder, can email a few files to an outside address, and then deletes the evidence.
Run it as a test user, on a laptop connected to Microsoft Defender for Endpoint. First bring that user into scope with Start scoring activity for users on the Policies page, or upload a resignation date for them through the HR connector. Every step is written to a log file with a timestamp, so you can match it against the alert. Alerts can take up to 24 hours to appear.
Test environments only: The simulation deliberately behaves like someone stealing data. It will not run unless you confirm it is a test environment, and it checks it is signed in to the test organisation you name. Never run it in production.
Hunting with KQL
Insider Risk Management alerts also appear in the Microsoft Defender portal, where your security team already works. There you can search the underlying activity yourself using advanced hunting. Advanced hunting uses KQL (Kusto Query Language) – you paste a query in, select Run query, and get a table of results.
Two settings matter before Insider Risk data shows up in Defender. First, turn on Sharing data with other Microsoft security solutions under Insider Risk Management settings > Data sharing. Second, the person hunting must be in the Insider Risk Management Analysts or Investigators role group – the same admin-versus-analyst split covered earlier.
This query lists every file copied to a USB stick or other removable drive, with the make, model and serial number of the device it went to:
DataSecurityEvents
| where Timestamp > ago(30d)
| where DeviceDestinationLocationType == 3
| project Timestamp, AccountUpn, DeviceName, ObjectName, ObjectSize,
          RemovableMediaManufacturer, RemovableMediaModel, RemovableMediaSerialNumber
| order by Timestamp desc
You do not need Insider Risk Management for the next one. It uses standard Defender data, so you can run it in any organisation with Defender today. Add your recent leavers and their last working day, and it shows every SharePoint or OneDrive download, every zip file created on their laptop and every email with attachments they sent outside, in the 30 days before they left:
let Leavers = datatable(AccountUpn: string, LastWorkingDay: datetime) [
    "leaver1@contoso.com", datetime(2026-11-21),
    "leaver2@contoso.com", datetime(2026-12-05)
];
let LookbackDays = 30d;
let LeaverUpns = Leavers | project AccountUpn = tolower(AccountUpn);
let CloudDownloads = CloudAppEvents
    | where Timestamp > ago(90d)
    | where ActionType == "FileDownloaded"
    | extend AccountUpn = tolower(tostring(RawEventData.UserId))
    | where AccountUpn in (LeaverUpns)
    | project Timestamp, AccountUpn, Activity = "Downloaded from SharePoint or OneDrive",
              Detail = ObjectName, Application;
let ArchivesCreated = DeviceFileEvents
    | where Timestamp > ago(90d)
    | where ActionType in ("FileCreated", "FileRenamed")
    | where FileName matches regex @"(?i)\.(zip|7z|rar|tar|gz|dat)$"
    | extend AccountUpn = tolower(InitiatingProcessAccountUpn)
    | where AccountUpn in (LeaverUpns)
    | project Timestamp, AccountUpn, Activity = strcat("Archive ", tolower(ActionType), " on device"),
              Detail = strcat(DeviceName, " - ", FolderPath), Application = InitiatingProcessFileName;
let ExternalEmail = EmailEvents
    | where Timestamp > ago(90d)
    | where EmailDirection == "Outbound" and AttachmentCount > 0
    | extend AccountUpn = tolower(SenderFromAddress)
    | where AccountUpn in (LeaverUpns)
    | project Timestamp, AccountUpn, Activity = "Email with attachments sent outside",
              Detail = strcat(RecipientEmailAddress, " - ", Subject), Application = "Exchange Online";
union CloudDownloads, ArchivesCreated, ExternalEmail
| join kind=inner (Leavers | extend AccountUpn = tolower(AccountUpn)) on AccountUpn
| where Timestamp between ((LastWorkingDay - LookbackDays) .. (LastWorkingDay + 1d))
| project Timestamp, AccountUpn, LastWorkingDay, Activity, Detail, Application
| order by AccountUpn asc, Timestamp asc
Try this: Run the leaver timeline against the last five people who left your organisation. If it returns anything, you have just found what Insider Risk Management would have alerted you to – and that is usually the most persuasive business case there is.
The full set of seven queries – including Insider Risk alerts by person, sensitivity label changes and a query that finds a run of the simulation script – is on GitHub with a README explaining each one.
In Part 5 I connect this policy to Adaptive Protection and DLP, so that a high risk score automatically tightens the controls for that person.
The rest of the series
- Series guide: Insider Risk Management with Microsoft Purview
- Part 1: The Purview workload everyone skips
- Part 2: From Ignite 2019 to AI agents
- Part 3: Licensing, prerequisites and pay-as-you-go
- Part 5: Adaptive Protection with DLP
- Part 6: Obligation or option? Regulation, privacy and the PII gap
- Part 7: Insider risk in Conditional Access and the Data Security Triage Agent
References
- Get started with Insider Risk Management – Microsoft Learn
- Insider Risk Management permissions – Microsoft Learn
- Set up a connector to import HR data – Microsoft Learn
- Investigate insider risk threats in the Microsoft Defender portal – Microsoft Learn
- DataSecurityEvents table in advanced hunting – Microsoft Learn
- Share Insider Risk Management data with other solutions – Microsoft Learn
- Scripts and KQL hunting queries on GitHub – Purview-insider-risk-management
Seán O’Farrell | cloud-secure.ai