
Just in Time Access for M365 Purview Roles

Microsoft’s unwavering commitment to security and compliance has consistently driven innovation and adaptability to meet evolving industry demands. Their dedicated security and compliance portals have left the legacy portal, portal.office.com, in the not too distant past.

One common frustration for M365 administrators is the inability to assign the following roles within Microsoft Privileged Identity Management:

  • Microsoft Purview roles’
  • Microsoft Defender roles’
  • Microsoft Dynamic roles’

    This blog post will primarily delve into the assignment of Microsoft Purview roles. The image below showcases the default role assignment choices available in Microsoft Privileged Identity Management.

Microsoft Purview Roles

Microsoft has invested significantly in their portal redesign at compliance.microsoft.com. In traditional scenarios, IT administrators often find themselves tasked with configuring, executing, exporting e-discovery case results, and subsequently reporting to compliance officers, data protection officers, or HR departments. However, entrusting IT admins with these compliance tasks raises initial concerns about data protection. It’s imperative that IT admins remain unaware of sensitive information contained within e-discovery case results, as these results might encompass IT admin staff within the search criteria.

As of the time of this post, there are approximately 95 role groups within M365 Purview. Here are some practical use cases illustrating how these roles can be assigned to fulfil various compliance roles and organizational requirements:

  • e-discovery
  • Insider Risk Management
  • Privacy Management
  • Data Investigator

How to Assign Microsoft Purview Roles to Microsoft Entra ID Groups

Note: For the purposed of this blogpost, I created a Microsoft CDX tenant, all users and screenshots are fictional.

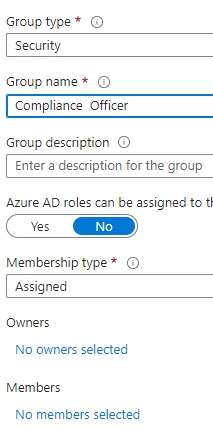
1: Create a Microsoft Entra id group. Important, to not add any members or owners
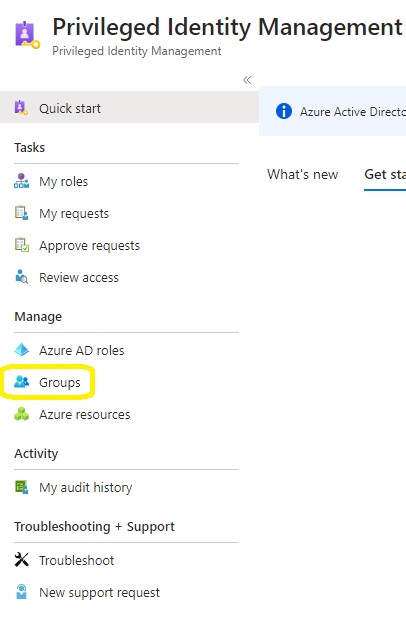
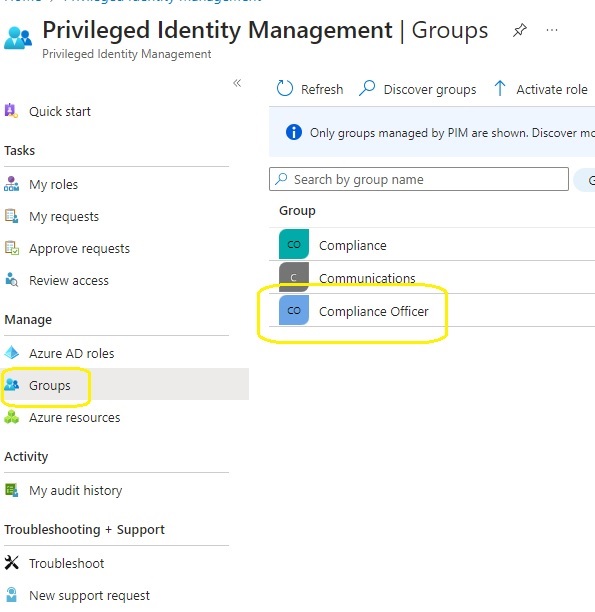
2: Login to Microsoft Entra Privileged Identity Management and select Groups.
3.Seclect Discover Groups

4.Search for the previously created group and then select manage groups
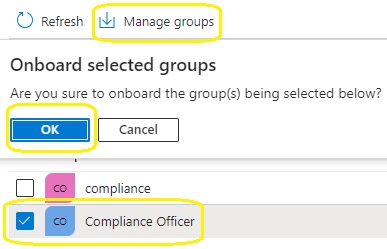
5.Select groups in Privileged Identity Management

6. Click on assignment, add members to eligible assignments, this is why , we did not need to add any group members in step 1

7. Click on settings and member
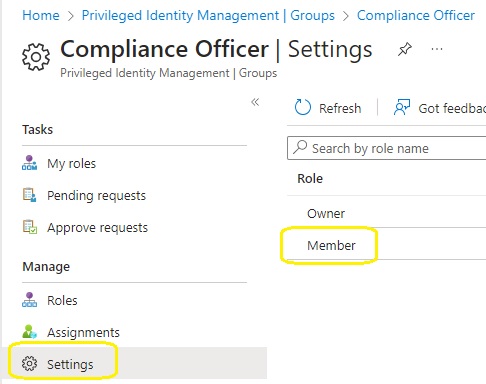
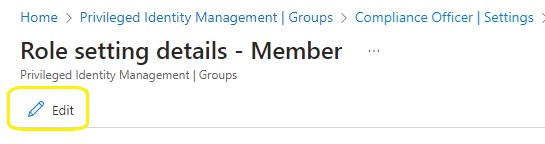
8. Edit the member settings
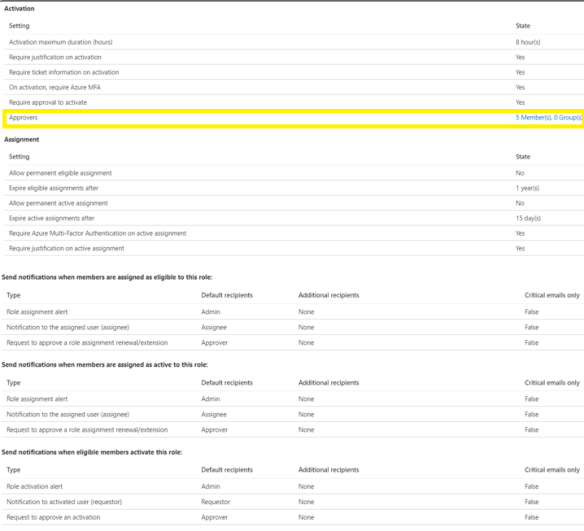
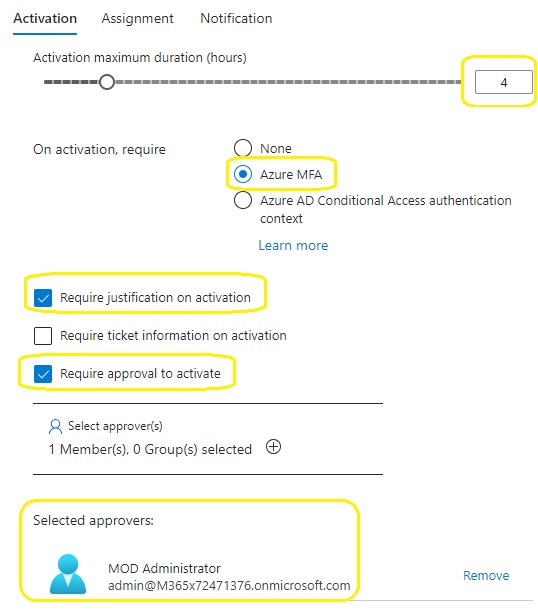
9. Set hours to 4, require justification on activation, require approval to activate and then finally select the approver. The approver may be different per role that requires activation.
10. Create a role group in the compliance.microsoft.com portal : Microsoft Purview Permissions

11. Name the role group

12. Add the roles.

Select all roles
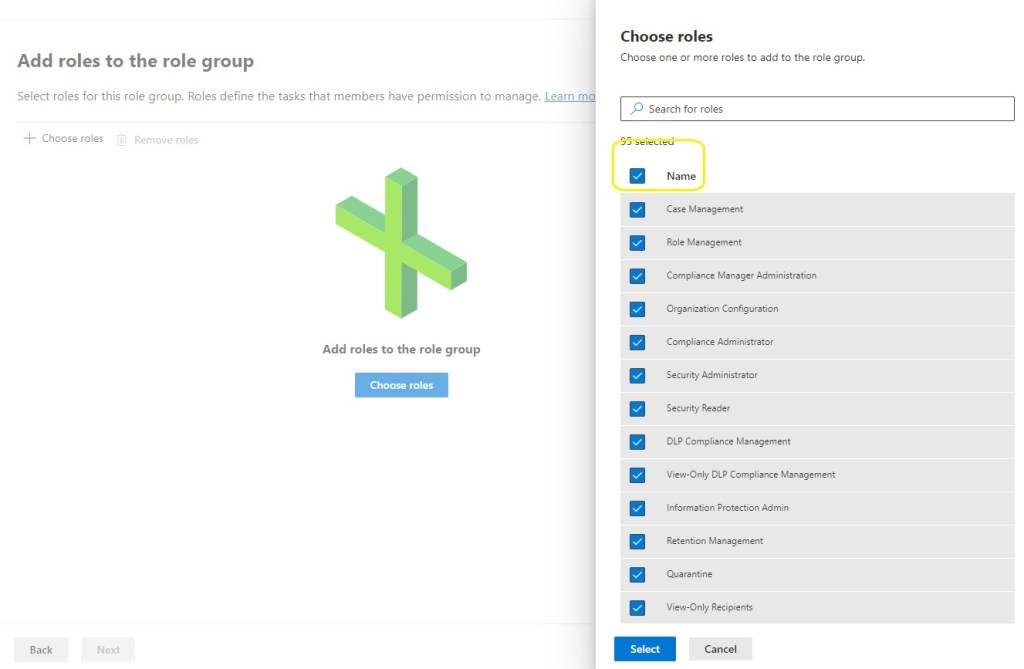
13. Choose groups and add the group that was created previously

14. Now the end user Adele Vance can login to https://entra.microsoft.com /identity governance / Privileged Identity Management and select ‘Activate just in time’
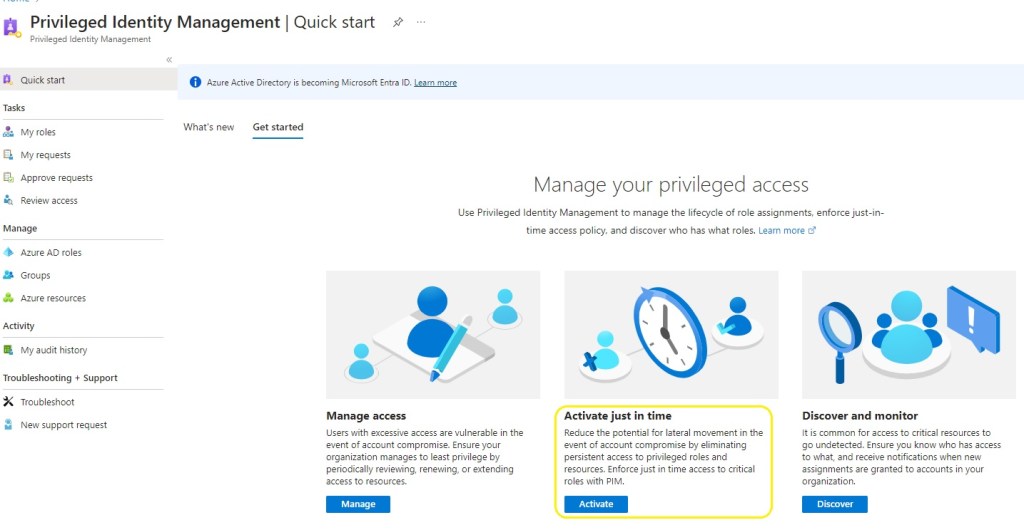
15. The user then selects group, activate and provides a business justification.
16. The group owner and admin , receives an email notification, that there is a pending just in time access request and can choose to approve or deny the request.

17. The compliance officer can then login to complicane.microsoft.com and perform his\her compliance activities. During my testing, no license was required for the compliance officer. I am sure Microsoft would insist that the compliance officer has an M365 E5 or E5 compliance add-on license:)

Summary

The technical steps outlined in this blogpost, enable organisations to apply Privileged Identity Management policies to roles \ permissions control in services like

  • Microsoft Purview roles’
  • Microsoft Defender roles’
  • Microsoft Dynamic roles’

M365 Purview roles are not available in M365 roles or Microsoft Entra ID Privileged Identity Management, for really good reasons. M365 Purview role \ permission elevation , can be typically required for legal disputes.

Every organisation, should consider compliance and governance with a cloud transformation journey where services, data and line of business workflows, transition from on-premises to Microsoft cloud services.

If anyone, or any organisation would like some further assistance with this, please get in touch with me via LinkedIn : https://www.linkedin.com/in/seanofarrelll/

Azure Privileged Identity Management to lock down provision of Virtual Machines in Azure

In my previous post on how to secure Office 365 Roles and this post is about how to secure Azure Resources.

Office365 and Azure Active Directory have a number of roles that are familiar like global administrator , compliance administrator etc. One of the most common use cases for Azure PIM it to request just in time access to the global administrator role

As organisations extend their networks into Azure , Azure subscription’s costs can sometimes spiral out of control. And this post will demonstrate the technical steps required to lock down the ‘virtual machine contributor’ role with Azure Privileged Identity Management, so that it requires finance department or senior it approval to create virtual machines in Azure, and the process around making technical admin staff eligible for the ‘virtual machine contributor role’

An example of how Azure costs could spiral , An Azure Admin , provisions the most expensive high performance virtual machine available in Azure, makes the VM geo-redundant, adds in a few ultra disks and a few Terra Bytes of Azure Blob Strage.

If there are multiple Azure subscriptions, The eligible users and app-rovers will need to be configured per subscription.In the image below we want to manage Azure Resources.

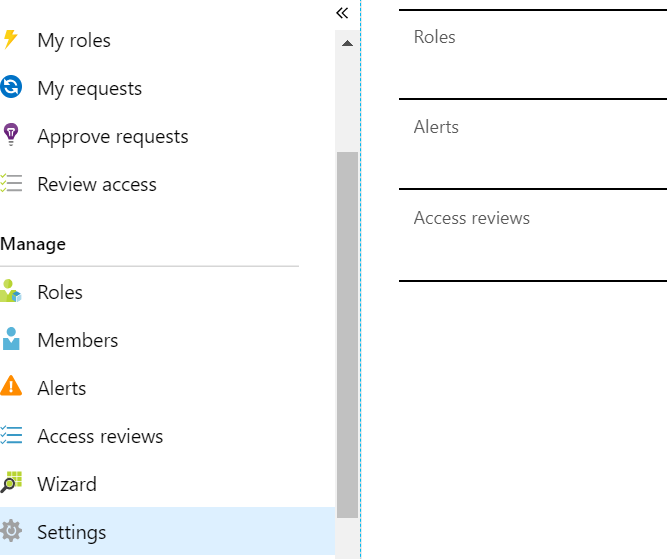
We click on Azure Resources and then click on settings.

Add the app-rovers for the role and ensure the app-rovers have mailboxes so that they receive the email notification
Next step is to add eligible users for the virtual machine contributor role.
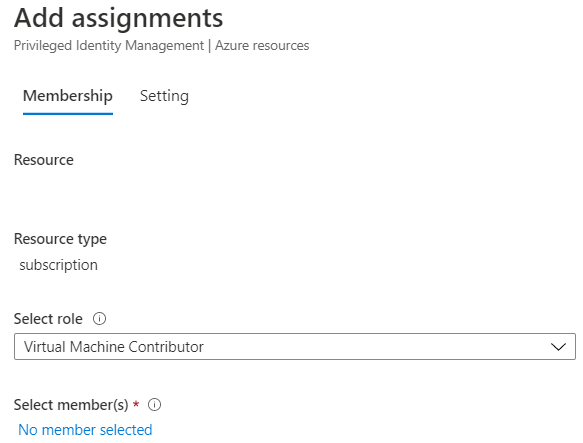
Now any admin that needs to provision a virtual machine in Azure has to follow a workflow and can only do so when senior IT resources or finance department users have approved the provision of the virtual machine

Azure Privileged Identity Management – Office365 Roles

Privileged Identity Management is an amazing new service that Microsoft has made available via the following licensing skus.

  • Enterprise Mobility + Security (EMS) E5
  • Microsoft 365 M5
  • Azure Active Directory Premium Plan

This blog post is related to Office365 roles.

I will create a new blog for using PIM with Azure resources, an example could be a workflow that requires financial approval to deploy virtual machines.

When I first set this up I followed the Microsoft guide lines but found it hard to understand how to start protecting privileged roles with PIM
This blog post will outline the steps required to manage some specific Office365 roles.

FIRST STEPS to enable Azure PIM 

Browse to this Microsoft Site – Getting started  with Azure PIM
Complete the following two sections
Enable PIM
Sign up PIM for Azure AD roles

It is critical for an Azure PIM administrator to be  a member of the ‘Privileged Role Administrator’ role so that the admin can assign users for eligibility to relevant roles.

Azure PIM sample use cases with Office365 

Global Administrator
License Administrator
Compliance Administrator ( This is probably the best use case for Azure PIM in Office365)
Exchange Administrator
Sharepoint Administrator
Service Administrator
(Office365 Premier Support tickets now need to be logged through the Office365 admin portal. Support staff only need this role and not global admin)

Add eligible users to privileged roles

The next steps will look at how we can make a user eligible for  privileged role access and some of the options available.

  1. Assigning  a user for eligibility to privileged roles, Browse to the manage section and select settings and then roles
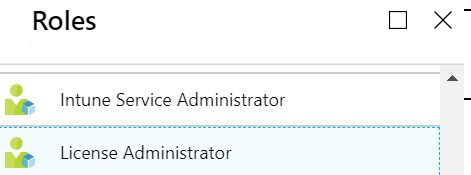
  2. Select the roles that you want to assign eligible users to
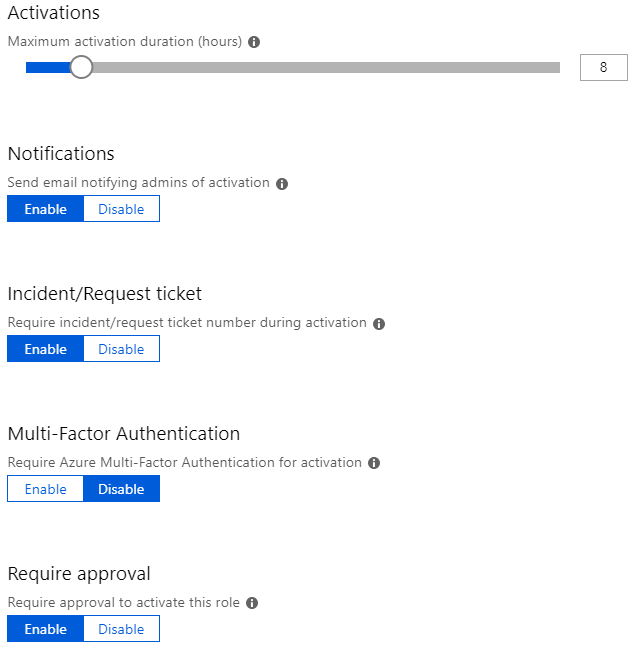
  3. Select the options displayed in the image below and add approval users. Not all rules may require MFA enforcement. But some will, like the Global Admin or Compliance Admin Role.
  4. Add Approval Users
    Most admin accounts do not have a license and therefore have no mailbox and cannot receive a mail notification for a request to approve access. It is possible to add approval accounts to ‘Privileged Authentication Administrator’ role and this enables the approval hyperlink within email notification to be re-directed to the Azure PIM request approval portal and approve the request. When Azure Seamless sign on is enabled the approver is directed to the Azure PIM request portal with single sign on and the process can be very quick.

The next steps demonstrate an end user or external guest account requesting access to the Office365 licensing portal.

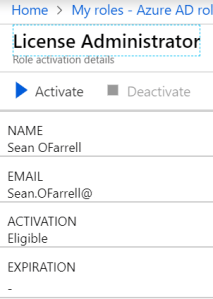
  1. The user requesting access would click on this URL
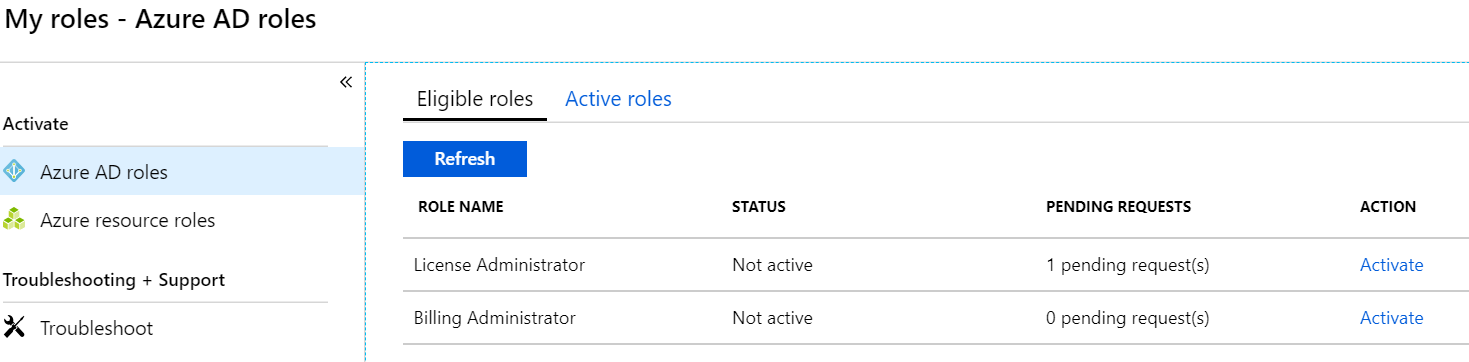
  2. The user will then be presented with an Azure page that he\she can request access to their eligible roles.
  3. Then click on the next Activation link
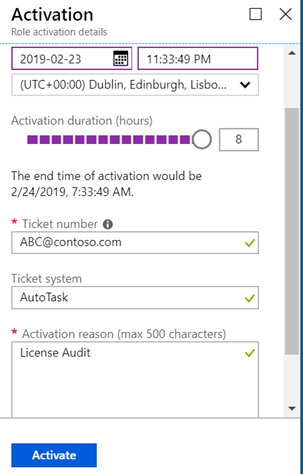
  4. Then fill in the details for the request and select activate
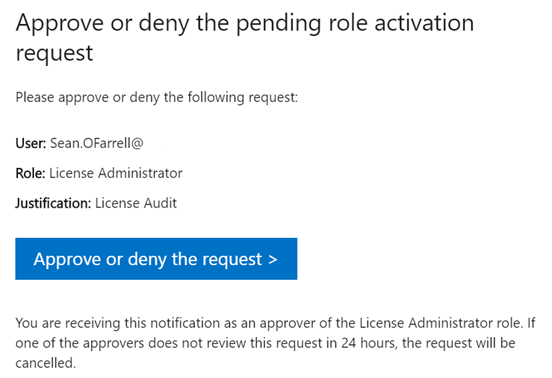
  5. This will then submit an email to a defined approval user, and the approval user will receive an email notification displayed in the image below
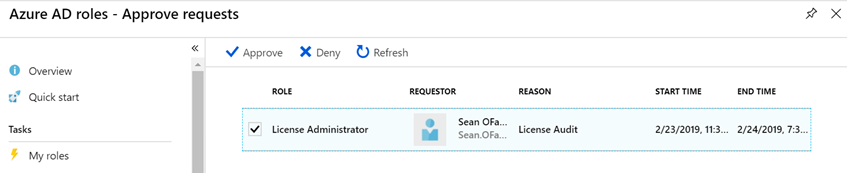
  6. The approval user will then be directed to the Azure PIM request portal and can then choose to approve or deny the request.

Auditing

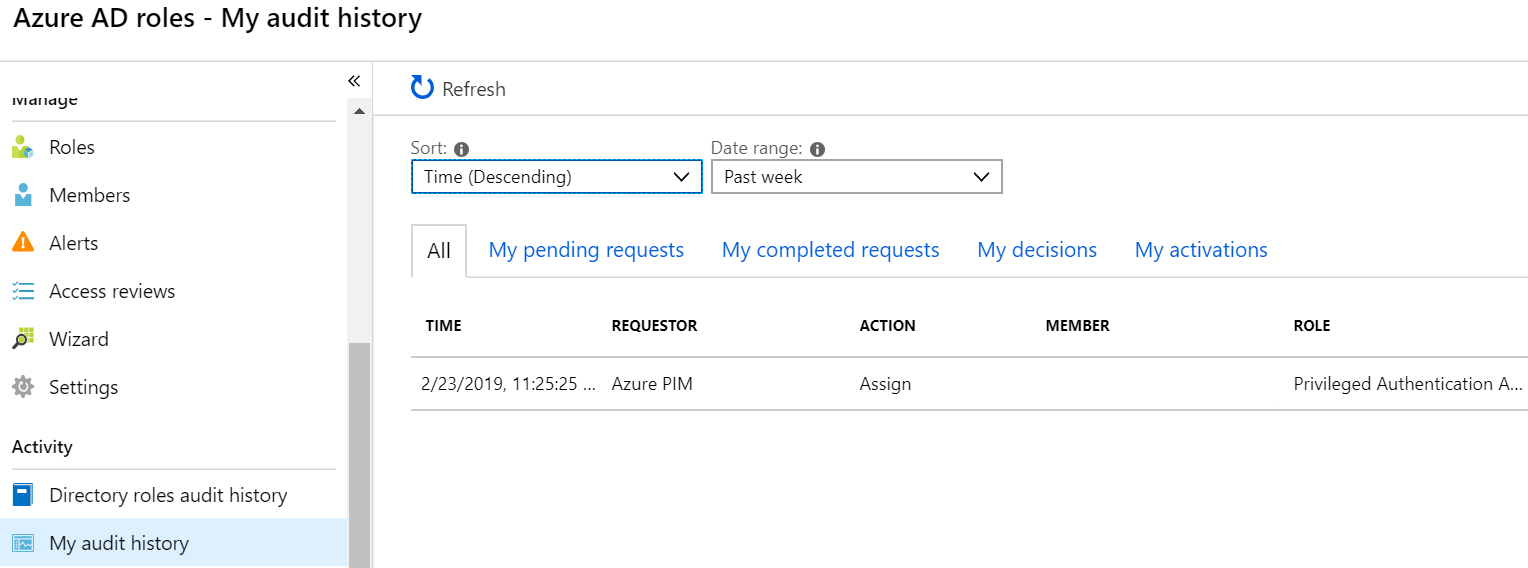
The final section to note is – Azure PIM auditing  is excellent and when Azure PIM is enabled it will send out notifications when users privileges have been elevated in the Office365 portal or Office365 service like Exchange Online or Sharepoint Online. Once PIM is in place the only place roles should be elevated is in Azure PIM and never never use generic admin accounts.