How to migrate Teams Sites from Office365 tenant to another Office365 Tenant using Migration Wiz

This image has an empty alt attribute; its file name is image.png

I have been working very closely with BitTitan for a number of years and BitTitan have been working very closely with Microsoft with the development of their Teams migration service.

The service was updated towards the end of August and this update brought a large number of enhancements which can be reviewed HERE

For years I have been migrating Office365 Tenants to other Office365 tenants and the problem still remains whereby a custom domain like contoso.com cannot exist in two Office365 tenants at once. So during acquisition or merger migration projects at what point do you migrate the Microsoft Teams sites. My recommendation is to take care of the following data sources first with the Migration Wiz user migration bundle.

Primary Mailbox
Archive Mailbox
OneDrive for Business
Outlook switch over via deployment pro.

Once the data sources above have been migrated , I would recommend that Outlook Web App access to the legacy source tenant mailboxes is blocked via running the following command

Get-Mailbox -resultsize unlimited | Set-CASMailbox -OWAEnabled $false
Get-Mailbox -resultsize unlimited | Set-CasMailbox -ActiveSyncEnabled $False

The official MigrationWiz migration guide is available HERE
Also follow this ARTICLE and setup the  Teams-FullControlApp in each source tenant.
I recommend that you use the autodiscover method to populate the project as this will also identify any incompatible items in Teams sites or channels

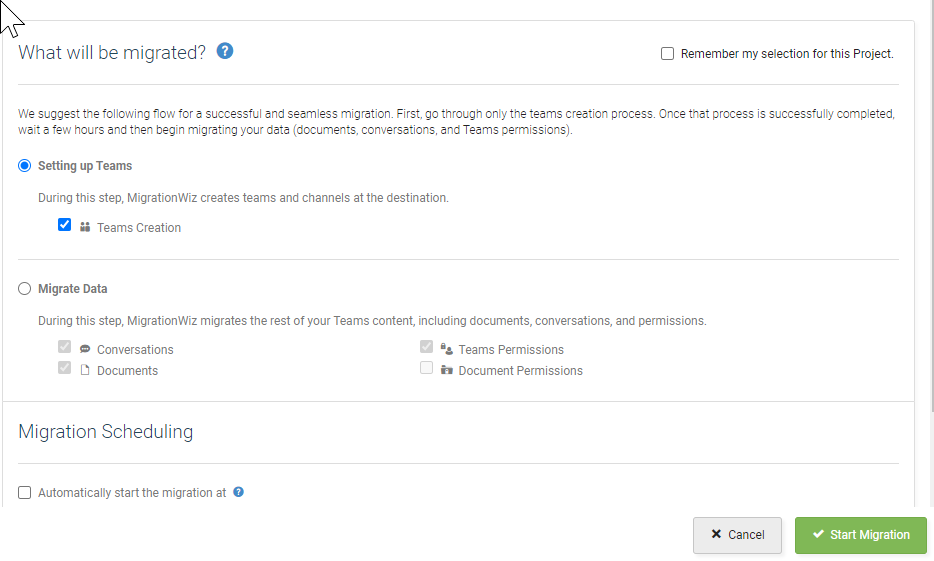
First step is to create the teams site in the target tenant , and do this 24 hours in advance
What_will_be_migrated_Teams.png

Next Step is to do the data migration

Validate the data and then remove the Teams licenses from the users in the source tenants with the following powershell commands. Create a new variable for each Offfice365 licensing sku that contains Teams.

Get-MsolAccountSku

$acctSKU=”contoso:O365_BUSINESS_PREMIUM”
$x = New-MsolLicenseOptions -AccountSkuId $acctSKU -DisabledPlans “TEAMS1”

$acctSKU2=”contoso:TEAMS_EXPLORATORY”
$x = New-MsolLicenseOptions -AccountSkuId $acctSKU -DisabledPlans “TEAMS1”

$acctSKU3=”contoso:O365_BUSINESS_ESSETIALS”
$x = New-MsolLicenseOptions -AccountSkuId $acctSKU -DisabledPlans “TEAMS1”

$acctSKU4=”contoso:O365_BUSINESS_ESSENTIALS”
$x = New-MsolLicenseOptions -AccountSkuId $acctSKU -DisabledPlans “TEAMS1”

Get-MsolUser | Where-Object {$_.licenses[0].AccountSku.SkuPartNumber -eq ($acctSKU).Substring($acctSKU.IndexOf(“:”)+1, $acctSKU.Length-$acctSKU.IndexOf(“:”)-1) -and $_.IsLicensed -eq $True} | Set-MsolUserLicense -LicenseOptions $x

And now all the Teams sites have been migrated and there is no chance of split brain because the Teams license has been removed from the source tenanat.

One really important point to note: MigrationWiz match users from the source to the destination based on the user prefix which is so useful when you are moving one domain from an Office365 tenant to another for example in a merger or aquistion.


Remove a public domain name from an Office365 Tenant – The QUICK WAY

I have worked recently on a lot of Office365 tenant to tenant migrations and the biggest challenge in all of these migrations is where the same domain name eg. contoso.com cannot exist in two tenants at once.

I always use the Migration Wiz Bundle which can migrate primary mailbox, archive mailbox , ODFB sites and Deployment Pro which manages the Outlook Profile transition to the new tenant.

Migration Wiz have an interesting co-existence solution which you can review HERE

If using a migration tool like Migration Wiz and all data has been migrated a really quick way of removing all traces from contoso.com from the legacy tenant is to run through the following process

WARNING ALL DATA MUST BE MIGRATED BEFORE ATTEMPTING TO USE THIS PROCESS. This process does not delete any data. It removes all references to the public domain that is required in the target tenant in this example that domain name is CONTOSO.COM. If users still need to access data in a Sharepoint Site in the legacy tenant the user me informed on what their new UPN is.

  1. Connect to Azure AD Connect server
  2. Disable-ADSyncExportDeletionThreshold  and then enter Office365 Global Admin Credentials
  3. Next steps are to de-select all the OUs that were previously in scope for synchronization
  4. Then run this command on the Start-ADSyncSyncCycle -PolicyType Initial
    (Run the command twice)
  5. This will place all objects that were synced to Office365 in the recycle bin.
  6. Change UPN for any cloud identity objects that remain
    Get-MsolUser -All | ? {$_.UserPrincipalName -match “contoso.com” -and $_.UserPrincipalName -notmatch “admin”} | % {Set-MsolUserPrincipalName -ObjectId $_.objectId -NewUserPrincipalName ($_.UserPrincipalName.Split(“@”)[0] + “@contoso.onmicrosoft.com”); $dataout += “$($_.UserPrincipalName)” ; $_.UserPrincipalName };$dataout | out-file “CSV FILE NAME AND PATH”}}
  7. Set the primary smtp address for all remaining mail enabled objects to contoso.onmicrosoft.com
    $AllMailboxes = Get-Mailbox -ResultSize Unlimited
    Foreach ($Mailbox in $AllMailboxes){
    # Creating NEW E-mail address that concatenate in the following way: Take the existing recipient Alias name + use the NEW Domain name as a domain suffix + “Bind” the Alias name + the NEW Domain name suffix.$NewAddress = $Mailbox.Alias + “@contoso.onmicrosoft.com”Set-Mailbox -Identity $Mailbox.Alias -WindowsEmailAddress $NewAddress 
    }
  8. Remove all contoso.com aliases
    $Records = Get-mailbox -ResultSize Unlimited| where {$_.emailaddresses -like “smtp:*@contoso.com”} | Select-Object DisplayName,@{Name=“EmailAddresses”;Expression={$_.EmailAddresses |Where-Object {$_ -like “smtp:*contos.com”}}}foreach ($record in $Records){    write-host “Removing Alias” $record.EmailAddresses “for” $record.DisplayName

        Set-Mailbox $record.DisplayName -EmailAddresses @{Remove=$record.EmailAddresses}

    }

  9. Remove Contoso.com from any groups
    Get-Msolgroup -All | where {$_.emailaddress -match “contoso.com”} | Remove-MsolGroup –Force
  10. Change the default domain in the Admin.Microsoft.com portal to contoso.onmicrosoft.com
  11. Remove Contoso.com
    Remove-MsolDomain -DomainName “contoso.com” –Force
  12. Next we can add Contoso.com into the new Office365 tenant and update the mx records for Contoso.com
  13. Last but not least , We modify AD Connect configuration and re-enable the sync of all the objects that were previously synced and are now in the Office365 recycle bin ,they will all be restored and have the ability to access their data via a contoso.onmicrosoft.com UPN.

We forgot to mention Public Folders. Migration Wiz have a separate tool for public folder migrations which is very simple to use. I always prefer to convert public folders into resource mailboxes.

Credit: The domain removal powershell migration scripts are publicly available in Migration  Wiz Knowledge Base articles.

Office365 & Intune White list URL and IP Range

For years I have fought tooth and nail with Security vendors on my enterprise customer sites that will typically have a corporate proxy or silent proxy like Palo Alto by tryng to get them to grant the customer,site or project access to Office365.

Microsoft have made the Office365 endpoints dynamically available as a web link which all enterprise firewall vendors support like Cisco, Juniper, Palo Alto can connect to.

Palo Alto guide HERE

Microsoft site Office 365 URLs and IP address ranges
Dynamic URL for firewalls and proxies 

I have faced on numerous occasions , issues with ip ranges that are outside the published Microsoft ranges. When my customer asked me what is this IP address , I cannot say it is mine and then need Microsoft to verify via a service ticket that they own the ip address.

My recommendation is also to white list the urls and ip ranges listed in this Microsoft article when using Intune. Intune network configuration requirements and bandwidth

Microsoft IP ranges outside the published ip ranges have affected me on customer project sites with Office365 ProPlus activation and Intune managed BitLocker encryption.

Office365 & AIP Sensitive Information Types

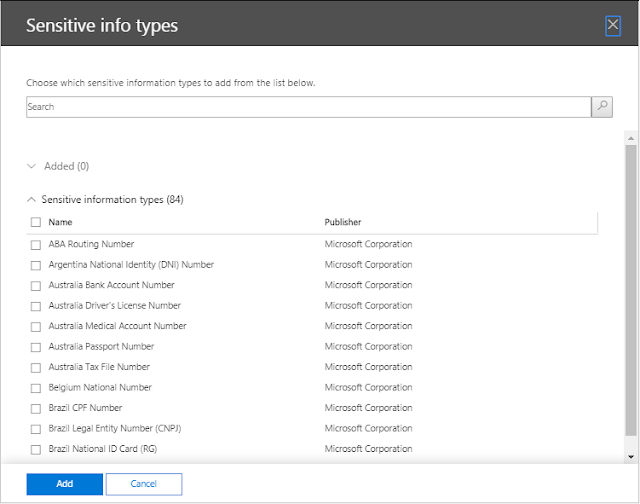
  • Sensitive Information Types defined in Azure Information Protection are not visible in the Office365 Security Center
  • Sensitive Information Types defined in the Office365 Security and Compliance center are not visible in Azure Information Protection
  • So this means sensitive information types need to be defined in each service.
  • @MSignite2018 Microsoft announced a change in search technology in Exchange Online and Exchange 2019 , they will now use Bing technology. The front end of the Office365 Security and Compliance Center seems to be using SharePoint search technology. I would love Microsoft to enable Exchange Online, AIP, & Sharepoint Online to use the same search technology used in Azure Log Analytics.
  • Microsoft state that when creating custom sensitive information types via an XML file and then importing them into the Security and Compliance center that it is not possible to have multiple regex values. It is possible to combine multiple regex values by using the PIPE value |. When combining multiple regex values , they can be tested in Office365 and in RegEx101.com
  • Using multiple regex values in AIP can also be combined by using the PIPE value |
  • This is an example of a regex for different pattern types for Irish mobile phone numbers that could be used in the Security and Compliance center GUI or the AIP GUI when defining regex sensitive information types.
    08[3|5|6|7|8|9]\d{7}|3538[3|5|6|7|8|9]\d{7}|003538[3|5|6|7|8|9]\d{7},
    notice the | that defines the different type of patterns.