Exchange Hybrid Agent

Image

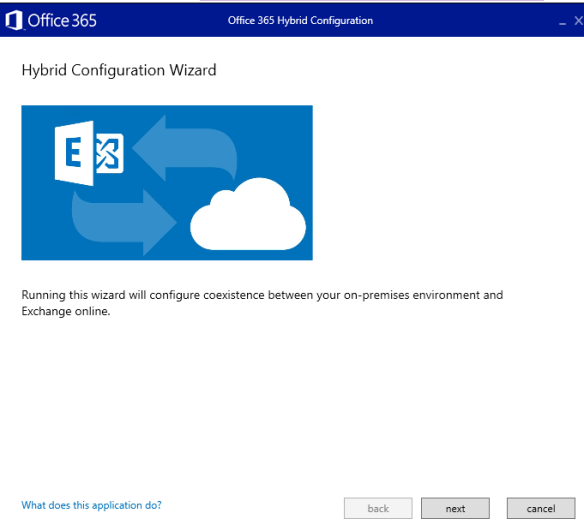
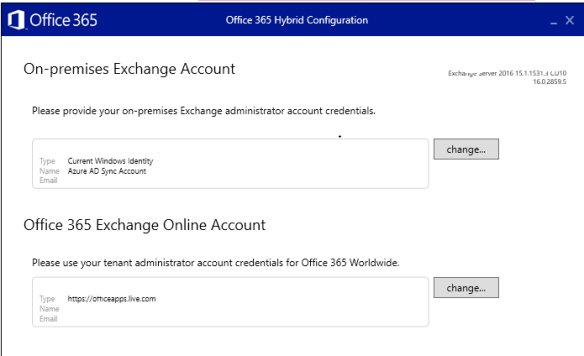
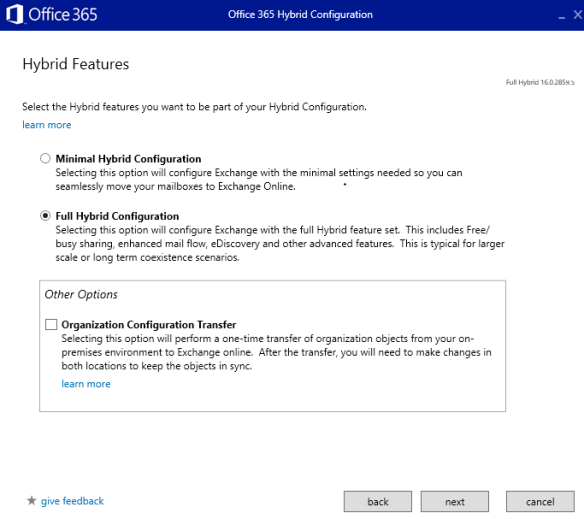
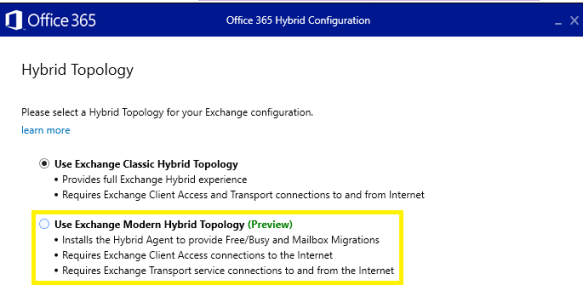
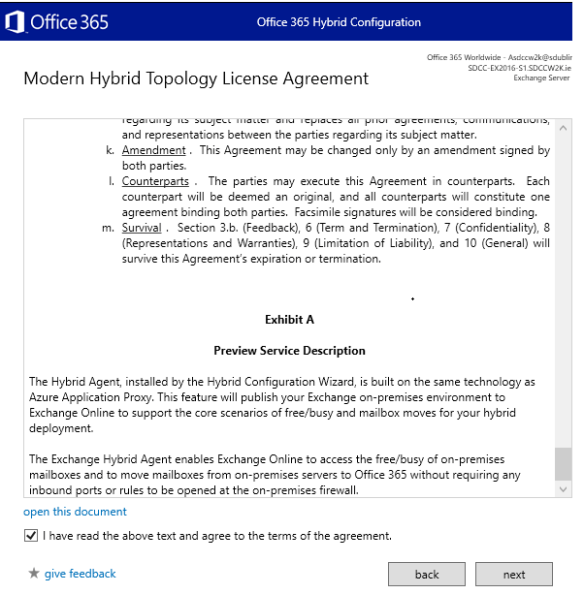
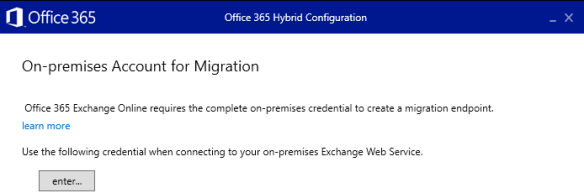
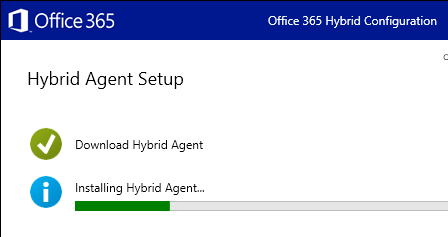
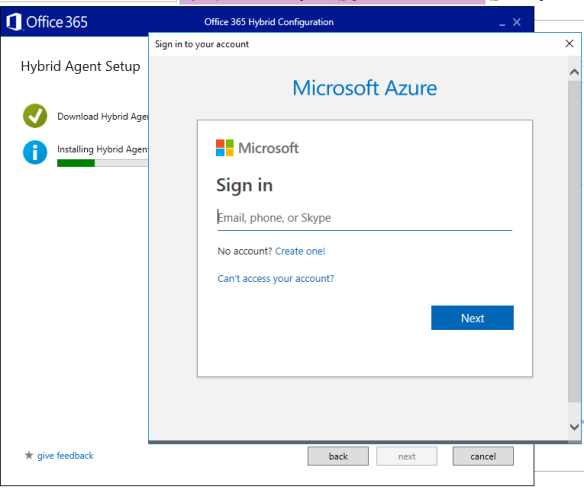
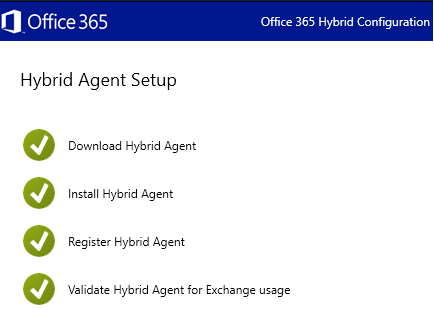
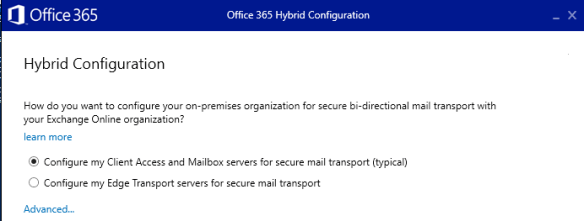
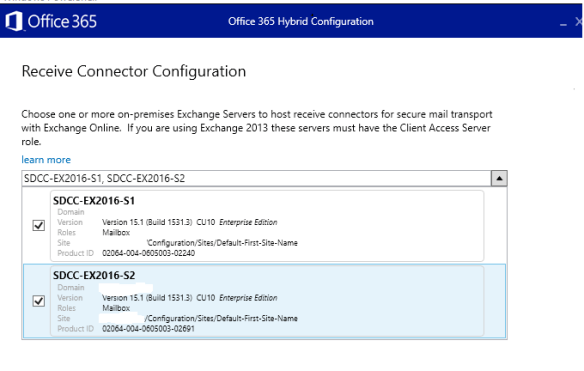
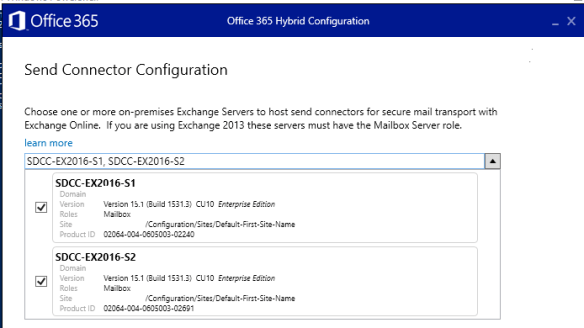
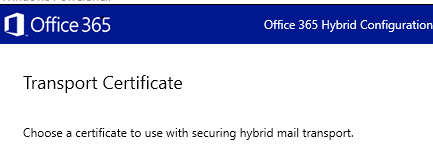
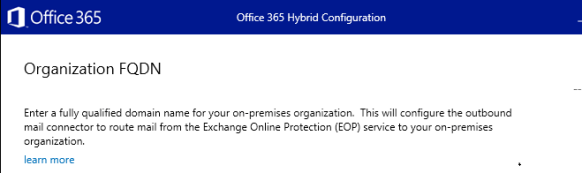
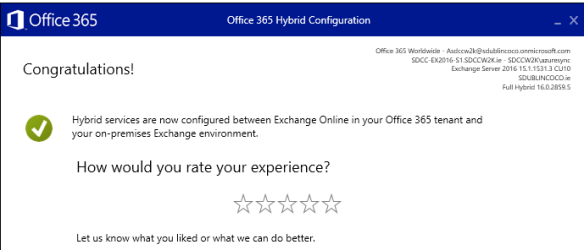
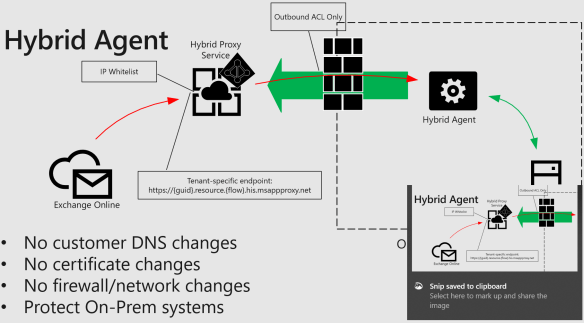
During one of my favorite sessions in Ignite last year, Microsoft announce a new feature : Hybrid Agent displayed in the image above. The next part of this blog is step by step screenshots displaying the configuration of Hybrid Agent on two Exchange 2016 CU10 servers.

First of all run this powershell command on all Hybrid servers.
Set-WebServicesVirtualDirectory -Identity “EWS (Default Web Site)” -MRSProxyEnabled $true

Most organisations route outbound external smtp traffic via a smarthost which can normally be an appliance like Cisco Ironports and do not permit outbound port 25 traffic from Hybrid servers.  I would suggest temporarily allowing smtp traffic outbound from the Hybrid servers until the Hybrid agent installation completes then block outbound port 25 again on the hybrid servers.

The next steps run through the Hybrid agent setup.


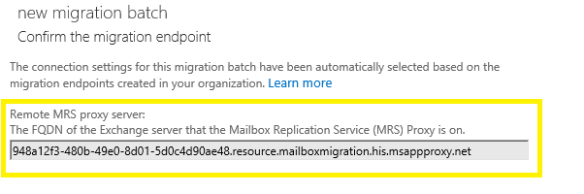
Now when attempting to migrate mailboxes note the change in the migration endpoint highlighted in the image below


Synchronize an Exchange Online Mailbox with a different Active Directory Forest.

I recently worked on a project whereby I was migrating a Global Company that owned a number of business and they wanted to break down the barriers between the different brands and all collaborate under a new brand in Office365.

I synchronized a number of forests from around the world into the organization’s Office365 tenant using the new Azure Active Directory synchronization tool. 

One of the businesses shared their Exchange Server (Business A)  with another business (Business B) and to migrate their mailboxes I implemented an Exchange Hybrid and migrated the mailboxes into Exchange Online. 

Business A Active Directory was authoritative for Business B mailboxes. So how do we disjoin them from Business A and synchronize them with Business B , so that Business B can perform identity management on their own Active Directory Forest.

So the following steps explain how to do this. This can of course be scripted if there were hundreds or thousands of users.

  1. Run this command on Business B Active Directory Forest to obtain all user’s immutable ID
    ldifde -f con -r userprincipalname=sean@contoso.com -l objectguid
  2. Then on in the AAD tool stop synchronizing the users’ from Business B
  3. This will then delete the users accounts, got to the Office365 recycle bin and restore the user’s account. This will also convert the user’s account to a cloud identity.
  4. The run this command in  the ‘Windows Azure Active Directory Module for Windows PowerShell’ to convert the cloud user’s immutable id so that it matches the object guids obtained in step 1

    set-MsolUser -UserPrincipalName sean@contoso.com -ImmutableID I3/MGNcBbUWWVs+jXPTH4g==

  5. Finally their are some attributes that we need to match from Business A Active Directory Forest with each user’s account in Business B Active Directory

    msExchAddressBookFlags
    msExchMailboxGuid
    msExchMasterAccountSid
    msExchRemoteRecipientType

  6. No we are ready to sync the OU with the AAD tool from Business B and Business B Active Directory will be the authoritative Active Forest for these mailboxes. 

Script to add legacyexchangedn as x500 alias into AD user object for Exchange Online

If a scenario existed whereby there was a non exchange hybrid like lotus notes or group wise messaging platform and some users were using Office365 and co-existence was achieved by uploading all of the onpremise users’ as external contacts. Office365 users recipients have messages forwarded to from the source messaging platform. 

As you begin to convert the onpremise users’ to federated or managed users. You need to capture that user’s legacyexchangedn and ingest it into the users’ AD users’ proxyaddresses attribute as an x500 alias to prevent potential NDRs from existing Office365 users.

So run this Exchange Online command

get-mailcontact – resultsize unlimited | select-object legacyexchangedn,primarysmtpaddress | export-csv “csv file path” delete the first line 1 from the output of the csv

Then download this SCRIPT and edit the following lines

  • edit line 11 and enter your domain name
  • edit line 25 and enter your domain name
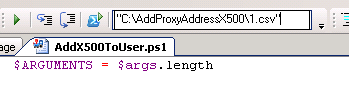
Then hold down shift and right click on the csv and select copy as path and paste the path into the window as per the image below and press the green play button.

This script will then search the root of the domain based on the domain name and mailnickname and add an x500 alias into the users’ proxyaddresses attribute which will then be synced to Office365 via dirsync

So before the OU containing the AD user objects that needs to be synced you will need to run this command as there will be conflicts in dirsync.

import-csv “C:\Users\admin\Desktop\contacts to be deleted\contacts.csv” | Foreach-Object{Get-Mailcontact $_.primarysmtpaddress | remove-mailcontact -Confirm:$false}

Credit : Eduardo Martin

Bulk Uploading Mailboxes to Exchange Online and assigning licenses


Microsoft have made it really easy to perform bulk migrate migrations and assign licenses in Exchange Online.

You can export a csv and use it twice. The first csv will have the following headings

emailaddress
sean.ofarrell@contoso.com
ciaran.ofarrell@contoso.com
dean.jones@contoso.com
tecnicalfellow@contoso.com 

You can then upload the file then via the following option in Exchange Online 


And then to assign the licenses use the same csv but change the top heading to userprincipalname like below

userprincipalname
sean.ofarrell@contoso.com
ciaran.ofarrell@contoso.com
dean.jones@contoso.com
tecnicalfellow@contoso.com 

Connect to Office365 via the Windows Azure Active Directory Module for Windows PowerShell and do the following.


# First of all paste in the following variables

$AccountSkuId = “contoso:EXCHANGESTANDARD”
$UsageLocation = “IE”

# The paste the command in below with the correct CSV file path

$Users = Import-Csv “C:\Users\contoso\Desktop\Scripts\Import_users.csv”
$Users | ForEach-Object {
Set-MsolUser -UserPrincipalName $_.UserPrincipalName -UsageLocation $UsageLocation
Set-MsolUserLicense -UserPrincipalName $_.UserPrincipalName -AddLicenses $AccountSkuId
}

And if you wanted to assign Exchange Online P2 Licenses then run the following commands,

# First of all paste in the following variables

$AccountSkuId = “contoso:EXCHANGEENTERPRISE”
$UsageLocation = “IE”

# The paste the command in below with the correct CSV file path

$Users = Import-Csv “C:\Users\contoso\Desktop\Scripts\Import_users.csv”
$Users | ForEach-Object {
Set-MsolUser -UserPrincipalName $_.UserPrincipalName -UsageLocation $UsageLocation
Set-MsolUserLicense -UserPrincipalName $_.UserPrincipalName -AddLicenses $AccountSkuId
}

If you are using waad and want to assign a user with a P2 license an archive then you need to populate the AD attribute for the user “msExchRemoteRecipientType’ and change the value to 3. This can be done in bulk via ADMODIFY or Powershell
Replacing TMG with IIS ARR for an Exchange Hybrid

On September 12th 2012 Microsoft announced that the TMG Forefront 2010 product will be discontinued. Microsoft obviously had to replace this product with alternatives. 
One of those products is the Web Application Proxy feature in Microsoft Windows Server 2012 R2   Web Application Proxy Deployment Guide 
Another product which was was released was Microsoft Application Request Routing 3.0 
This product plugs into IIS and can act as a reverse proxy to publish Exchange 2013/2010.
The Exchange Team Blog have a three part article on how to set it up and install it
Part 1 , Part 2 , Part 3 

There is an excellent Article on the Office365 community site on how to configure TMG 2010 for an Exchange Hybrid scenario.

And the key paths that require publication from the Hybrid Server are 
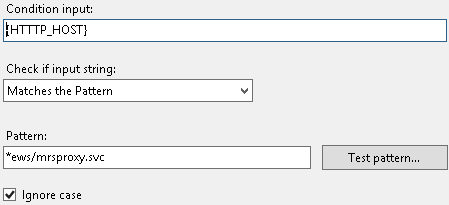
  • /ews/mrsproxy.svc
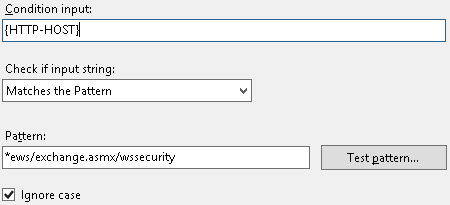
  • /ews/exchange.asmx/wssecurity
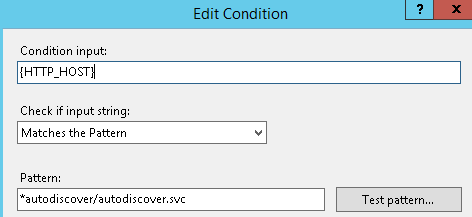
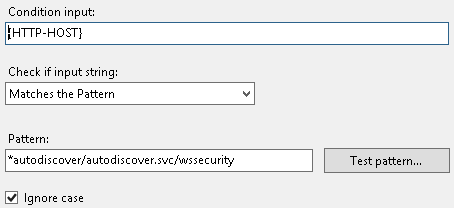
  • /autodiscover/autodiscover.svc/wssecurity
  • /autodiscover/autodiscover.svc
So how do we get these paths working in IIS ARR?????

The following 4 images are how we add the paths into the https url re-write section of IIS ARR


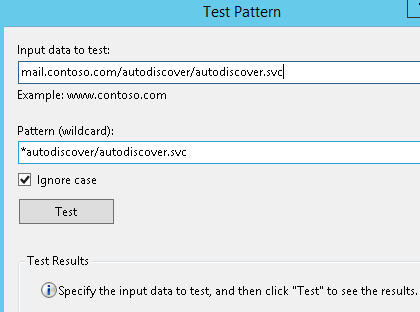
And then finally to test the path you enter the public url as per the image above mail.contoso.com/autodiscover/autodiscover.svc and when we press test.
GREEN LIGHTS APPEAR 🙂 

The main purpose of this blog was to help people understand how to get different path types into IIS ARR as it took me a bit of time to configure. A server 2012 R2 server can be provisioned in minutes in the right environment. Publishing Exchange Hybrid services like this from a DMZ is in line with Microsoft Best Practices.