Sync Multiple AD Forests and Google Apps Directory into Office365

I have recently began using a product called CloudAnywhere from CloudiWay which has some really excellent features like:

  • Syncronise multiple Active Directory Forests and passwords into Office365
  • Syncronise Google Apps Directory into Office365.
I recorded a VIDEO showing some of the features of the product.

Bulk activation of users in Office365

I recently had to activate 2000 Exchange Online P1 users and 100 Office365 E4 Users.

So how can we do this quickly?

Powershell to the rescue.

Ensure that the Windows Azure Active Directory Module for Windows PowerShell is installed. Launch the module and run the following commands.You can download the module HERE

I need a CSV file for Exchange Online Plan 1 users and Office365 E4 users. To do this I run the following powershell commands to export all unlicensed users to a csv file.

Get-MsolUser -all | where {$_.isLicensed -eq $false} | select-object userprincipalname | out-file c:\users.csv

I can then review the contents of this csv file and create two csv files.

Exchange Online Plan 1 users : p1.csv
Office365 E4 users : e4.csv

Connect-MsolService (Enter Global Administrator credentials)
Get-MsolAccountSku (Take note of the account skus)

Assign a usage location to each set of users with the following powershell commands. The usage location in this example is Ireland IE

Import-Csv -Path c:\P1.CSV | foreach {set-MsolUser -UserPrincipalName $_.UPN -UsageLocation IE} 

Import-Csv -Path c:\E4.CSV | foreach {set-MsolUser -UserPrincipalName $_.UPN -UsageLocation IE} 

Then assign a license to each set of users.

Import-Csv -Path c:\P1.CSV| Set-MsolUserLicense -UserPrincipalName {$_.’UPN’} –AddLicenses “Contoso:EXCHANGESTANDARD” 

Import-Csv -Path c:\E4.CSV| Set-MsolUserLicense -UserPrincipalName {$_.’UPN’} –AddLicenses “Contoso:ENTERPRISEWITHSCAL” 

And there we go all users activated.


Quest on Demand Email Migration to Office365

I do not mean to sound like a Quest Sales Man , But this product from Quest truly is a super product.

It allows you to migrate email from the following sources.

Microsoft Exchange 2000/2003/2007/2010
IMAP
Lotus Notes
Microsoft Bpos
Microsoft Live@edu
Microsoft Office365
Novell Groupwise
Sun One / iPlanet
Pop
Windows Live Hotmail

You can then migrate to the following targets

Microsoft Exchange 2010/2013
Office365
Microsoft Live@edu

So why would you use this service?

A couple of reasons, It is hosted in Windows Azure and can allow for zero touch migrations.Exchange 2007 messaging platforms upwards give us the ability to implement hybrid environments which can then create a platform which will allow rich co-existence and migration.

Its a hell of a lot cheaper than the full email migration products from quest.

It can migrate from Lotus Notes!!!

I have worked on quite a few corporate companies that  acquire companies. Extracting email from a business first before an AD consolidation project makes the AD consolidation project a lot easier and a tool like this allows zero touch email extraction into a companies own on-premise exchange messaging environment or into my preferred platform Office365.

I have taken some screen shots of how easy the wizard is to begin a migration. In this example I   wanted to migrate from Exchange 2010 to Office365 wave15. So before I did that , I created an application impersonation role in the exchange 2010 on-premise environment and one in the Office365 environment.

After that we sign into the Quest On Demand Portal HERE

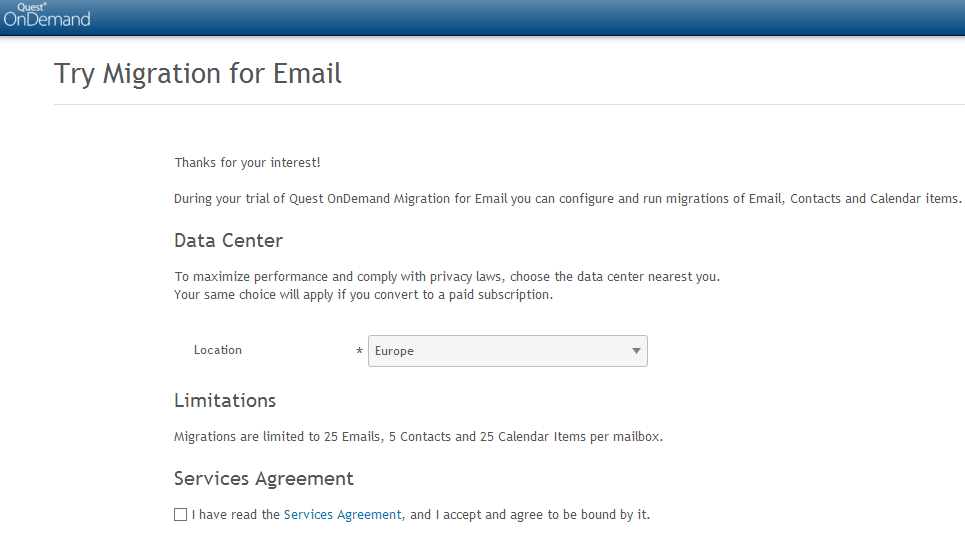
Then agree to the service’s agreement and select your data center location.

Then create a Migration Plan. There are four simple steps.

  1. Connect to the email services
  2. Import Mailboxes
  3. Choose what to migrate
  4. Migrate
On the connections tab you connect to the source exchange 2010 messaging platform and enter the credentials of an account that has the application impersonation. There is a test connection tab to verify connectivity.

Then you connect to the target , in this case Office365. You will need to add an exchange license to the office365 account in order to make it a member of the application impersonation group. Microsoft throttle the amount of data that can be migrated into Office365. So you can add multiple accounts for the target to increase migration throughput.

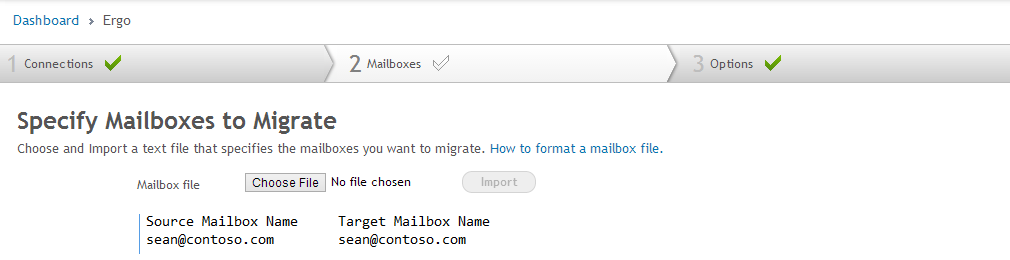
In section 2 you specify the source and target mailbox which is populated by a simple text file.
You then select what to migrate.

Finally you begin migration.

And once all the mail has been extracted from the business and when the ad consolidation project has been complete , you can refer to one of my previous blogs HERE on how to convert existing Office365 users to federated users.

Bulk activation of Office365 Users

When using DirSync and ADFS it can take a long time to activate thousands of users. So here is a really quick way of doing it.

Firstly HERE is a great article on msexchangeguru.com on dirsync filtering. So there are plenty of organisational units in Active Directory that do not need to be syncronised to Office365.

So I always filter the OU’s that are synchronized to Office365.

Within the organisation section of the Office365 portal make your external domain which has been verified the default domain.

Ensure all user’s have the correct User Principal Names as per one of my previous BLOGS 

So once all the user’s have been synced to Office365 , they need a license assigned to them.

So connect to Office365 via the Windows Active Directory Module for Windows Powershell and do the following.

connect-msolservice # and enter an Office365 Global Administrator’s credentials.

Get-MsolAccountSku  # this will tell you what office365 skus are available. For this example it will be EXCHANGESTANDARD


As all of the users are currently unlicensed , we will set a location for the users as per the command below and the location will be us.

Get-MsolUser -UnlicensedUsersOnly |Set-MsolUser -UsageLocation US

Then we will add a mailbox for all the users that were synced and we can do so with the following command.

Get-MsolUser -UnlicensedUsersOnly | Set-MsolUserLicense -AddLicenses “Contoso”:EXCHANGESTANDARD

Now all the users have a mailbox and can start using Exchange Online 🙂