Quest Powershell Script to change UPN for Office365

I normally use AD Modify to modify users’ UPNs. But it is only really practical when you are changing the UPN’s per OU. 

Lets say you were migrating from a different messaging platform , like Lotus Notes or GroupWise. But AD had the mailnickname attribute populated and the correct UPN added into your AD. To run the script you need to do the following

  • Create a csv mail.csv and place it in the root C:\mail.csv. The heading of the csv will be ‘mail’ and then all the mailnicknames like sean@contoso.com
  • On line 29 add in the distinguished name of the domain/forest scope
  • Create a folder C:\logs to analyse any errors
  • Watch out for ‘ which are acceptable characters in a smtp email address but unacceptable as a UPN in Office365.
  • The script can be downloaded HERE.
The author of the script is a colleague of mine Adam Smith

Converting Office365 Cloud Identities into Managed Identities

There are three core identity scenarios in Office365 as illustrated above. I created a previous blog post on how to covert cloud identities to federated identities which can be viewed HERE

To convert cloud identities to managed identities with password sync can be quite simple by changing the users UPN and also matching the user’s UPN with their primary smtp address.

However , How many time have you received the dreaded email from Microsoft like below

Sean
Ofarrell
Unable to update this object because the following attributes associated with this object have values that may already be associated with another object in your local directory services: [ProxyAddresses SMTP:sean.ofarrell@contoso.com]. Correct or remove the duplicate values in your local directory. Please refer to http://support.microsoft.com/kb/2647098 for more information on identifying objects with duplicate attribute values.

So you search active directory and exchange online for conflicts but cant find any which will probably drive you CRAZY. So here is how to fix it.

I will demonstrate how to fix it for one user
It is very important that WAAD is not running when running these powershell commands.

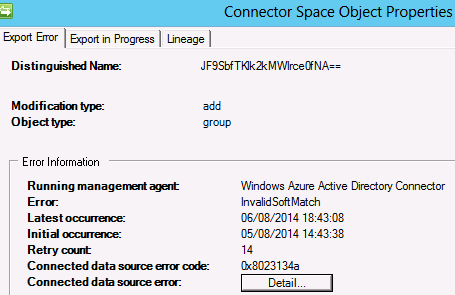
The image below is a synchronization error message from sean.ofarrell@contoso.com in WAAD

So to fix this we copy the distinguished name and run the following command.

set-MsolUser -UserPrincipalName sean.ofarrell@contoso.com -ImmutableID JF9SbfTKlk2kMWlrce0fNA==

How to perform WAAD Manual Sync

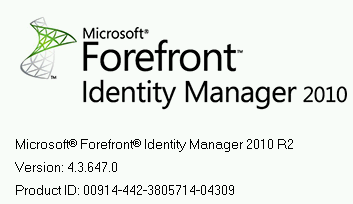
WAAD version 4.3.647.0 seems to have moved the powershell module for manual syncs. To put the shortcut back on the desktop of your WAAD Server. Simply create a new shortcut and paste in the details below and then type start-onlinecoexistencesync to perform a manual sync

powershell.exe -noexit -noprofile -file “C:\Program Files\Windows Azure Active Directory Sync\DirSync\ImportModules.ps1”

How to enable Yammer SSO without ADFS

It would be great if when you click the Yammer icon in the Office365 services ribbon it actually signs you into Yammer rather than redirecting you to Yammer.com.

This blog will detail how to setup single sign on to Yammer via Microsoft Windows Azure Active Directory. When SSO for Yammer is enabled with Azure AD there is no on premise ADFS requirements.

Every Office365 Subscription also has a Windows Azure tenant in the background.When signed into an Office365 tenant , open a new tab and browse to this URL https://manage.windowsazure.com/ and signup for a free trial. 

You will need a credit card  when signing up however there will be no charge to the credit card.

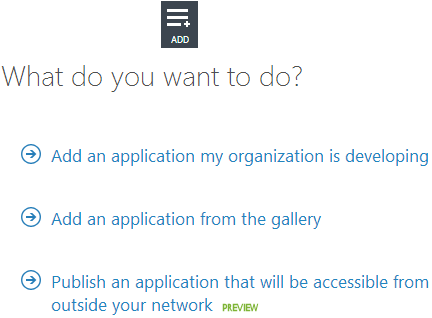
  • Browse to the Active Directory section in the Azure Management Portal and then select
    “Add Application”  and “Add an application my organization is developing”
    as per the image below.
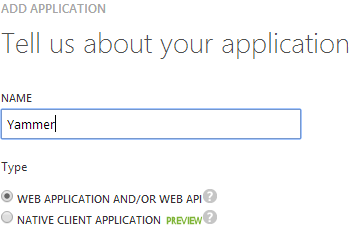
  • Name your application as per image below
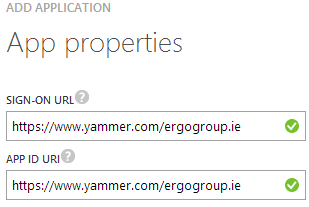
  • Then enter your sign-on url & app id uri as per image below
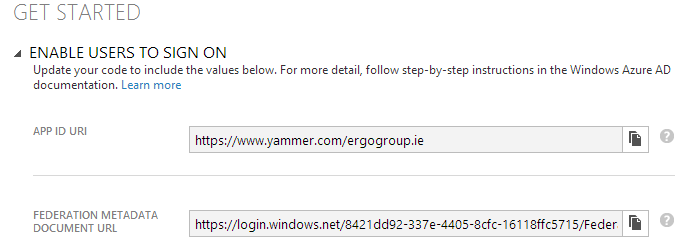
  • You then select “ENABLE USERS TO SIGN ON” and then browse to the “FEDERATION METADATA DOCUMENT URL” and save the metadata xml file as per image below.
  • Next we need to connect Windows Azure Active Directory via powershell and run the following commands
Import-Module MSOnlineExtended -Force
$replyUrl = New-MsolServicePrincipalAddresses –Address “https://saml.yammer.com/sp/ACS.saml2”
New-MsolServicePrincipal –ServicePrincipalNames @(“yammer/sso”) -DisplayName “Yammer Federation” -Addresses $replyUrl

  • The command will output an “AppPrincipalId” take note of this value and save it into a text file.
  • Then you will need to fill in the Yammer  SSO-Checklist.docx which you can download HERE
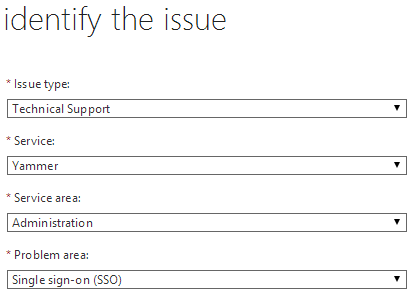
  • We now create a Service Request as per image below
  • We then create a compressed file that contains the FederationMetadata.xml, the AppprincipalId and the SSO Checklist and attach the file to the service request.
Once Yammer Support enable Single Sign On for your Yammer network. When you click on the Yammer link from the Office365 portal it will sign you into Yammer 🙂 Or when you browse to your Yammer SSO URL like https://www.yammer.com/contosogroup.ie
If you sign into Yammer , You can then open a new tab to access portal.microsoftonline.com or a Sharepoint Online site without having to re-authenticate. All this with no – on premise ADFS!

Credits: Billy Harris Microsoft

Office365 WAAD not deleting filtered Organisational Units

If you you upgraded a Dirsync Server to the newer WAAD sync tool and the original configuration was syncing the full AD forest then when you upgrade to the newer version. You need to perform a full synchronisation with the complete AD Forest.
 
After the full sync completes , You can then filter the OU’s and they will be deleted from Syncing with Office365.
 
 
I recently had an issue whereby the objects in the OU’s that I had filtered were not getting removed from my Office365 tenant. So to resolve the issue , I performed the steps above.
 
Once complete , Run the powershell command below to clear out the Office365 recycle bin.
 
Get-MsolUser –all -ReturnDeletedUsers | Remove-MsolUser -RemoveFromRecycleBin -Force