
This is the part of the series I most wanted to write. Most guidance on the Data Security Posture Agent shows it checking for sensitive information types (SITs) you already have. Here I use it the other way round: to find the SITs Contoso did not know it needed, then build and test them.
- Part 1 - Let the data tell you: what Purview already sees, and why the Posture Agent changes the starting point
- Part 2 - Getting the Posture Agent running: prerequisites, gotchas and what it actually cost
- Part 3 - From discovery to definition: using the agent to find the sensitive information types you did not know you needed (this post)
- Part 4 - Teaching Purview what matters: trainable classifiers (coming soon)
- Part 5 - From classification to protection: labels, DLP and the evidence trail (coming soon)
How you ask decides what you get
The agent turns your prompt into one of two kinds of search, and the wording decides which.
A narrow prompt becomes a keyword query
My first prompt asked for “files and emails containing confidential Mark 8 product design, roadmap or project details that do not have a sensitivity label”. The agent could not express the OR and AND combination, or “no sensitivity label” without a label name, as one query. It said so, rewrote the prompt and showed the KQL it would run.
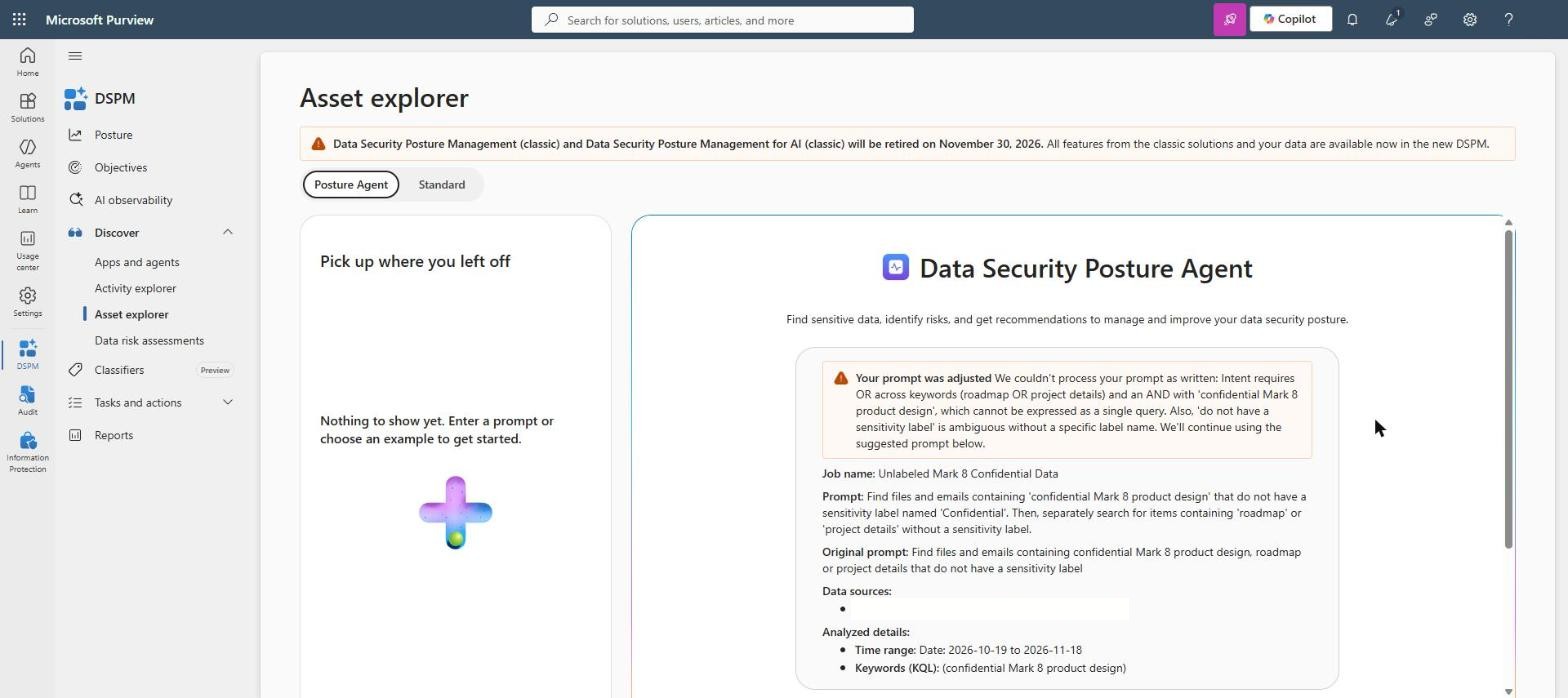
That job finished with 0 items. The query was a literal phrase, limited to the default 30-day window, over content that did not use those words. Searching for what you already think exists is the wrong way round.
A discovery prompt becomes a semantic query
The prompt that worked described intent rather than words:
Find confidential business documents created in the last 3 years that contain
internal project codenames, product specifications or recurring internal
reference numbers
The agent accepted it as written and ran it as a semantic query over the requested date range. Note the three things the prompt asks for. I was not looking for a specific document; I was looking for the shapes that sensitive content tends to have.
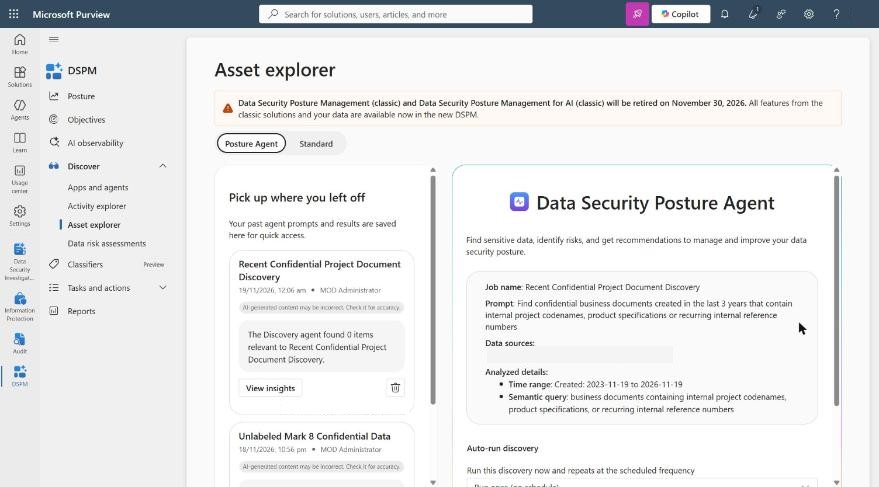
Tip: ask for a time range in the prompt. The default is the last 30 days, which excludes most of an organisation’s long-lived intellectual property.
Reading the results
Over one user’s mailbox and OneDrive, the job found 20 items, none labelled. The report bands them by how well they match the intent: 5 High (over 90%), 15 Medium (50 to 90%) and 0 Low.
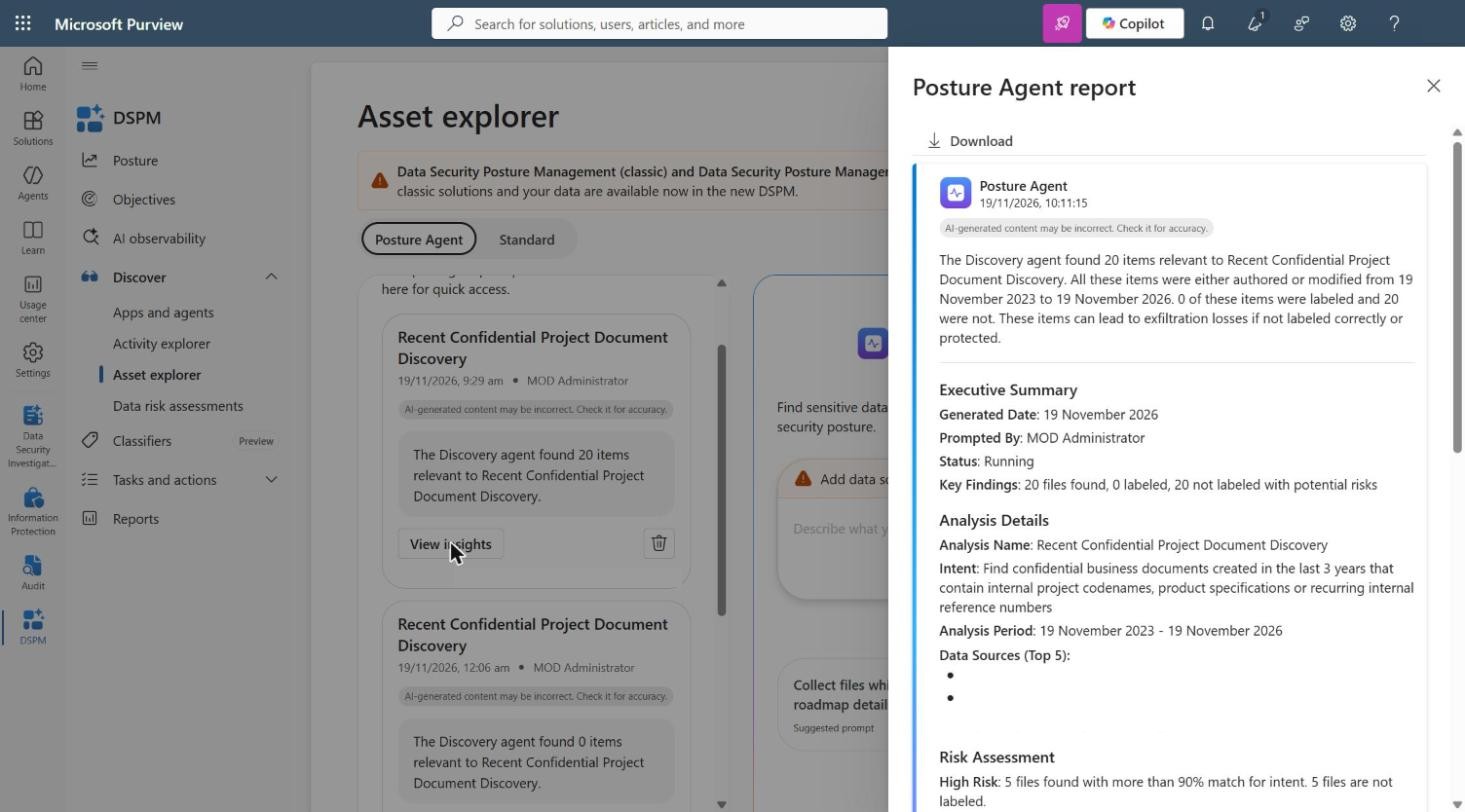
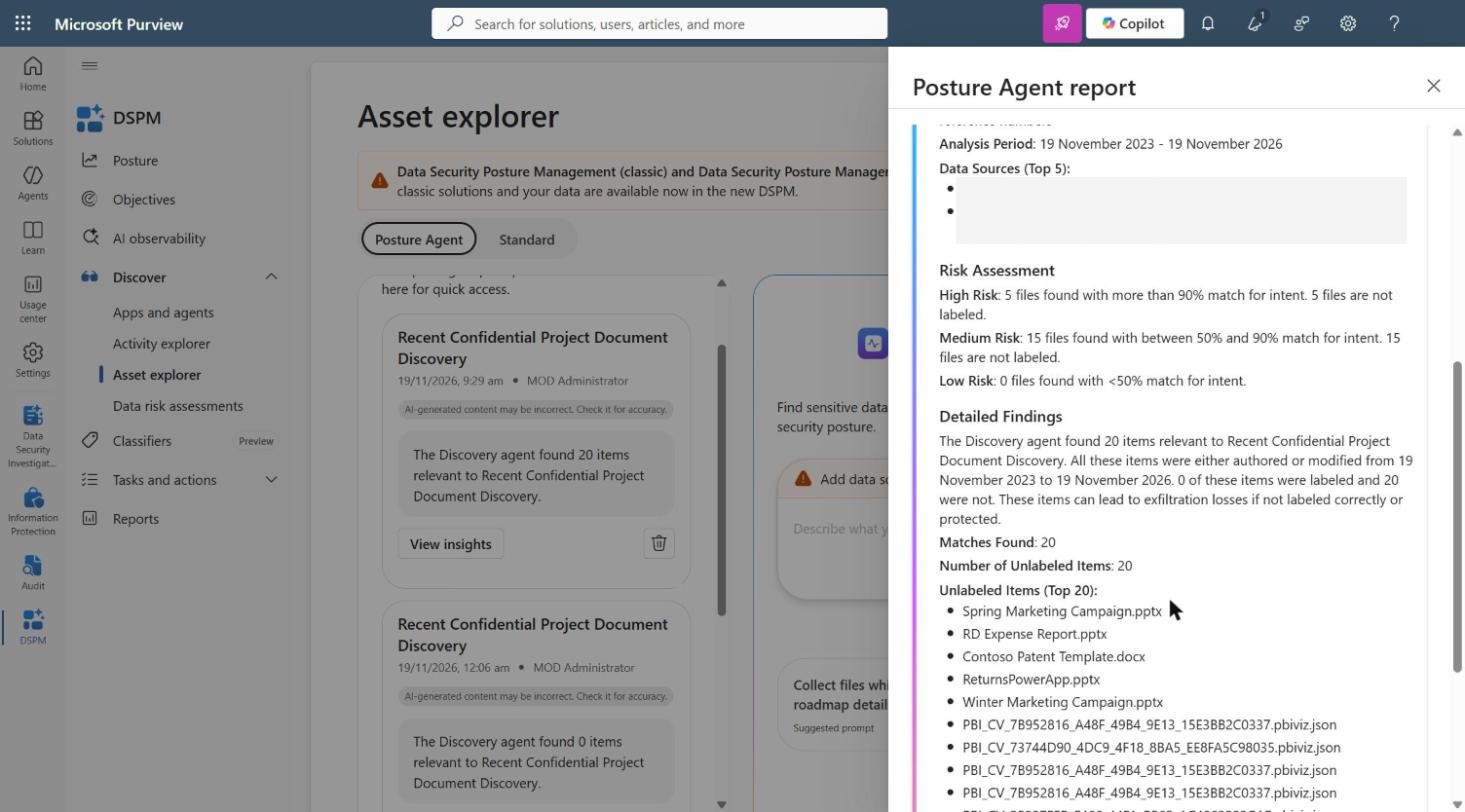
The list is where the work is. I sorted it into four piles:
| Finding | What it tells us | Becomes |
|---|---|---|
| CR-227 Product Overview.docx | A recurring reference format: CR followed by three digits | A pattern SIT (regex) |
| Project Tailspin, Customer Purchasing Data for Project 9 | Internal codenames nobody had listed | A keyword SIT |
| Contoso Patent Template, RD Expense Report | Content defined by what it is, not by a pattern | A trainable classifier (Part 4) |
| pbiviz.json files, DataMashup, task reminders, meeting titles | Noise: system files and calendar items | Nothing - exclude |
Two things to know about the report. It counts duplicates (one Power BI visual appears three times), so 20 items is fewer distinct files. And it gives a band per item but no reason, so use Asset explorer to look at each file before you trust a pattern.
The findings that matter were not on anyone’s list. Nobody in a workshop would have said “we need to protect anything with a CR number”. The agent found the pattern because it appears in content that looks confidential.
Building the SITs
Creating a SIT costs nothing and needs no Security Copilot capacity. In the unified Classifiers page, select Create > Sensitive info type.
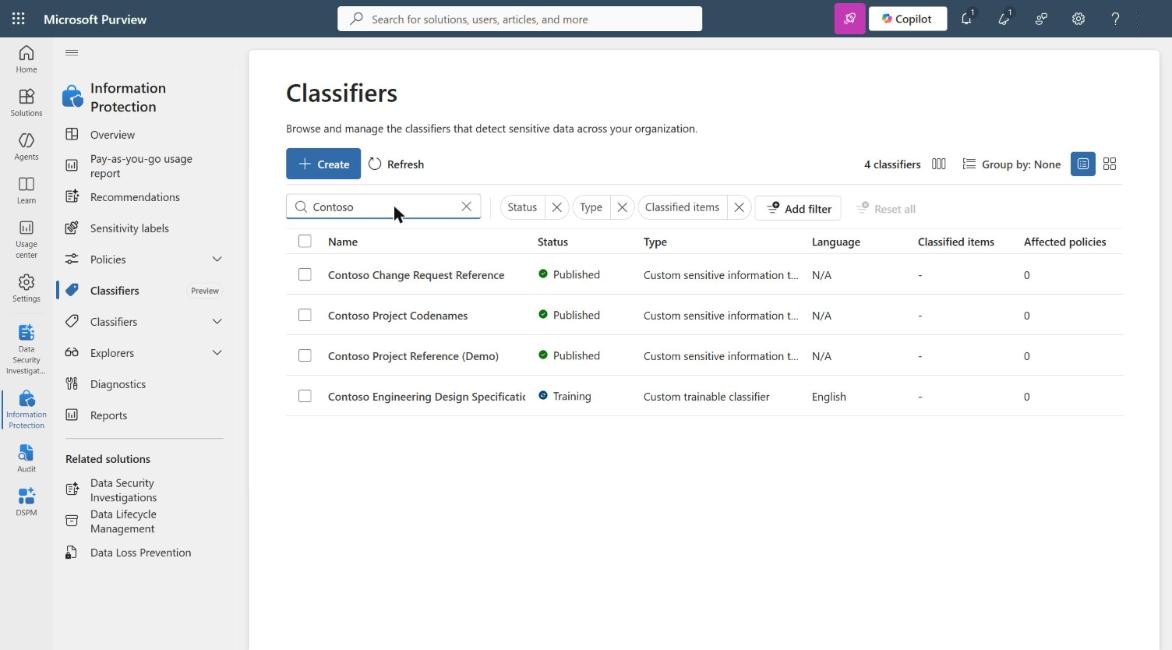
Contoso Change Request Reference
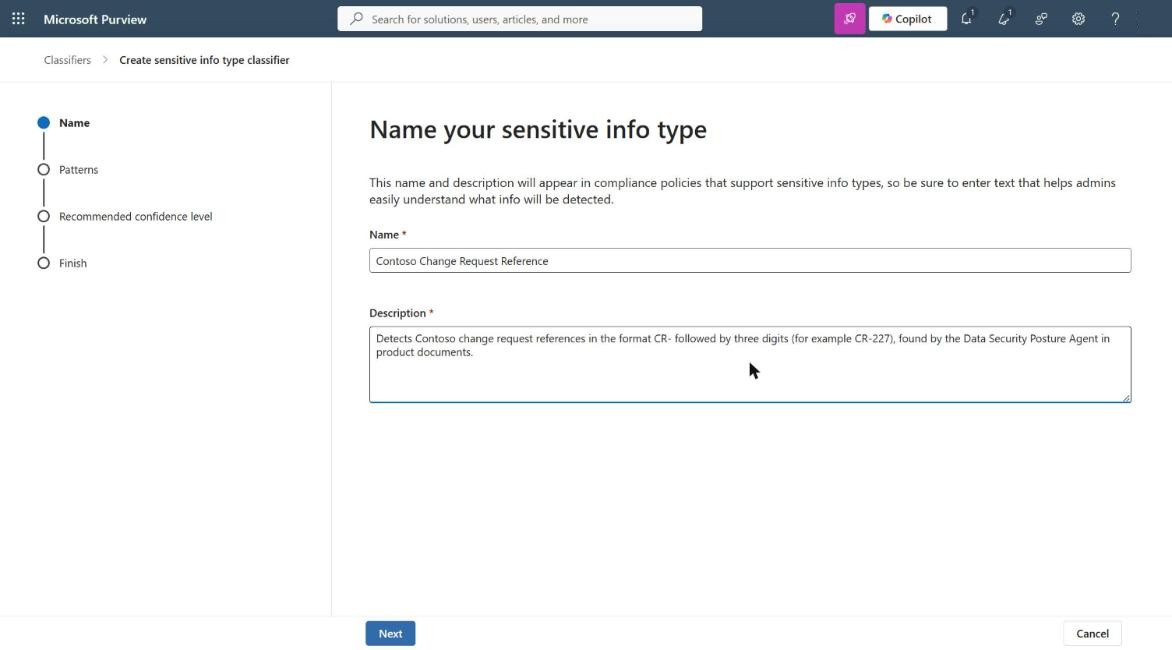
I built it with two patterns, so the confidence reflects the evidence:
- High confidence: the regex CR-\d{3} plus at least one supporting keyword within 300 characters (change request, product overview, specification, confidential, internal only).
- Low confidence: the regex on its own.
The first gotcha came straight away. Selecting Word match replaces whatever you typed with a template, and your regex has to go inside its capturing group:
(?:^|[\s,;\:\(\)\[\]"'])(CR-\d{3})(?:$|[\s,;\:\(\)\[\]"']|\.\s|\.$)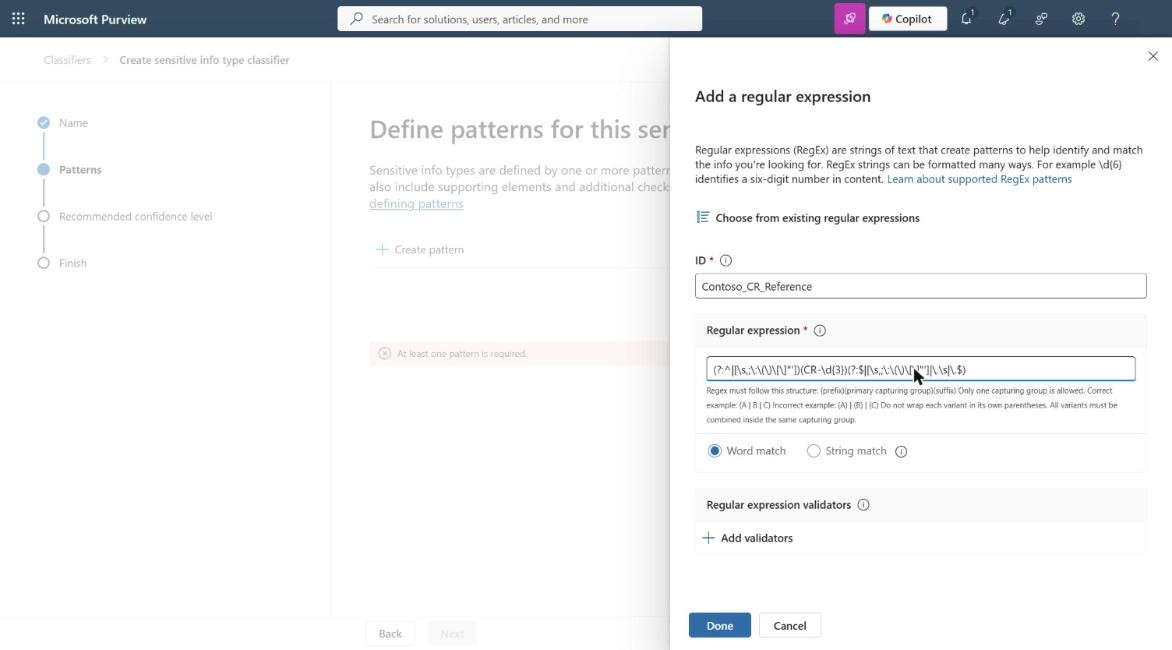
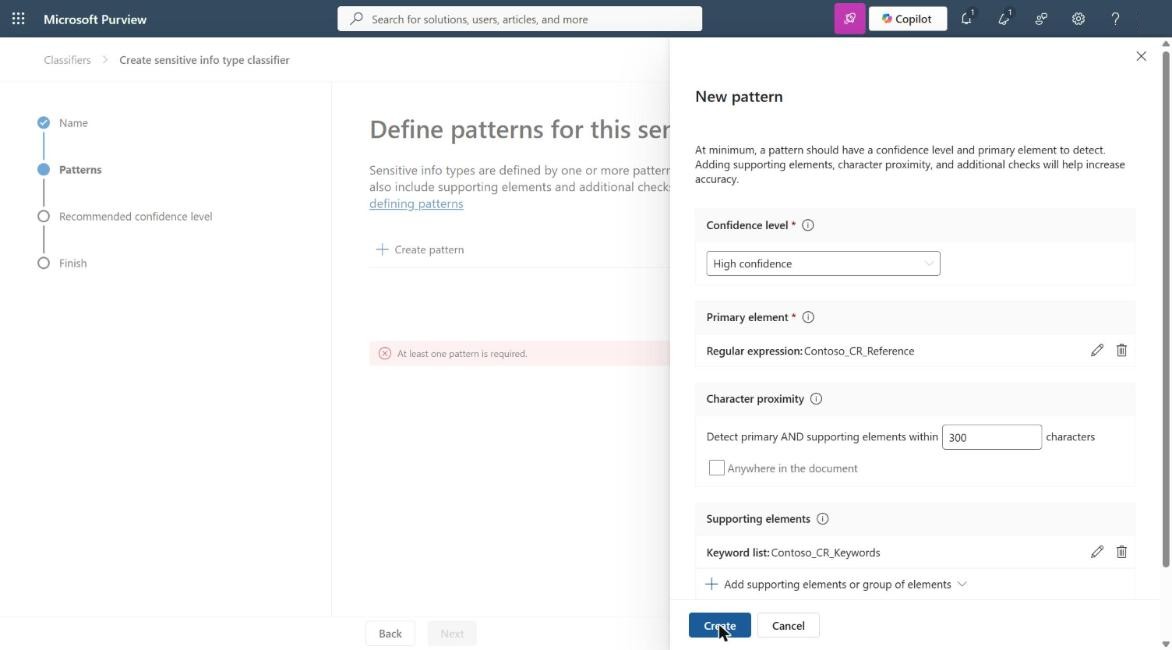
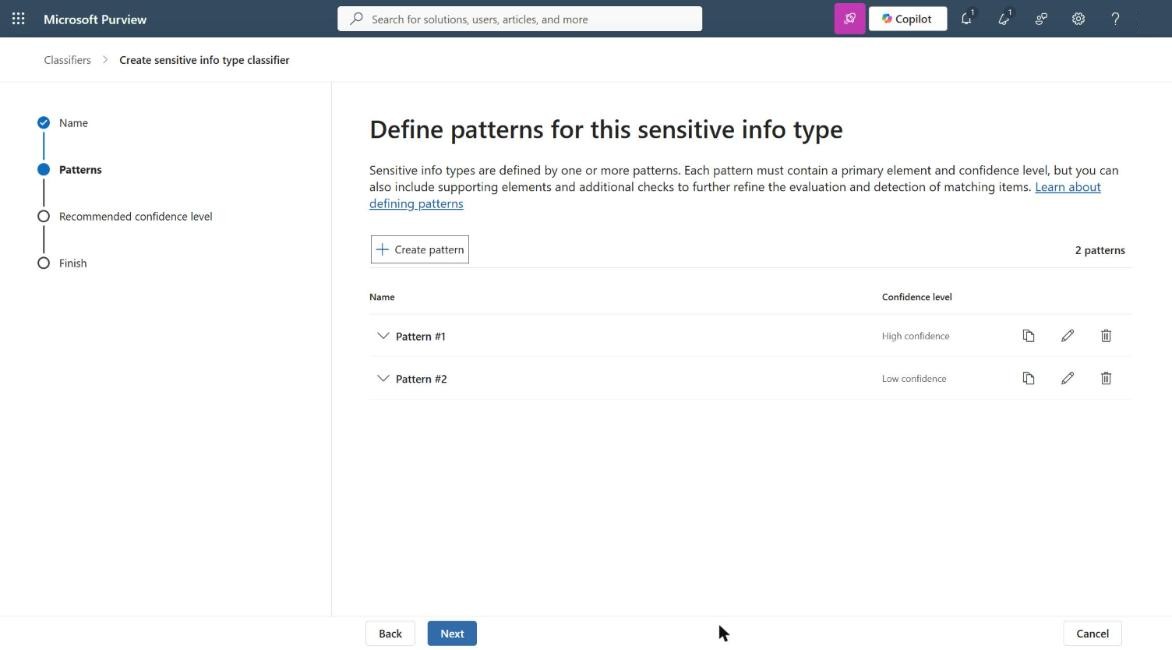
- Choose from existing regular expressions does not list a regex from the SIT you are still creating. For the second pattern, enter it again.
- The recommended confidence level only offers levels your patterns use. I chose High, so policies default to the stricter match.
Contoso Project Codenames
The codenames are a simple keyword list at Medium confidence: Project Tailspin, Tailspin and Project 9.
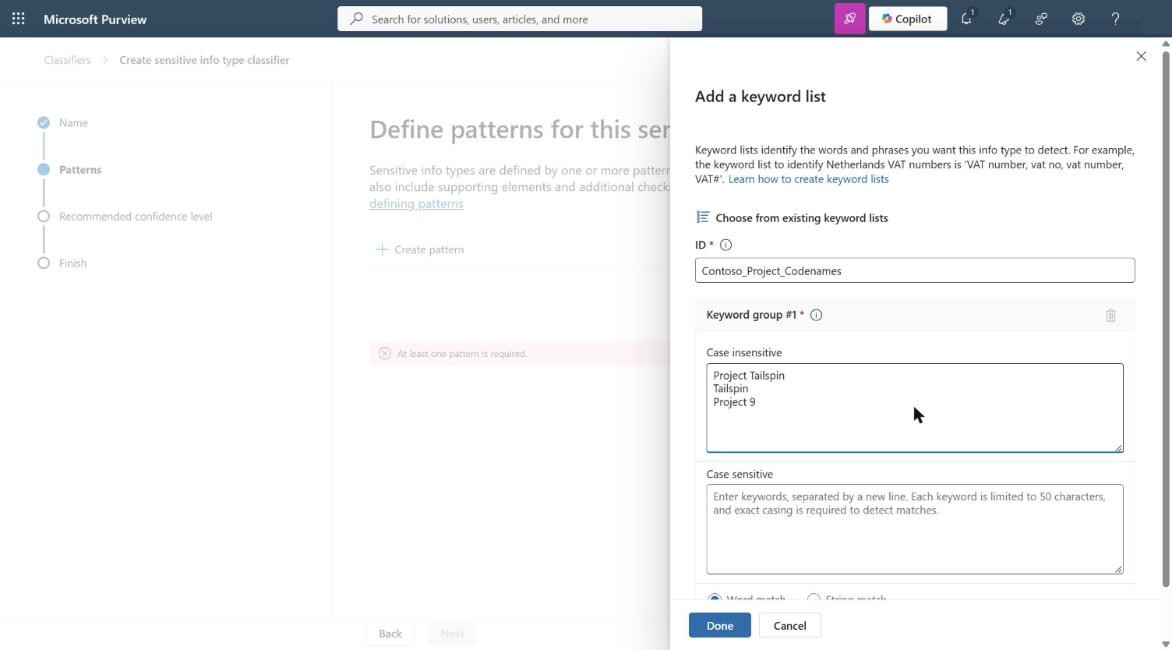
Be careful with short or generic keywords. “Project 9” is fine in Contoso’s demo data, but in a real organisation check how often a codename appears in ordinary content before you build a policy on it. A codename that is also a common word needs supporting keywords and a higher confidence pattern.
Test before you trust
The SIT’s Test option needs a file; there is no box to paste text into. I tested with a short file containing three real references (CR-227, CR-228, CR-231) and two decoys (CR-12 and CR-1234).
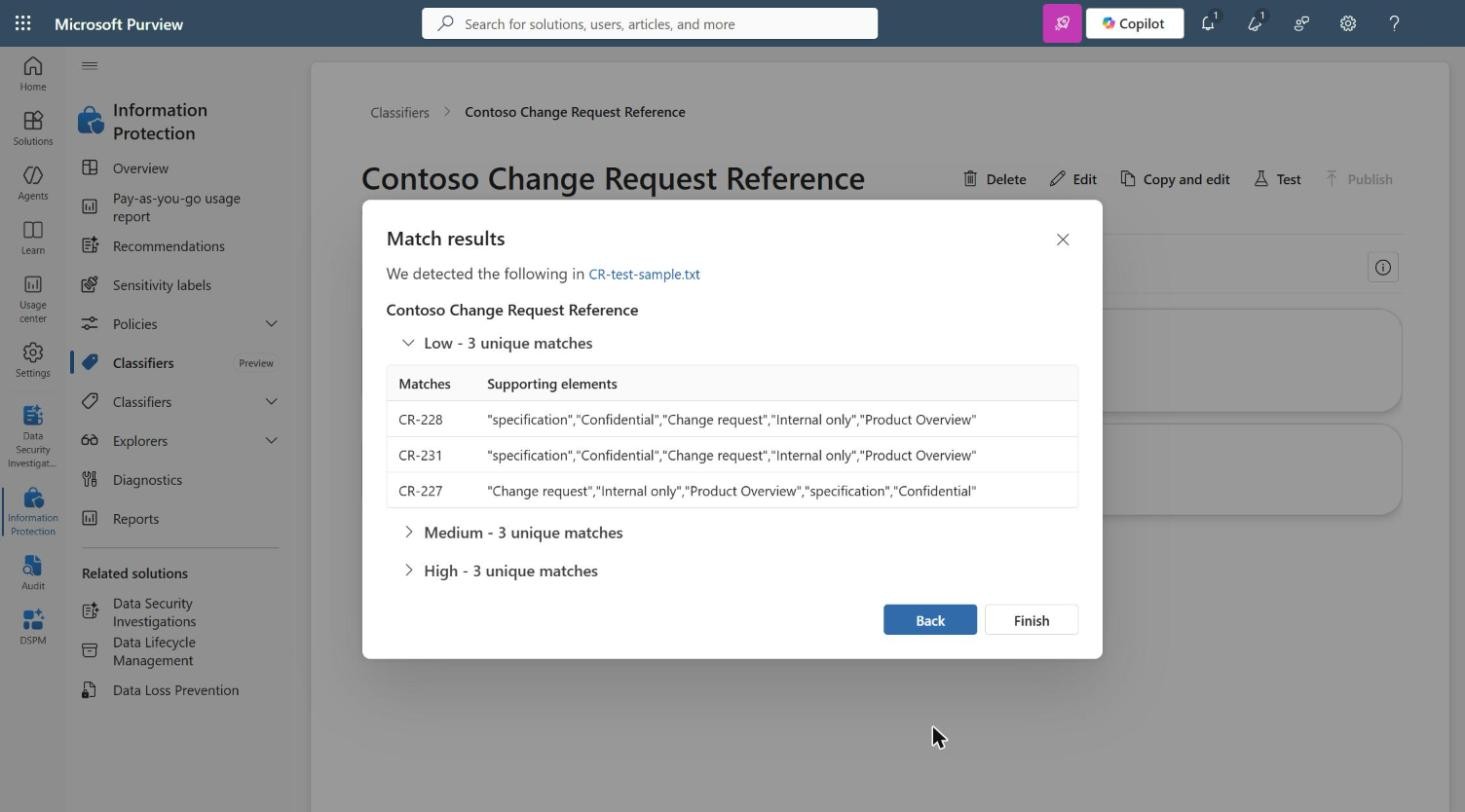
All three real references matched, with the supporting keywords listed for each. Neither decoy matched, which proves the word boundaries are doing their job. This is the check that stops a SIT from flooding a DLP policy with false positives.
The loop
That is the process this series is about. It repeats for every team and every data source:
- Ask the agent a discovery-style question about a team’s content.
- Sort the results into patterns, categories and noise.
- Build a SIT for each pattern, and test it with real and decoy examples.
- Send each category to a trainable classifier.
- Schedule the prompt to run monthly, so new patterns surface as the business changes.
Part 4 picks up the categories: teaching Purview to recognise documents such as Contoso’s design specifications with a trainable classifier.
References
- Get started with the Data Security Posture Agent - learn.microsoft.com/purview/copilot-in-purview-posture-agent-get-started
- Create custom sensitive information types - learn.microsoft.com/purview/create-a-custom-sensitive-information-type
- Regular expressions in sensitive information types - learn.microsoft.com/purview/sit-regex-validators-additional-checks


Pingback: Where do we start with data classification? Part 1: Let the data tell you | Cloud-Secure.ai
Pingback: Where do we start with data classification? Part 2: Getting the Posture Agent running | Cloud-Secure.ai