Unknown's avatar

About Sean O'Farrell

Behind the scenes of this blog is me, Seán O'Farrell. I am the principal Microsoft security architect in eir evo, in Dublin, Ireland. My blog posts are completely my own views & provide no warranty. My blog posts are in no way affiliated with my current employer, Microsoft, Quest or any vendor’s technologies mentioned in my blog. Focused on all Microsoft security products and services specifically Defender * and Purview.

Tier 1 Bpos to Office 365 Transition


I recently completed Ireland’s first Tier 1 Bpos to Office 365 transition and would like to share the steps involved to achieve this.

My client was a global charity with their head quarters in Dublin and operating in 14 countries with 1400+ users spread over 90 locations and most with little or no it support.

As users were so dispersed throughout the globe the charity did not want to implement Single Sign On. One of the most critical requirements for the charity was the need to keep existing ost files on client machines. The reason for this is because some locations in Africa have poor Internet connectivity speeds and it could take weeks for the creation of a new Outlook profile to download and re-sync a local cached copy of a mailbox.So I confirmed with Microsoft that we could keep the existing OST’s and they said we could. However the Office 365 Client Prereqs needed to be installed on each client machine prior to transition.

So I am going to bullet point in order the steps.

  • Engage with a Microsoft Office 365 transition manager
  • Remove Office Communicator prior to transition – this can be done running this command or a batch file MsiExec.exe /I{0F3AB690-1F39-40B8-9D4A-6E8DDA850FB0}/passive
  • Once that has been done install Microsoft Lync
  • Then install this UPDATE on all Client computers
  • Send out a communication to all staff stating that after transition they can access their web mail via https://portal.microsoftonline.com and smart phones can access m.outlook.com
  • One week before transition , setup Lync SRV Records for each domain as per Microsoft’s GUIDE and internal firewall rules
  • One week prior to transition , reset user’s passwords so that they comply with Office 365’s password policy I did this very quickly and easily via Messageops powershell gui for Bpos

  • Then run the powershell below to ensure any mailboxes with delegated control preserve their custom permissions

Export Public Delegates

#$LiveCred = Get-Credential

#$Session = New-PSSession –ConfigurationName Microsoft.Exchange –ConnectionUri https://ps.outlook.com/powershell/ -Credential $LiveCred -Authentication Basic –AllowRedirection

#Import-PSSession $Session
get-mailbox -filter {grantSendOnBehalfTo –ne $null} select userprincipalname, grantsendonbehalfto export-clixml delegates.xml

get-mailbox -filter {grantSendOnBehalfTo –ne $null} select userprincipalname, grantsendonbehalfto export-csv delegates.csv

Import Public Delegates
#$LiveCred = Get-Credential

#$Session = New-PSSession –ConfigurationName Microsoft.Exchange –ConnectionUri https://ps.outlook.com/powershell/ -Credential $LiveCred -Authentication Basic –AllowRedirection

#Import-PSSession $Session
$logfile = “log-” + (get-date –uformat “%H%M-%Y%m%d”) +”.txt“
start-transcript $logfile
import-clixml delegates.xml foreach{
“User: ” + $_.userprincipalname
foreach($i in $_.grantsendonbehalfto){
“GrantSendOnBehalfTo: ” + $i
set-mailbox -identity $_.userprincipalname –grantsendonbehalfto @{Add=$i}
}

“———————————–”

}

“number of mailboxes with grantSendOnBehalfTo : ” + (get-mailbox -filter {grantSendOnBehalfTo –ne $null} ).count

stop-transcript

  • During transition the external DNS records for autodiscover can be edited. So if you have a domain named contoso.ie you would create a CNAME record called autodiscover.contoso.ie and point it to autodiscover.outlook.com
  • So once the transition has been complete, a user can still sign into the single sign in utility but Outlook will not be visible. The user can then open Outlook and will get a warning stating ” An administrator has performed maintenance on your Outlook profile, Please restart outlook” So once the user restarts Outlook , the user will then be prompted for his/her user name and password.
  • Some Outlook clients may not want to connect to Office 365 via autodiscover and if that happens simply configure the Outlook profile via this website config.365.com another great site from messageops.
  • Once Outlook can open and close without password prompts you can remove the single sign in utility by running this command MsiExec.exe /X{A91E3887-5185-4091-AF33-AB0048444055} /passive
  • I then wanted to chat to the charity’s ICT manager so I enabled external federation by doing the following steps.

    Click “Manage” from Lync Online under Admin page
    If you are using E account, you will see current setting for Lync online for management page. If Domain federation or Public IM connectivity was disable under Current settings section, please enable them first.
    Click Domain federation: Select “Allow federation with all domains except those I block”
    Click Public IM: click “Enable” to active Public IM.
    After your enable federation, then you can see the External Access for particular user when editing setting

Ok so there are the technical steps and what is next for the charity. They were waiting for Office 365 before they did some customized development of Sharepoint online and now they can start this work. They absolutely love Lync and can easily communicate between 14 countries.Of the 1400+ users , there was an issue with 2 users , one in Dublin and one in Sudan!

My next blog post on Office 365 will be around the design and implementation of a ADFS 2.0 Farm which can tolerate one Active Directory site failure of a multi site Active Directory and still allow users to authenticate.

Implementing Kemp Load Balancers with Exchange 2010 Sp2


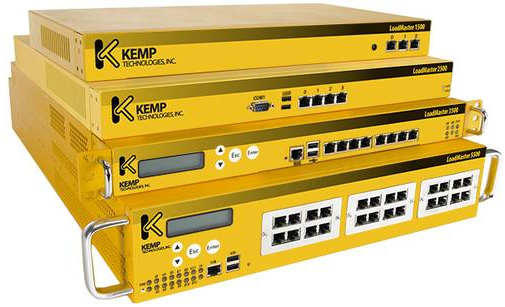
I recently implemented a 2 node Kemp Loadmaster 2200 array and I generally followed Henrik Walther articles on Msexchange.org. There are 2 articles

Load Balancing Exchange 2010 Client Access Servers using an Hardware Load Balancer Solution
Uncovering the new RPC Client Access service included with Exchange 2010

There are a couple of steps in the articles which have changed with Exchange 2010 SP2 and newer firmware on the Kemp Loadmasters which I can highlight below to help anyone out.

  1. Instead of manually editing and adding registry entries for rpc static ports you can download and run a powershell script HERE from Bhargav.Some of the registry locations are different in Exchange 2010Sp2 and you dont need to edit Microsoft.exchange.addressbook.service.exe.config
  2. The latest revisions of Kemploadmaster firmware do not include the persistence type ‘active cookie or Source IP’ the reason for this is because Kemp are phasing this persistence method out in favour of Super http. However if you would like to enable it you need to do the following.

    Go to logging options, debug options , enable l7traces then contact Kemp and they will give you a frame number which you can enter and it will allow ‘active cookie or source ip persistence’

Microsoft App-V Resources

I have been doing a lot of App-V Sequencing recently and thought I would post a list of App-V resources which I refer to on a regular basis.

App-V Sequencing Recipe Forum

http://social.technet.microsoft.com/Forums/en-US/prescriptiveguidance

Application Virtualization Whitepapers

http://technet.microsoft.com/en-us/appvirtualization/cc843994.aspx

Contains App-V Sequencing guide and common practices.

The Microsoft Application Virtualization Blog

http://blogs.technet.com/b/appv/

Application sequencing SuperFlow

http://www.microsoft.com/download/en/details.aspx?displaylang=en&id=5262
Must use interactive documentation on sequencing.

Sequencing articles on TechNet

http://technet.microsoft.com/en-us/library/cc817192.aspx

http://www.appdeploy.com/

InstEd IT – free MSI Editor

App-V 4.6 Sequencing Recipe – Template

Create an App-V Package Accelerator

Enable and Use the App-V Read-only Shared Cache for VDI and RDS

Advanced App-V Sequencing: Internet Explorer Add-Ins and VFS

App-V Sequencing: Built-in Diagnostics and Templates

Sequence an Application Plug-in for Dynamic Suite Composition

App-V Configuration Options

App-V with AppLocker Executable Rules

App-V with AppLocker Windows Installer RulesDeploying App-V with the Microsoft Deployment Toolkit

Deploying App-V with System Center Configuration Manager

Deprovision a Virtual ApplicationLaunch a Virtual Application and Review Client Configuration

Publish a Virtual Application Using Full Infrastructure Mode

Run Microsoft Office in an App-V Virtualized Environment

Setting Up the App-V Management Server

Update a Virtual Application Using App-V

Updating and Upgrading a Sequenced Application Using App-V

Use App-V Metering to Manage Application Licenses

DPM 2010 Sql Instance Wont Start after failed SQL Service Pack Update

A customers DPM Server crashed today while in the middle of the installation of SQL2008 Service Pack 3. So when the server came back online the msdpm2010 sql instance would not start.

So when reviewing the event logs I could see the following.

event ,959 mssql$msdpm2010

The resource database version is 611 and this server supports version 662. Restore the correct version or reinstall SQL Server

The fix is quite simple. Take a copy of the DPM Databse which is located by default in C:\Program Files\Microsoft DPM\DPM\DPMDB

Then go to programs and features and select SQL 2008 , then uninstall/change and then repair. Point the repair wizard at the sql 2008 installation media and let it repair the SQL 2008 installation.Once complete , reboot the server and then will then be able to view your protection groups as before.

Office 365 Cutover Install


I completed an Office 365 install today and wanted to point out a few things which may help people along.

When using the office 365 mail migration program the server you are migrating from must have a trusted cert.The server I worked on today was an SBS2003 server with a self signed cert , So i just got a 30 day trial verisign cert and that did the trick.To ensure the migration tool will work you need to get all green ticks when running the Exchange Remote Connectivity Analayzer for auto discover.

Sometimes Lync wont connect even though the Office 365 Connector wizard has completed and stated the Lync setup was complete. You can manually enter the external lync server via options. The server I needed to connect to from Dublin was sipdir.online.lync.com:443

There are also some updates for Lync Clients

Lync 2010 (32-bit) (7577.256) – Download – KB2496325
Lync 2010 (64-bit) (7577.256) – Download – KB2496325

Once the Office 365 Connector has completed it will display – Additional Manual Steps required to configure Outlook.So you need to create a CNAME called “autodiscover” and point it to “autodiscover.outlook.com”
I opened up contol panel / mail / profiles then delete the existing profile and then press apply then create a new profile with exactly the same name and allow autodiscover to find your server the reason for recreating a profile with the same name is to preserve the user’s NK2 File.

What is my Outlook Web App address. Lets say my domain name was sean.com then my Outlook Web App Address would be https://www.outlook.com/sean.com

What server do I connect to for smart phones??

You can go the Mobile Phone Setup Wizard

Finding My Server Name

To determine your server name, use the following steps:
Sign in to your account using Outlook Web App.
After you sign in, click the drop-down arrow next to the Help question mark, and then click About.
Find the server name listed under External POP setting or Internal POP setting. If your server name is in the format podxxxxx.outlook.com, then your Exchange ActiveSync server name is m.outlook.com. If your server name includes your organization’s name, for example, pop.contoso.com, then your server name is the same as your Outlook Web App server name, without the /owa. For example, if the address you use to access Outlook Web App is https://mail.contoso.com/owa, your Exchange ActiveSync server name is mail.contoso.com.

Force DPM Tapes to become free. Even with data within retention!


I was recently working on a DPM 2010 Install and needed to force tapes that had data on them that was within a retention policy period to be free as I needed to do an urgent backup onto these LTO 5 Tapes.

DPM doesn’t allow you to mark tapes as infinitely over writable, even if you put in 0 days or weeks it will always default back to 1.

So here is a cool powershell script from Microsoft. So visit HERE paste the script into notepad and save as ForceFree.ps1 and copy it into the DPM Bin Folder. And run this command ForceFree.ps1 -DPMServerName -LibraryName -TapeLocation

The tape libary I was using was a “Hewlett Packard 1/8 G2 Autoloader (x64based)” So I entered this info into the command switch when running the force.ps1 powershell script but kept getting an error message saying ” Cannot find tape libary Hewlett Packard 1/8 Autoloader (x64based).

So the fix for this is really simple ,

So as per image above on the right hand side , click on Rename Libary. In my case I renamed the libary to LTO5 and then re-ran my powershell script with the new tape libary and it worked fine and I was able to use the tapes to backup data.

Also don’t forget to enable quick erase via regedit for tapes.

DPM 2007 – DPM2010 Upgrade

Here is a great blog post on DPM2007 – 2010 Upgrade

However I would also use dpmbackup tool.

You can find this in C:\Program Files\Microsoft DPM\DPM\DPM\bin

So open a command prompt with elevated privlages and set your current directory to the bin folder in DPM then run dpmbackup -db

But where does the backup go?

You can find it in \Program Files\Microsoft Data Protection Manager\DPM\Volumes\ShadowCopy\Database Backups and it will be named DPMDB.bak

So if the upgrade goes wrong at least you have your DPM Database backed up!

So an inplace upgrade really is quite simple.If you have not killed the DPMRA executable you will be prompted to do so during the upgrade.

Once the upgrade is complete , Reboot the server and then apply the March 2011 Dpm Rollup which you can download HERE

Upgrade all protected machine’s agents and ensure communication is ok with all agents and thats it!

Citrix Xenapp: You have started Windows Explorer in your remote session.

I recently rolled out a Citrix Xenapp 6 farm with a published application which was a desktop. When users started to logon they began getting the error in the above image.

I was using HPT5550 Thin Clients. So I flashed the thin clients with the latest firmware which was released in April 2011 and also updated the ICA Client to 11.02.I also noticed that some standard hot keys like alt-tab , ctrl c , ctrl v were not working.

So the simple fix is to untick “view in seamless windows” on the thin client ica connection.